
Instagram Edits App on Mac: Every Icon and Button Explained
The Instagram Edits app is finally available on macOS. The company has officially announced it. However, unlike the mobile app, which is user-friendly for beginners, the Instagram Edits app on the Mac can be confusing.
We are planning to create detailed walkthrough guides for the Instagram Edits app, but this guide covers what the various icons mean in the Instagram Edits app on desktop, on macOS.
Projects Toolbar
What opens first is the Projects screen. These controls sit in its top right corner.
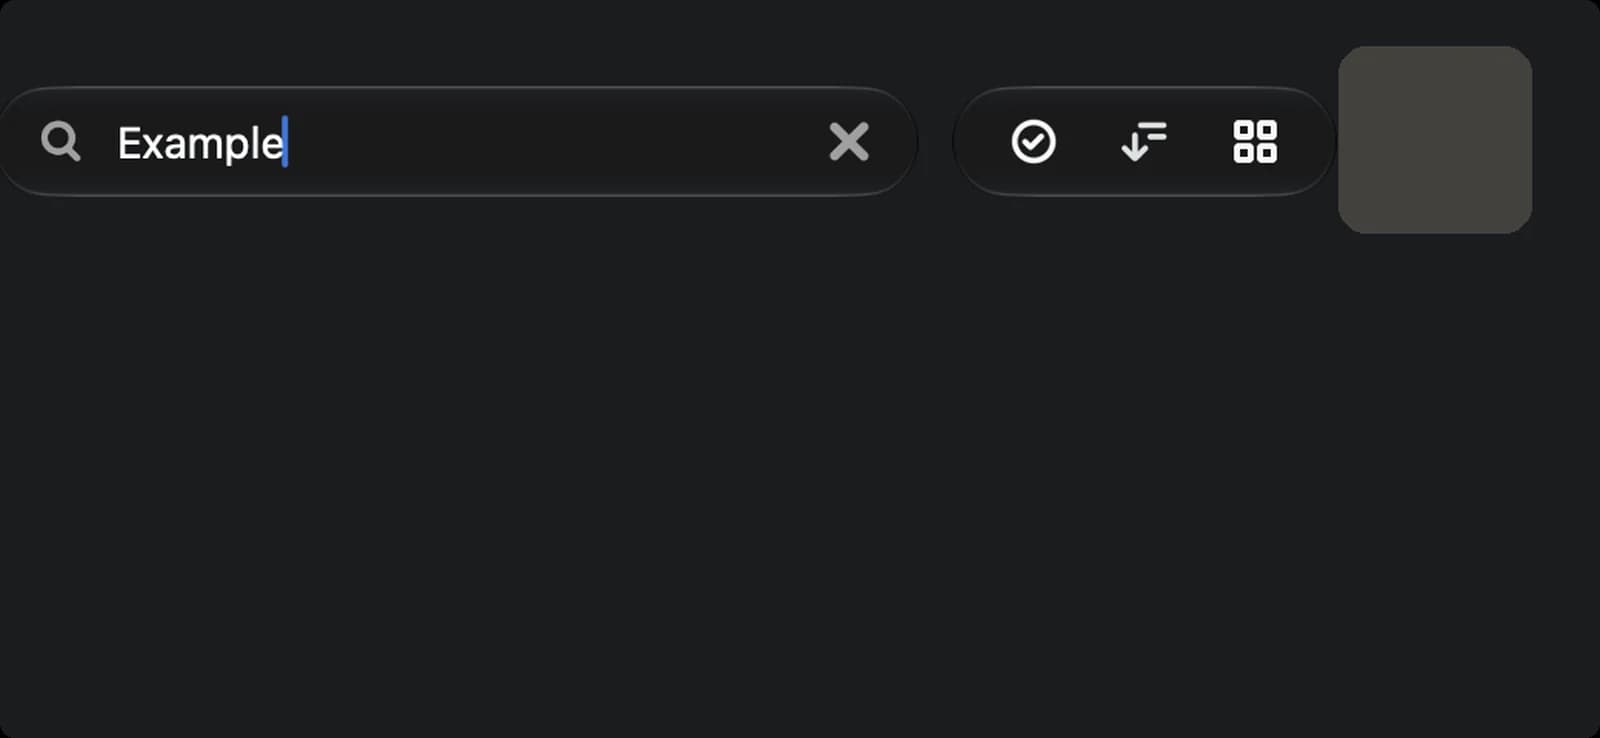

Search
Find a project by name. Here it is open, filtering the grid to one project.

Select
Turns on selection mode so you can pick several projects and delete or duplicate them together.

Sort
Changes the order of the grid: date modified, favorites, name, duration or size.

View mode
Switches the thumbnails between square tiles and tall 9:16 tiles.

Account
Your profile photo. Clicking it opens the Settings window, starting on the Account page.
Projects Grid
Your projects, and the button that starts a new one.
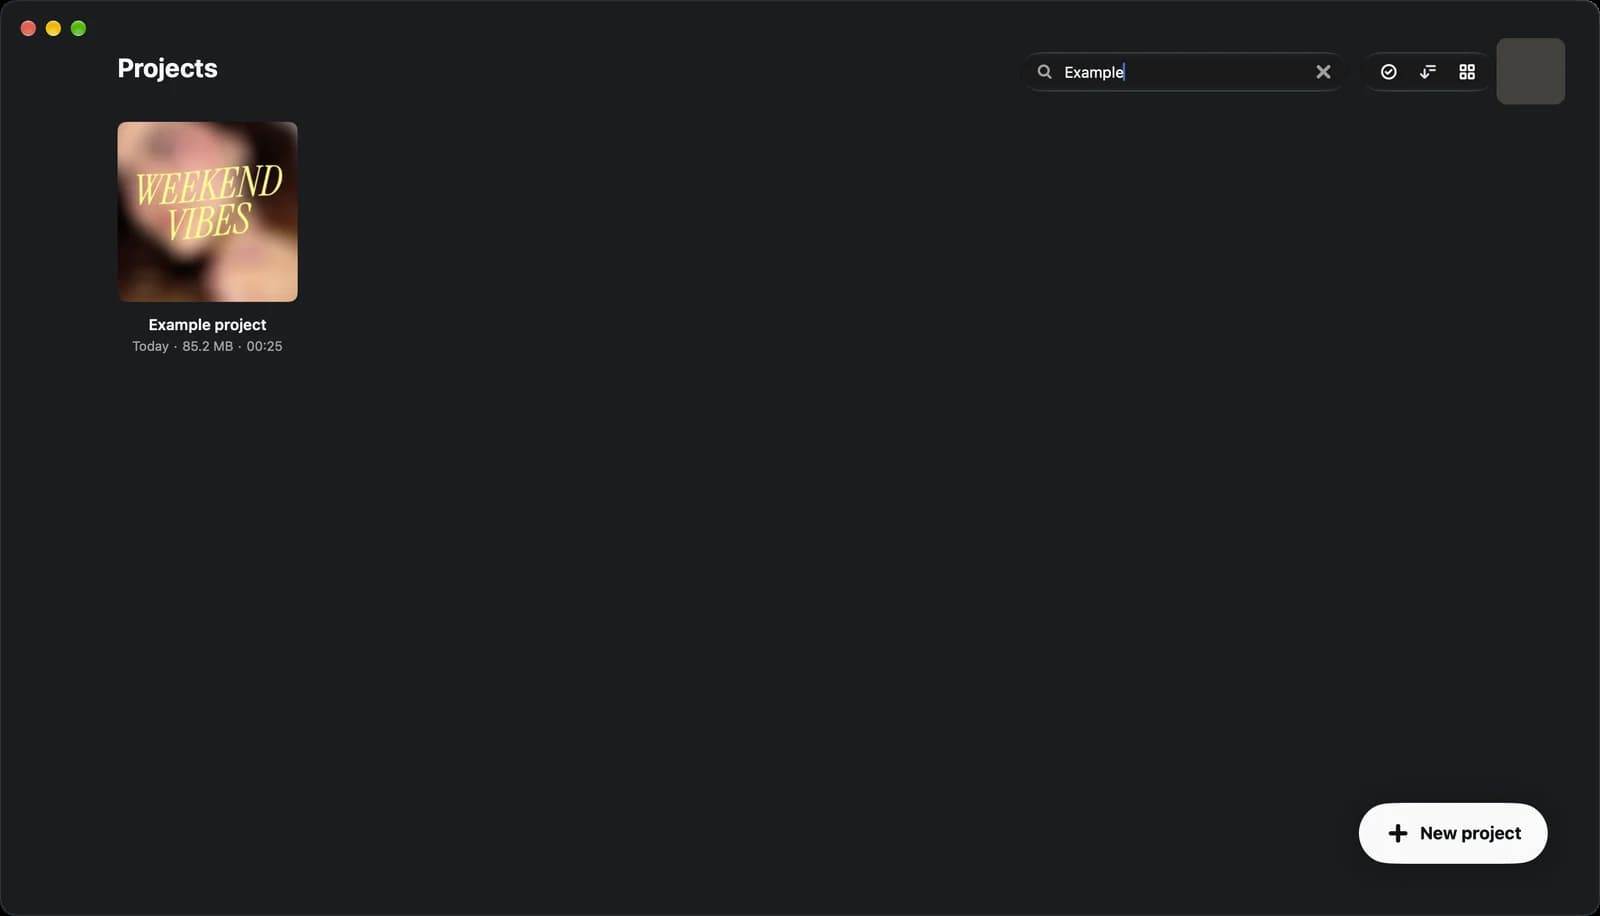

Project tile
One project. Click it to open the editor, or hover and right-click for the menu on the third screenshot.

New project
Starts an empty project. You pick the aspect ratio and add media once the editor opens.
Project Menu
Right-click a project for these.
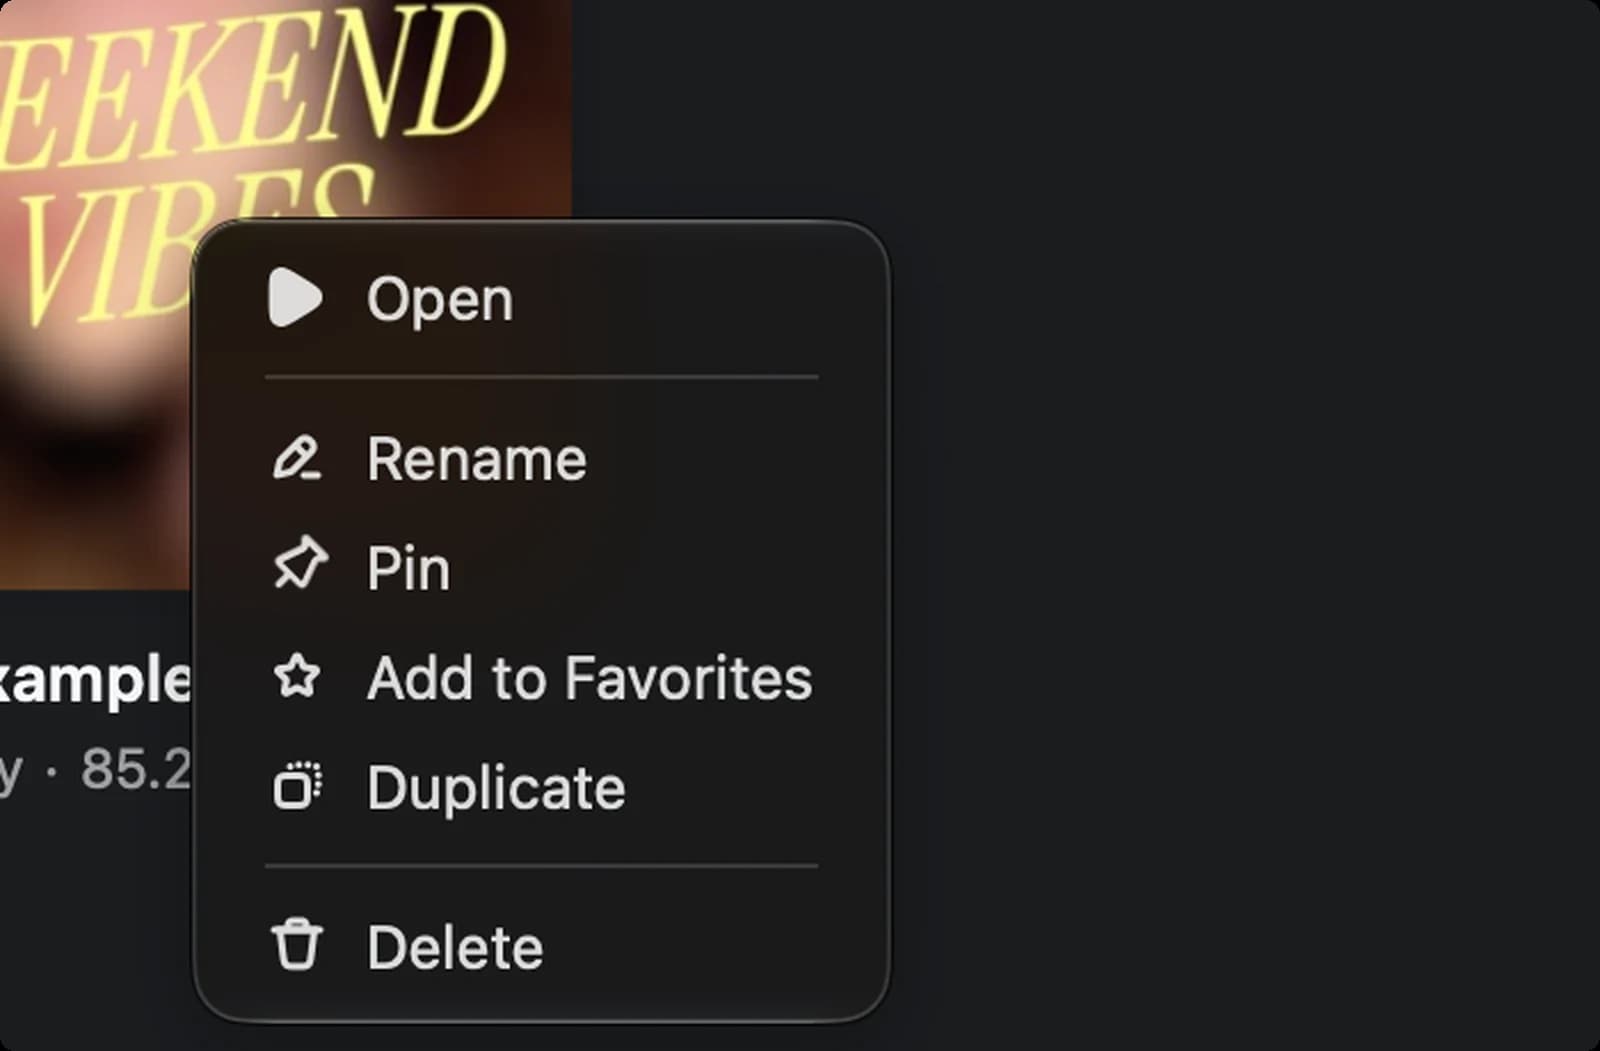

Open
Opens the project in the editor. Double-clicking the tile does the same.

Rename
Change the project name.

Pin
Keeps the project at the front of the grid whatever the sort order.

Add to Favorites
Marks it as a favorite, so it shows first when you sort by Favorites.

Duplicate
Makes a copy, so you can try a different cut without touching the original.

Delete
Removes the project. Edits asks you to confirm first.
Preview Buttons
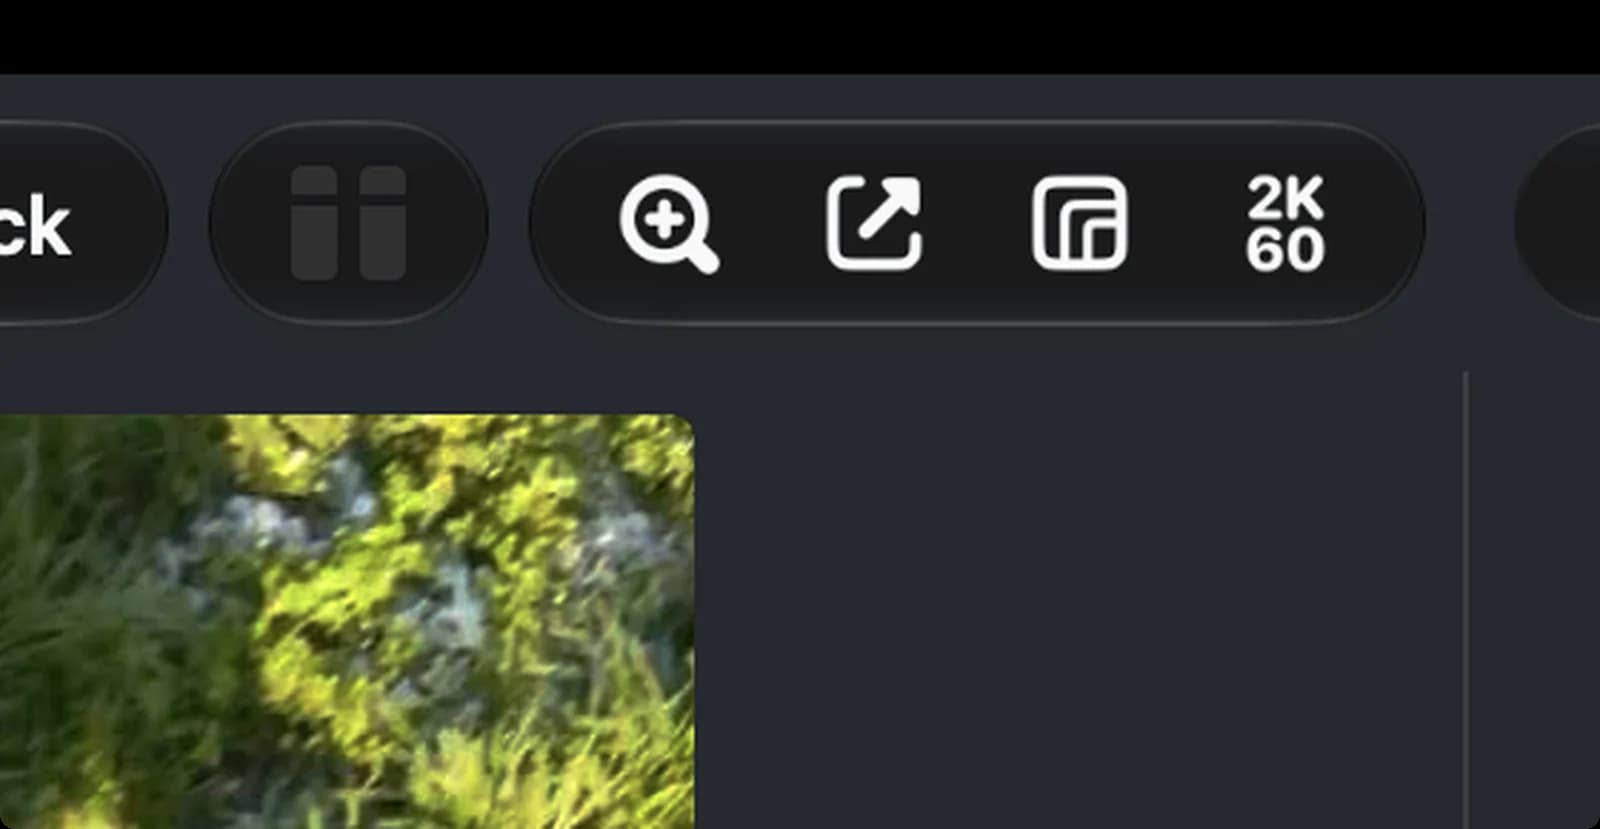
The middle of the top bar controls the preview.

Main volume
The overall playback volume, the main level meter and a limiter. It only affects what you hear, and the exported video, not single clips.

Zoom preview
Zoom the preview in and out, or fit it to the window. It does not change the video.

Pop out
Opens the preview in its own window, so you can put it on a second display.

Aspect ratio
The frame shape of the whole project: 9:16 for Reels, 16:9 for YouTube, 4:5 and 1:1 for carousels, and more.

Quality
The export quality: resolution, frame rate, SDR or HDR and the quality level. The label shows the current choice, 2K at 60 fps here.
Search and Layout Buttons
The right end of the top bar.
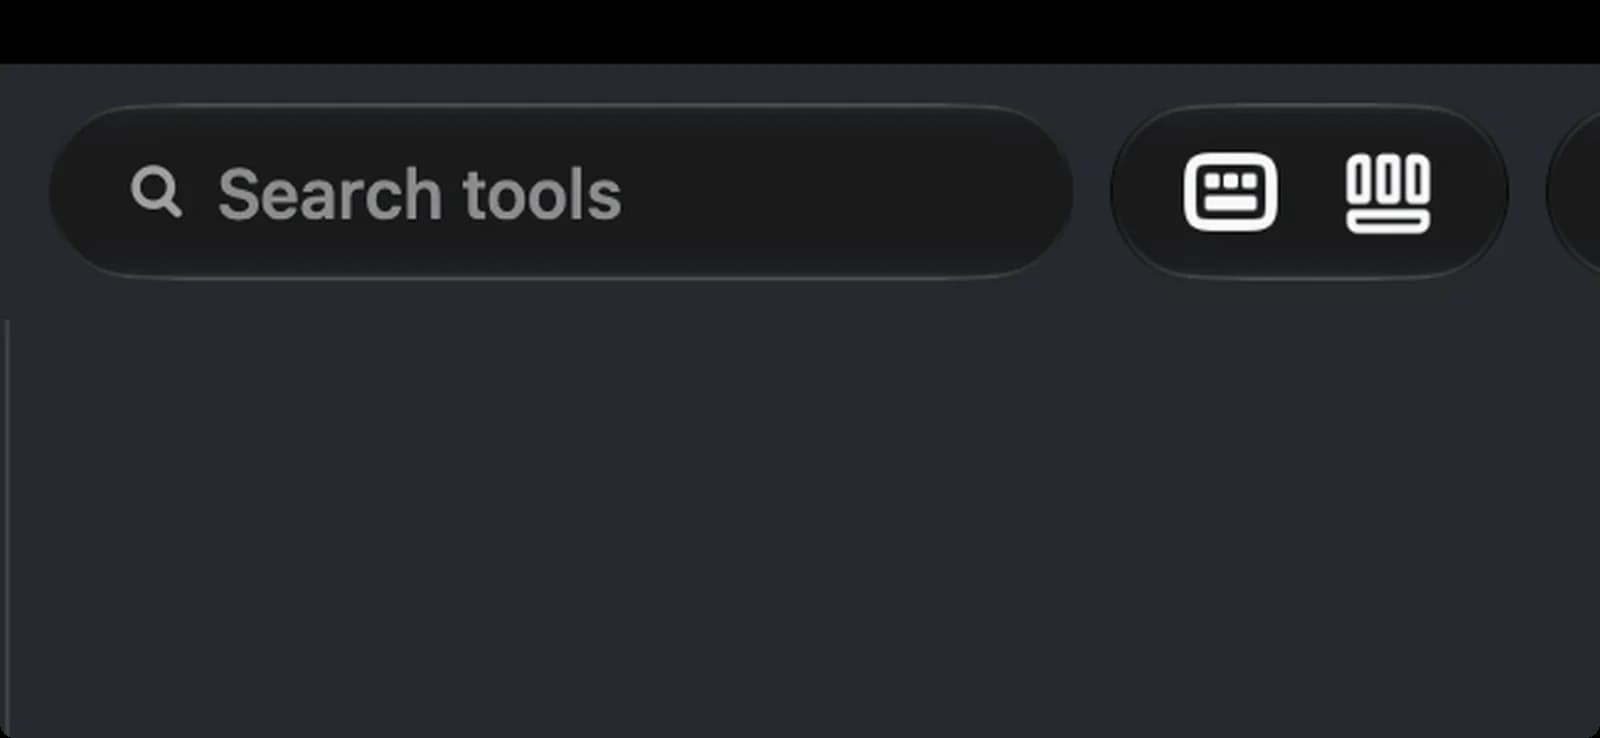

Search tools
Type the name of any tool or effect to jump to it, instead of hunting through the panels.

Keyboard shortcuts
Opens the shortcut list. You can switch to the CapCut, Final Cut Pro or DaVinci Resolve layouts or set your own.

Layout
Picks which area gets the most room: the timeline, the library panel or the inspector.
Preview Menus
The icons inside the volume, zoom and aspect ratio menus.
Main volume
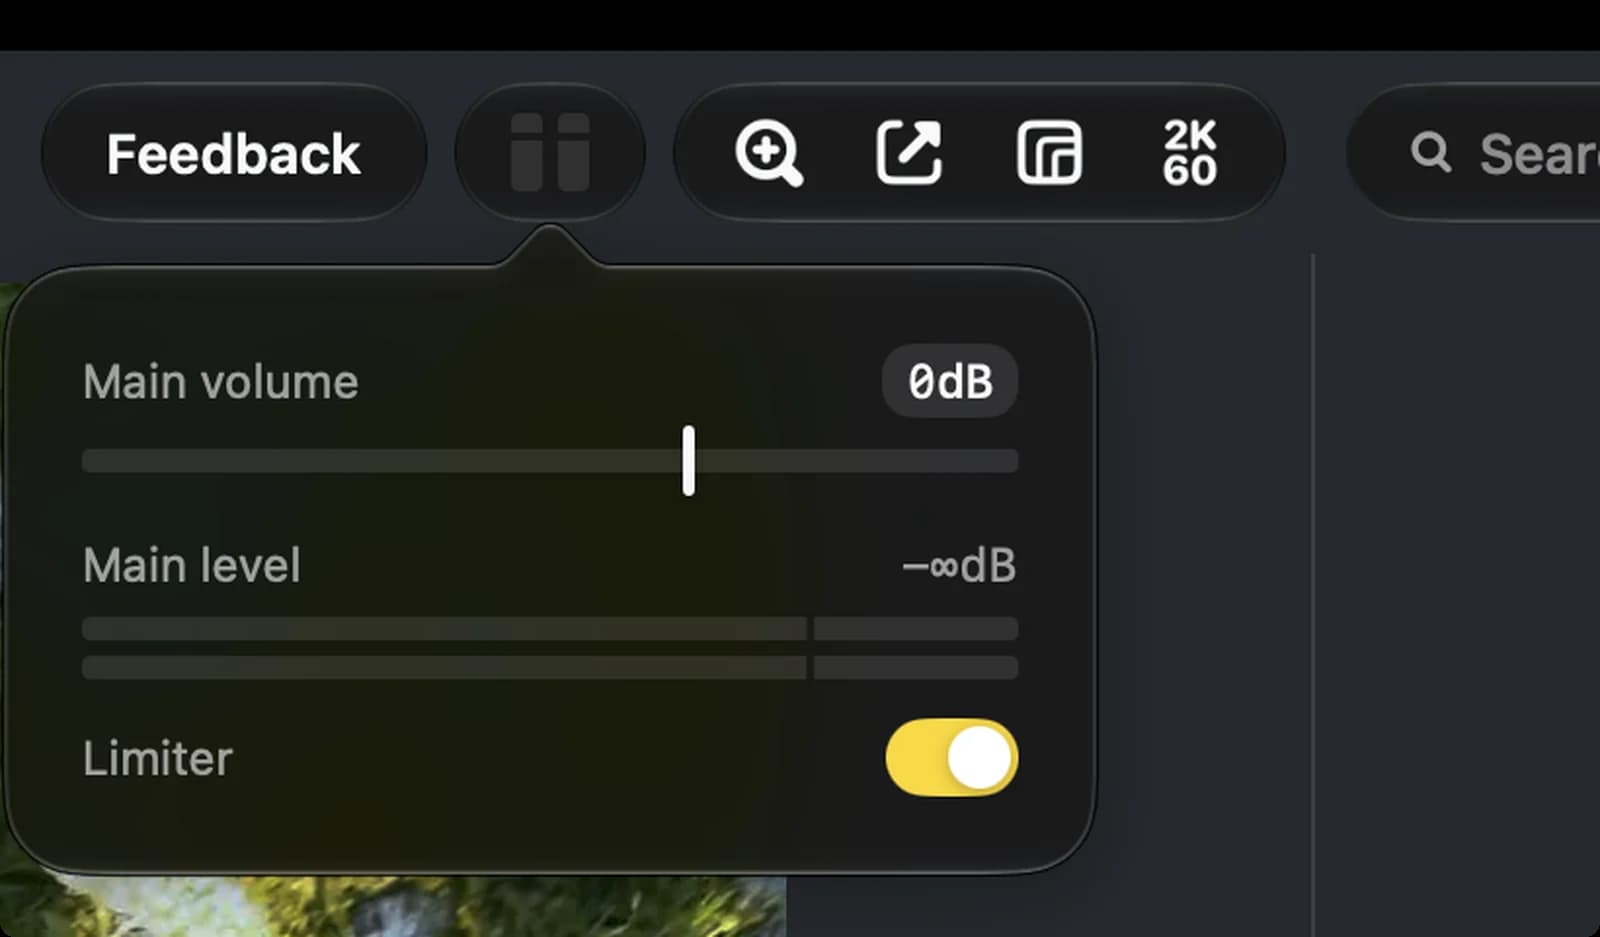

Limiter
Stops the mix going over 0 dB and distorting. Leave it on unless you know why you want it off.
Zoom
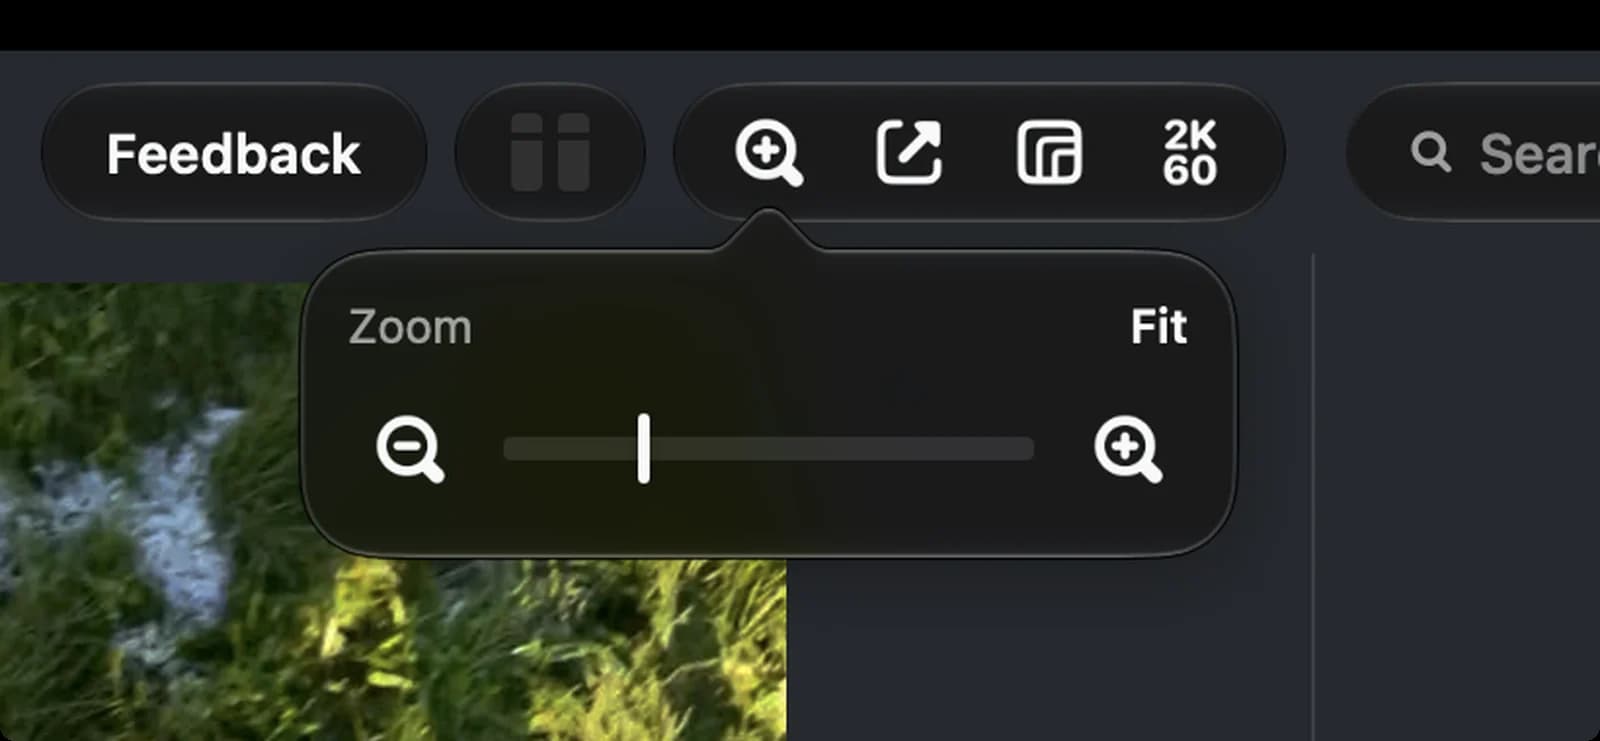

Zoom out
Shrinks the preview.

Zoom slider
Drag for any zoom level in between.

Zoom in
Enlarges the preview to check details. ⌘ and + or ⌘ and scroll do the same.
Aspect ratio
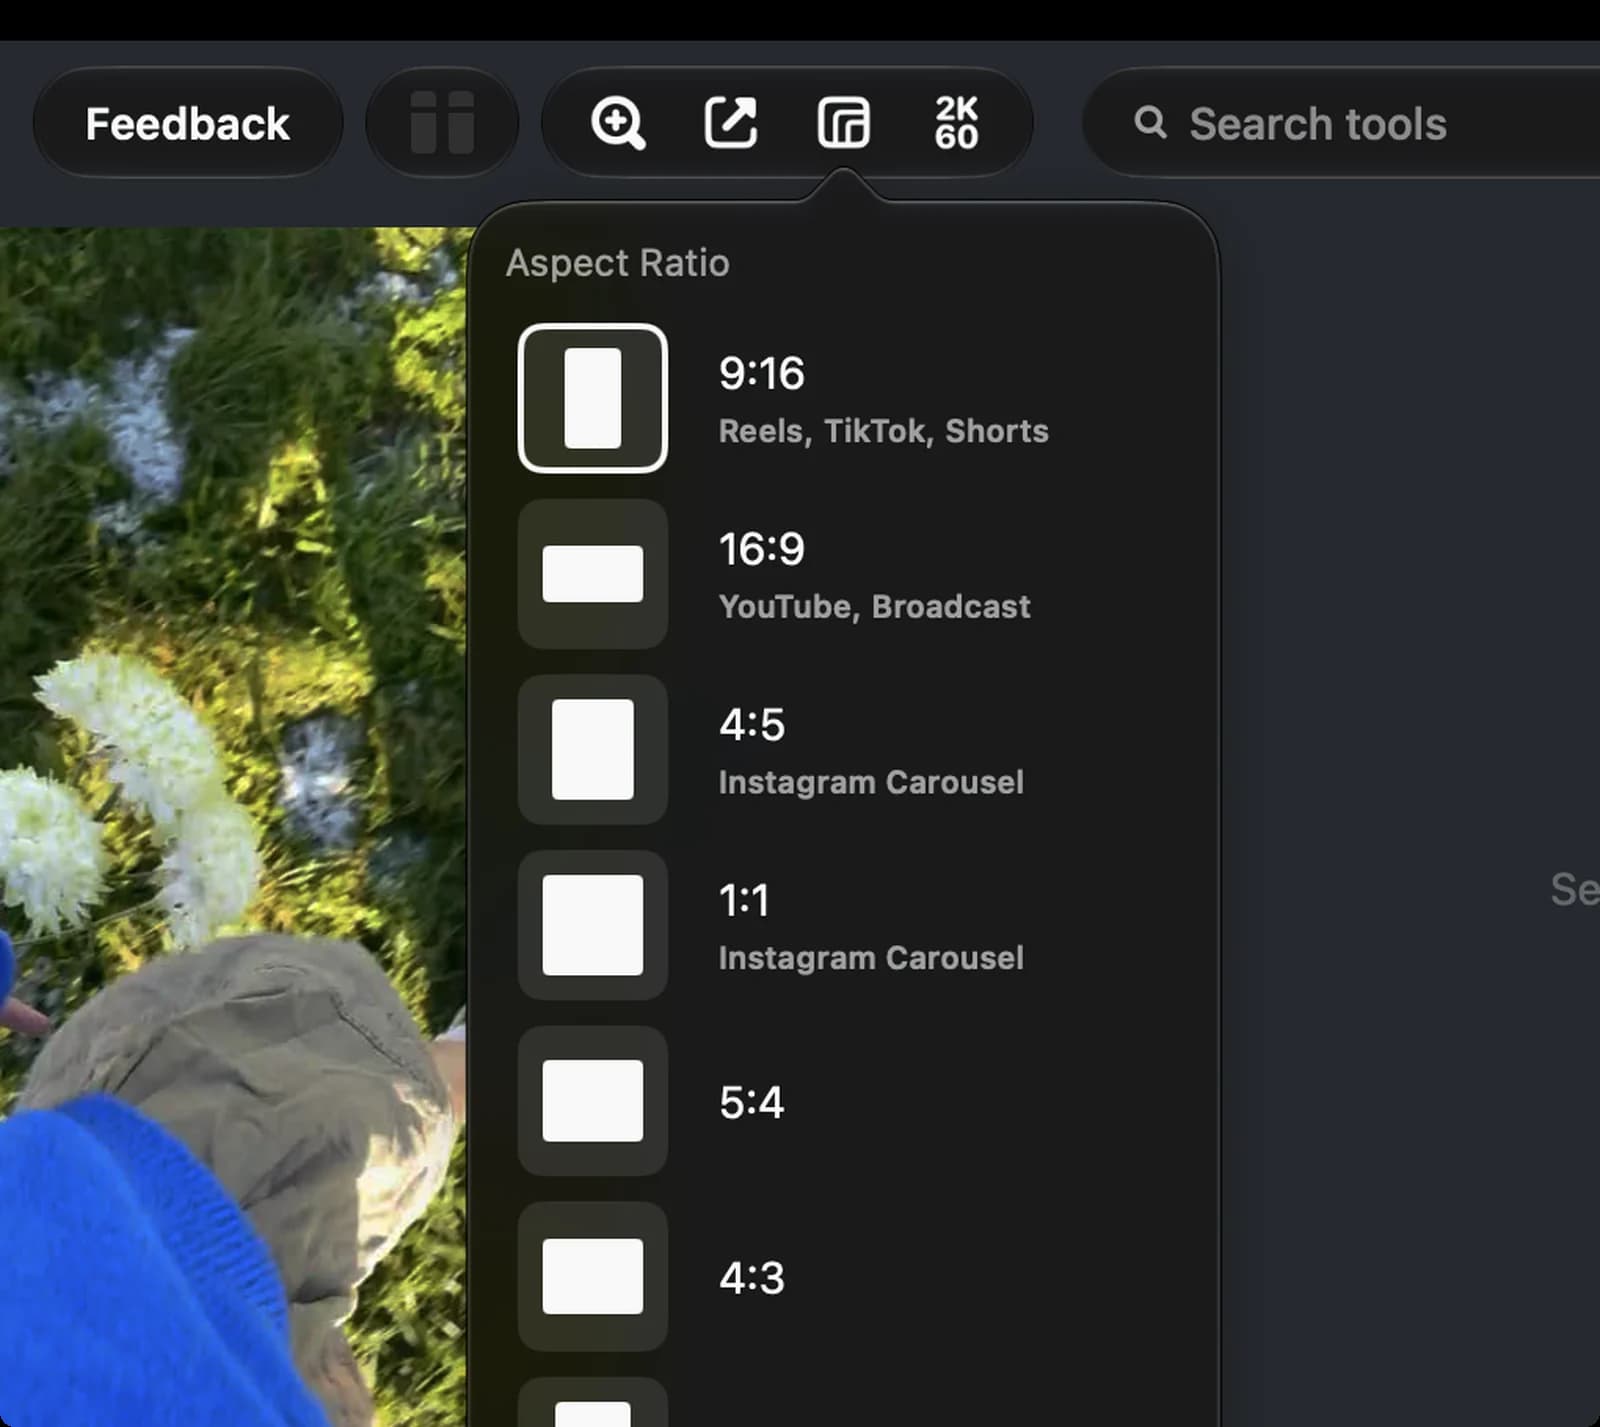

9:16
Vertical, the shape of Reels, TikTok and Shorts. The default for a new project.

16:9
Widescreen for YouTube and broadcast.

4:5
The tall rectangle used for Instagram carousel posts.

1:1
Square, also for carousels.

5:4 and 4:3
Older photo and screen shapes. The list goes on below these.
Layout Menu
The icons inside the Layout menu.
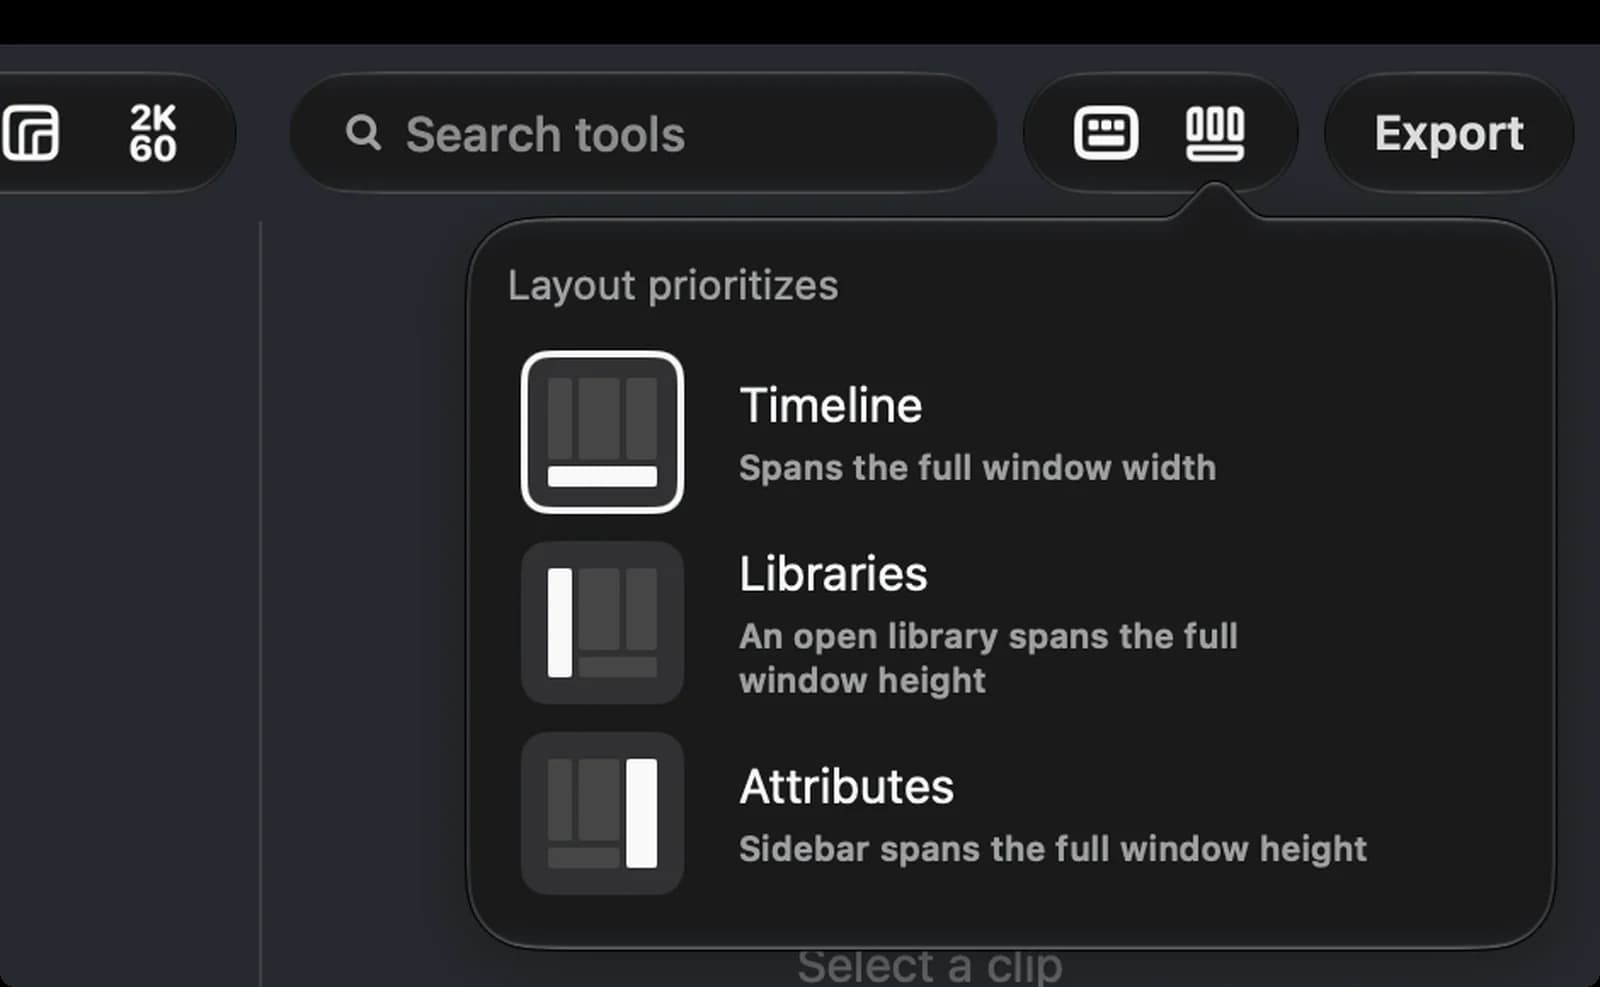

Timeline
The default layout: the timeline runs the full width of the window.

Libraries
An open library panel gets the full window height, good for browsing long lists of effects or audio.

Attributes
The inspector gets the full height, so you see more clip settings without scrolling.
Media and Text Tools
The top half of the tool rail down the left edge. Each icon opens a panel beside it.
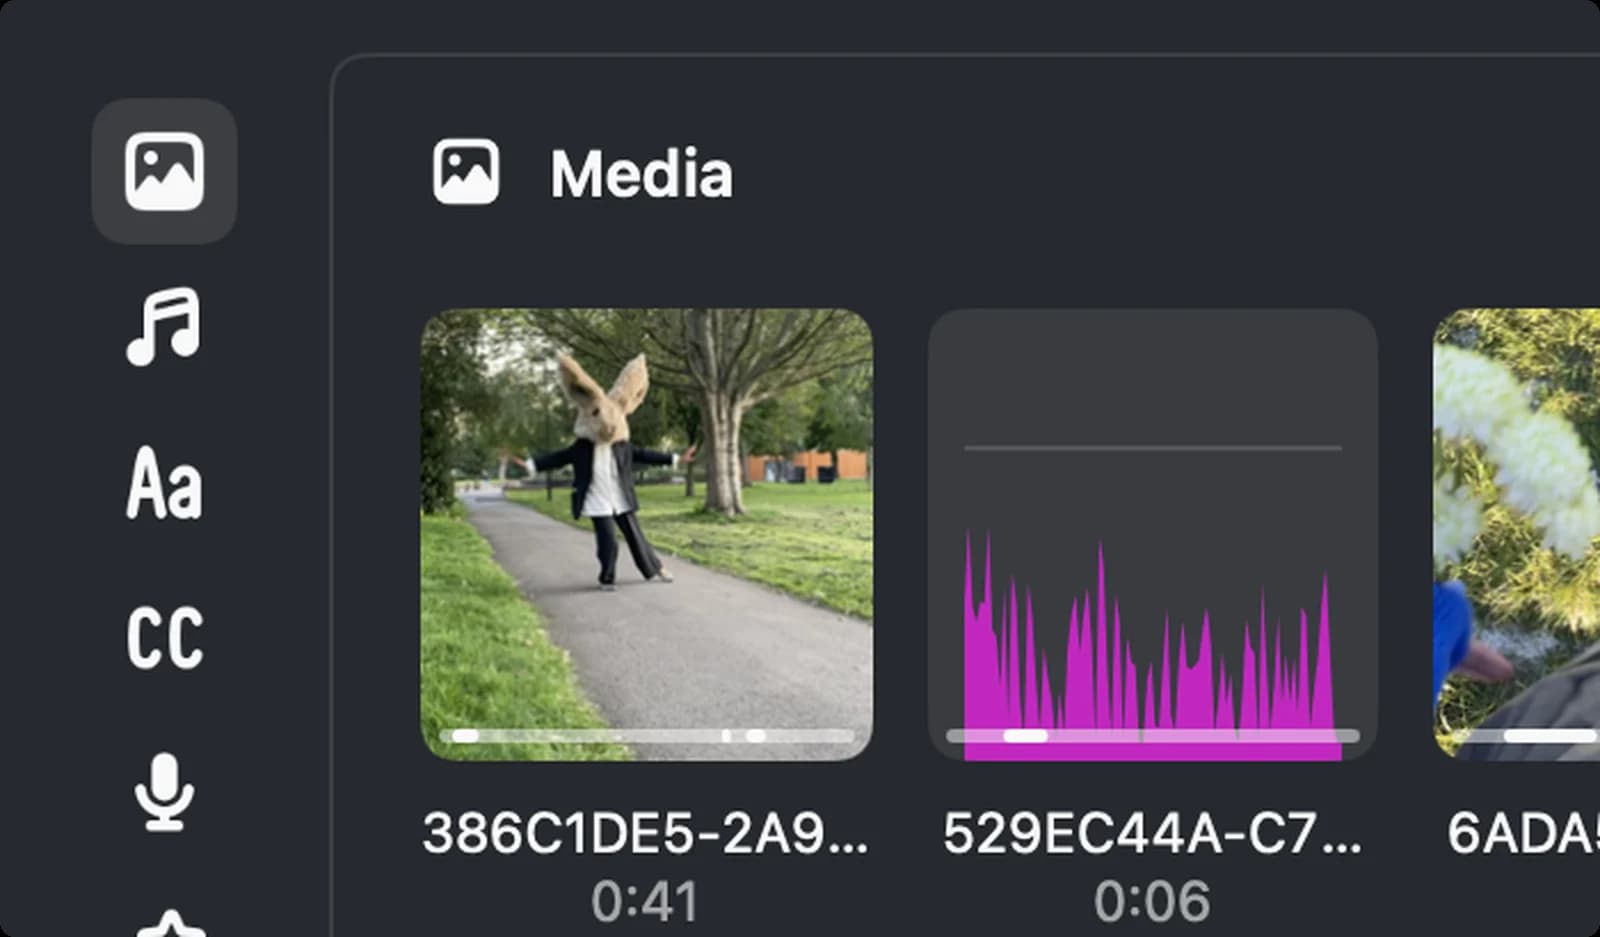

Media
Your imported videos, photos and audio files. The panel every project starts in.

Audio
Music from Instagram's library, trending sounds, original audio and royalty-free tracks.

Text
Text styles. Pick one and type in the preview.

Captions
Makes captions from the speech in your clips, with a language and a template.

Voiceover
Records narration from your Mac's microphone, with a script box and a countdown timer.
Effects and Sound Tools
The bottom half of the tool rail.
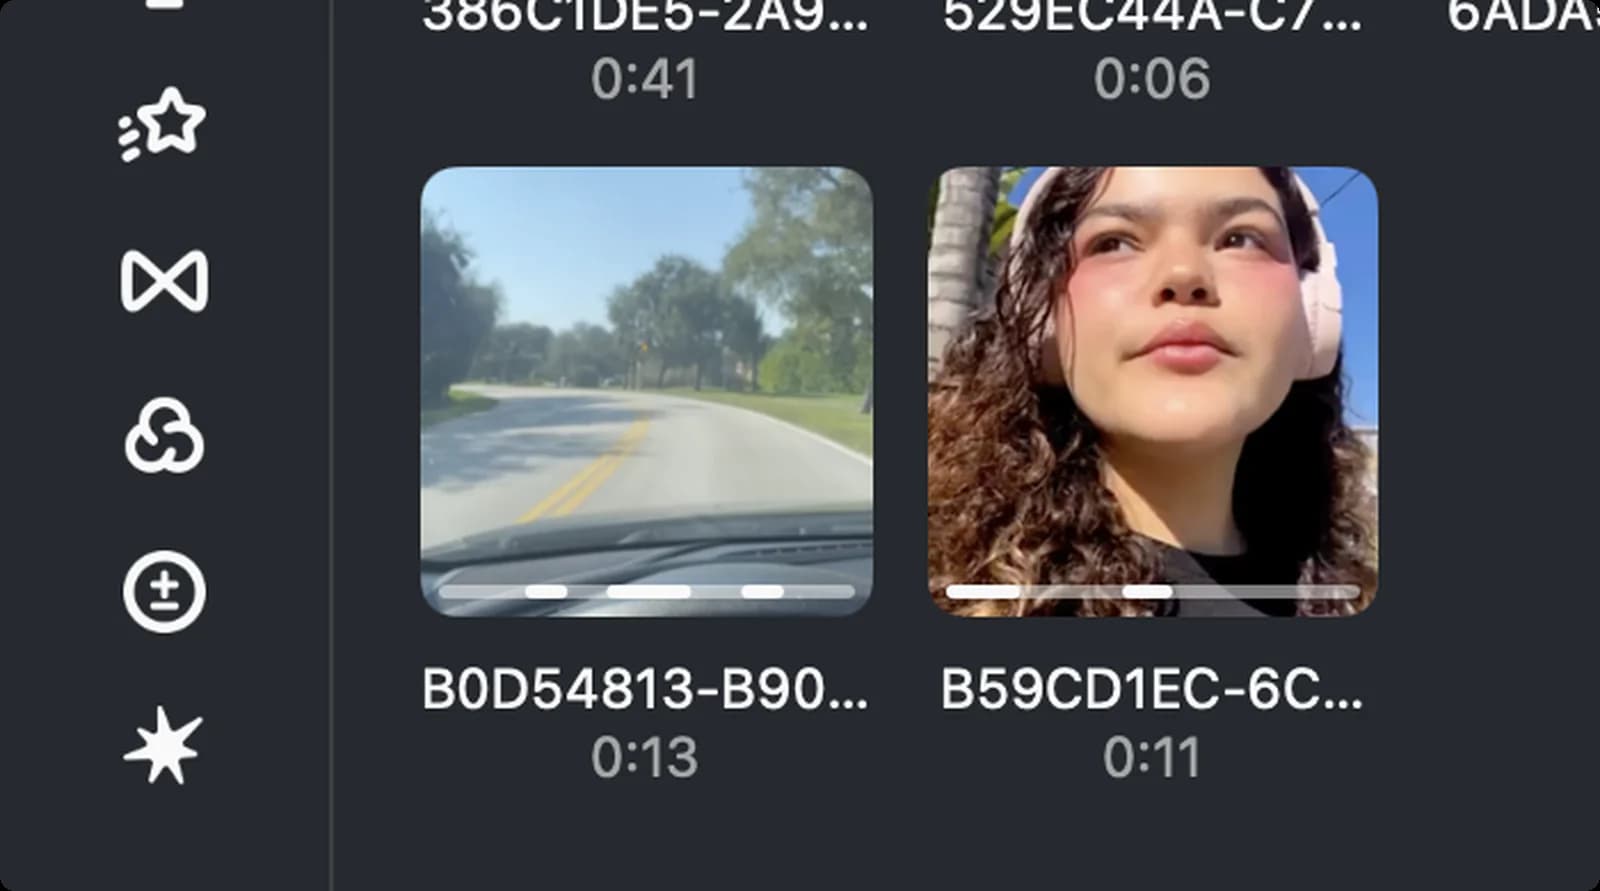

Effects
Visual effects for a clip: zooms, camera moves, film looks, outlines and in-and-out animations.

Transitions
Dissolves, zooms, fades and wipes that go between two clips.

Filters
Colour looks applied to the whole clip in one click.

Adjust
Your saved colour adjustment presets and LUTs, and a button to start a new adjustment.

Sound FX
Short sound effects: whooshes, beeps, ASMR sounds and more, searchable and sorted by category.
Media Panel
The files in your project. Hover a tile and click the plus to add it to the timeline.
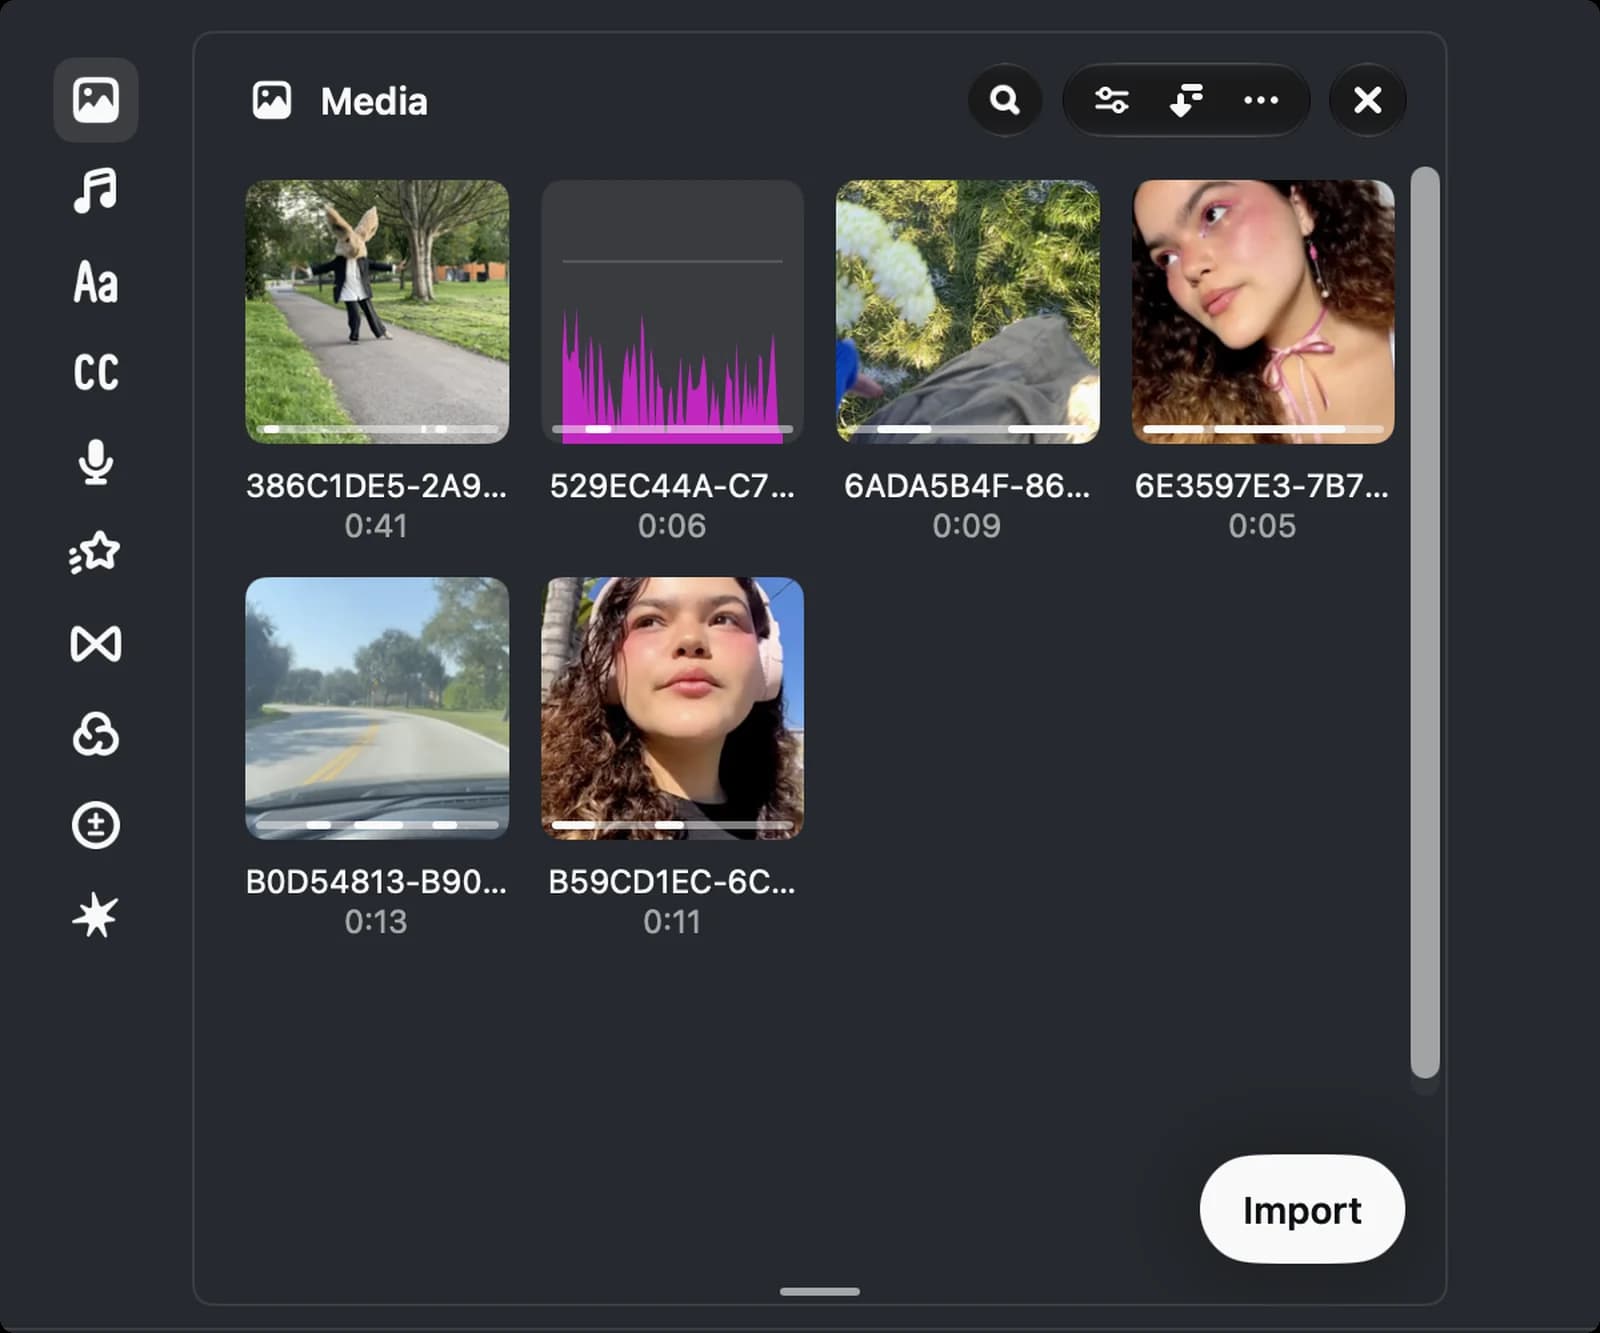

Media
The panel's name and icon. The same icon is the first one on the rail.

Search
Find a file by name.

Filter
Show everything, or only video, audio or images.

Sort
Order the files by name, import date, creation date, type or duration.

Settings
Media storage options and a button to make a folder.

Close
Hides the panel so the preview gets more room.
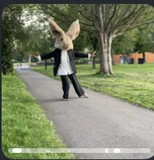
Media tile
One file. Hover it and a plus appears in the corner; click it to add the file to the end of the timeline.
Resize handle
Drag it down to make the panel taller.
Playback Controls
The left end of the timeline bar.
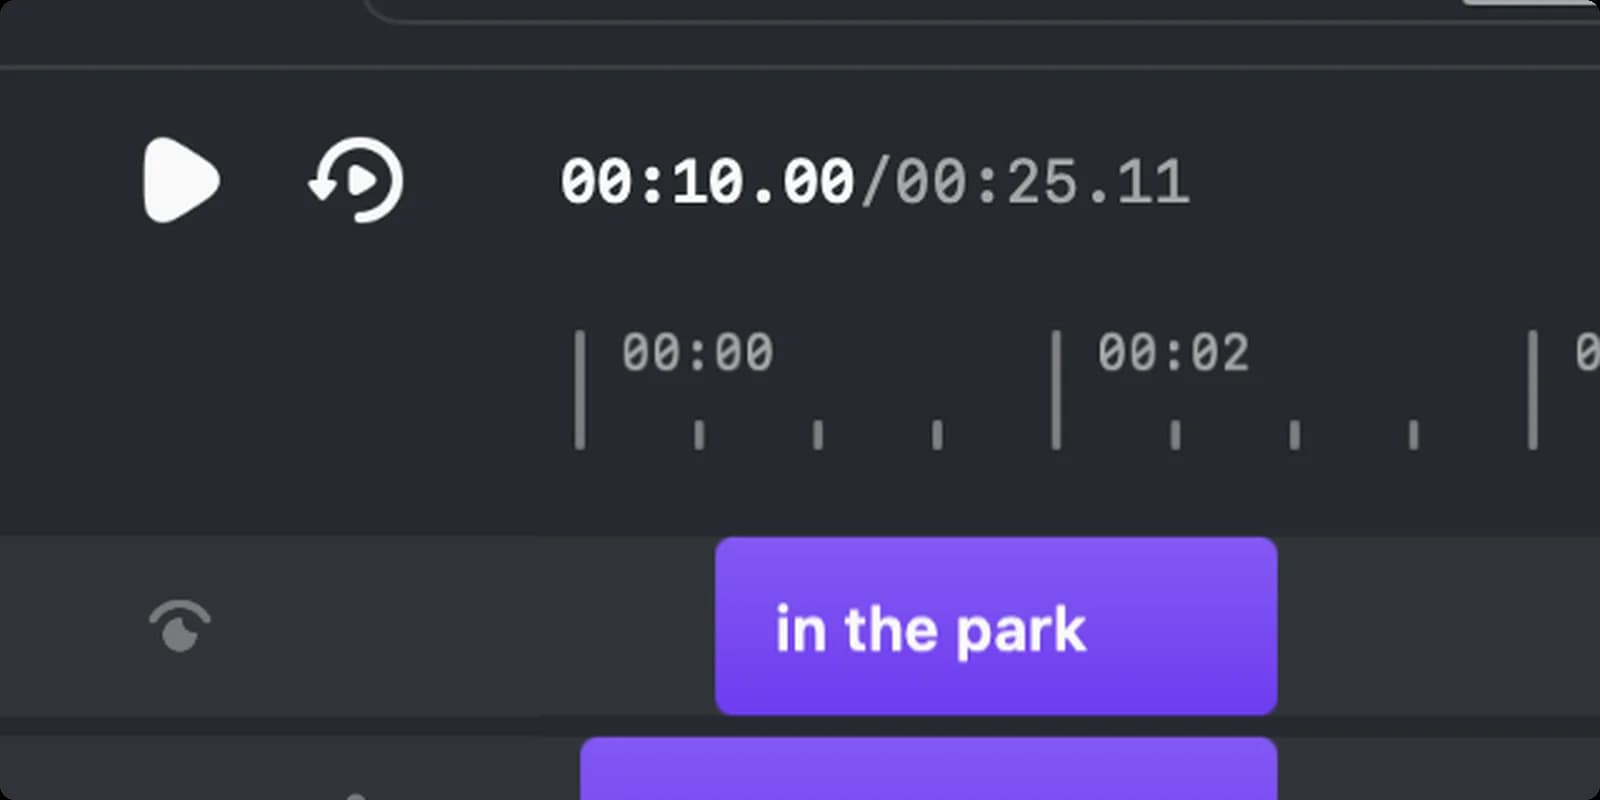

Play
Plays or pauses. Space.

Play from start
Back to the beginning and play. Return.
Editing Tools
The tools in the middle of the timeline bar. Hover one and the tooltip shows its shortcut.
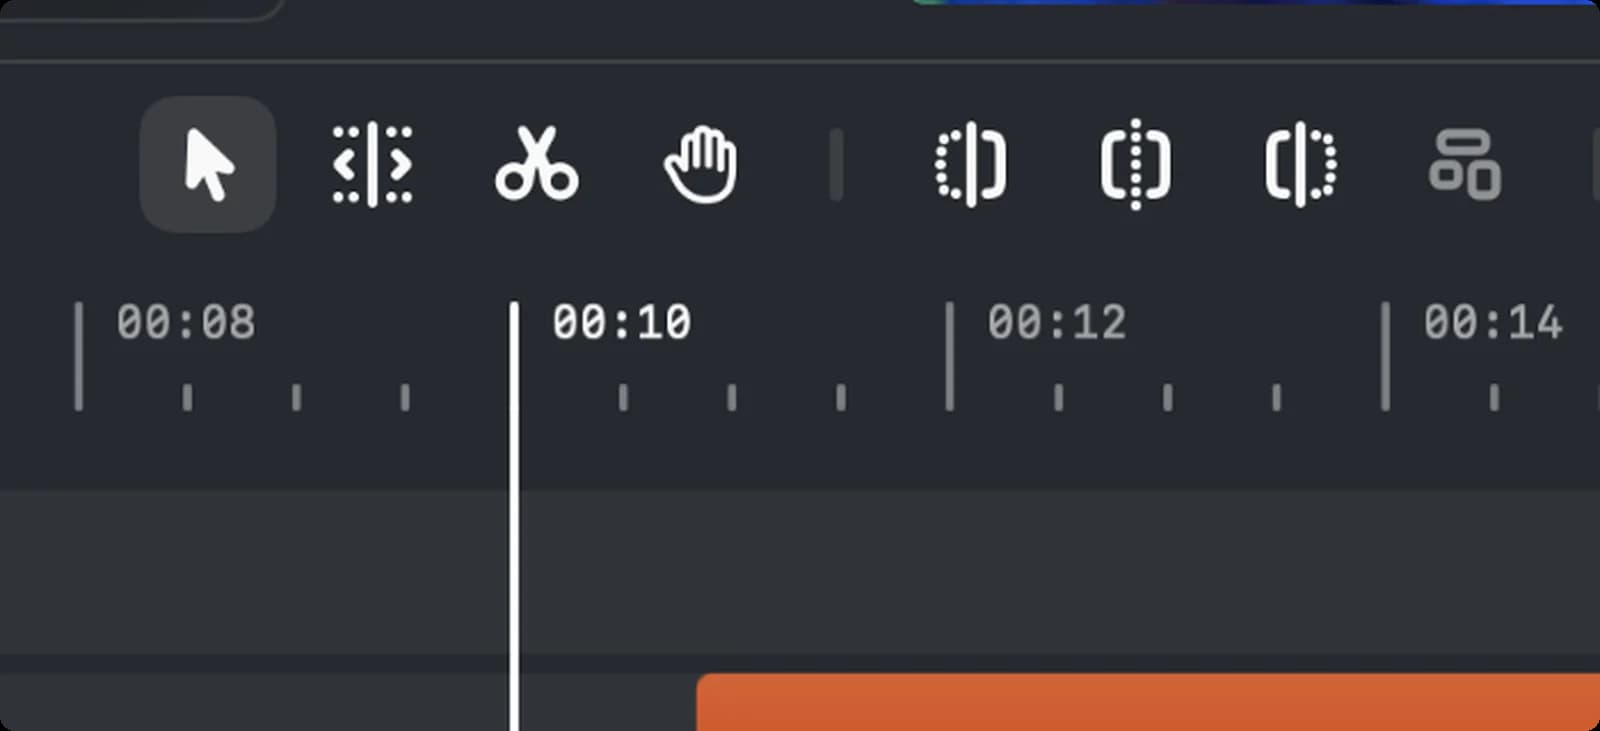

Select
Click to select, drag to move. A.

Slip, Trim, Roll
Changes what dragging a clip edge does. T.

Blade
Click a clip to cut it in two. B.

Hand
Drag the timeline around without touching clips. H.

Trim start
Removes everything before the playhead in the selected clip. Q.

Split
Cuts the selected clip at the playhead. ⌘B.

Trim end
Removes everything after the playhead. W.

Group
Joins the selected clips so they move together. ⌘G.
Undo and Timeline Settings
Next to the editing tools.
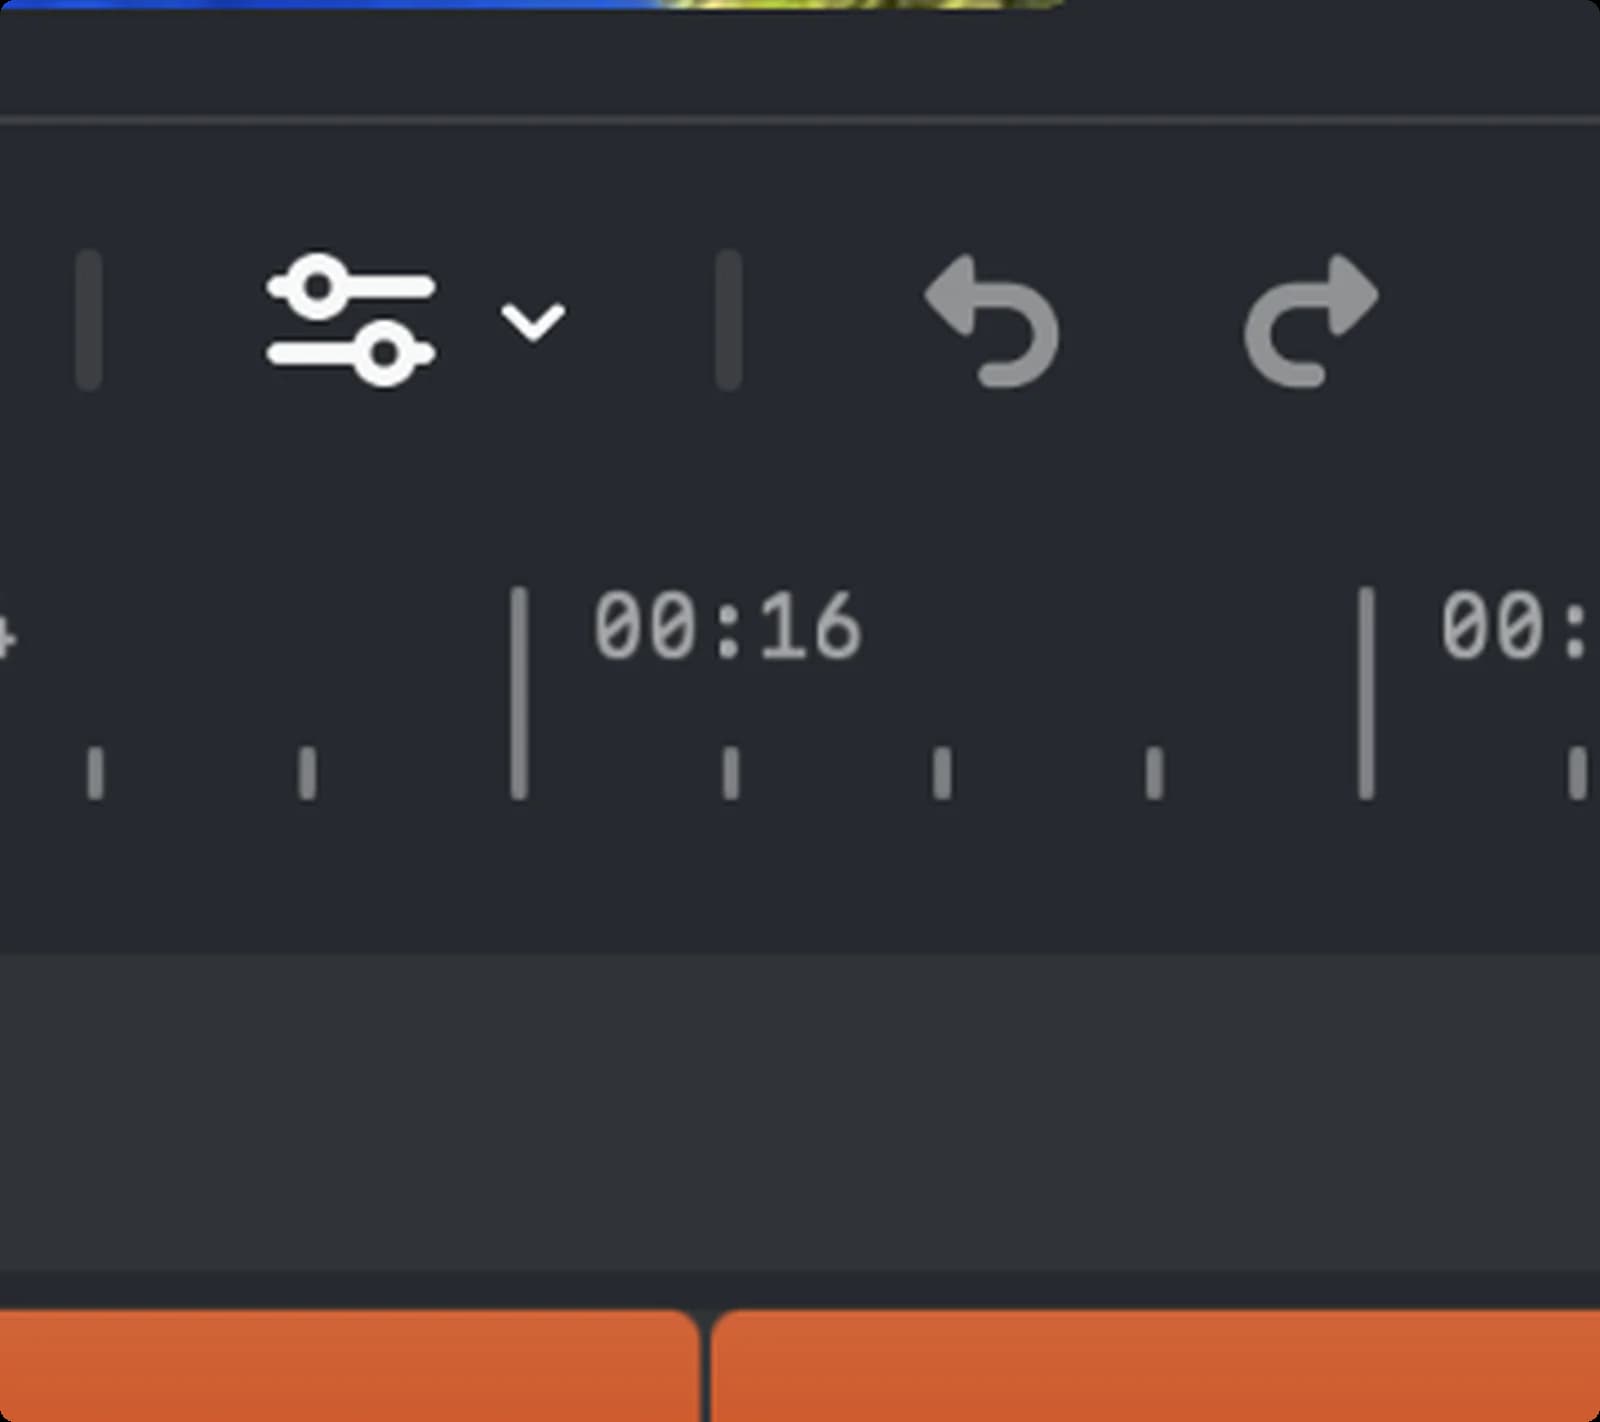

Timeline settings
Snapping, magnetic timeline and loop. See Timeline Settings below.

Undo
⌘Z.

Redo
⇧⌘Z.
Timeline Zoom
The right end of the timeline bar.
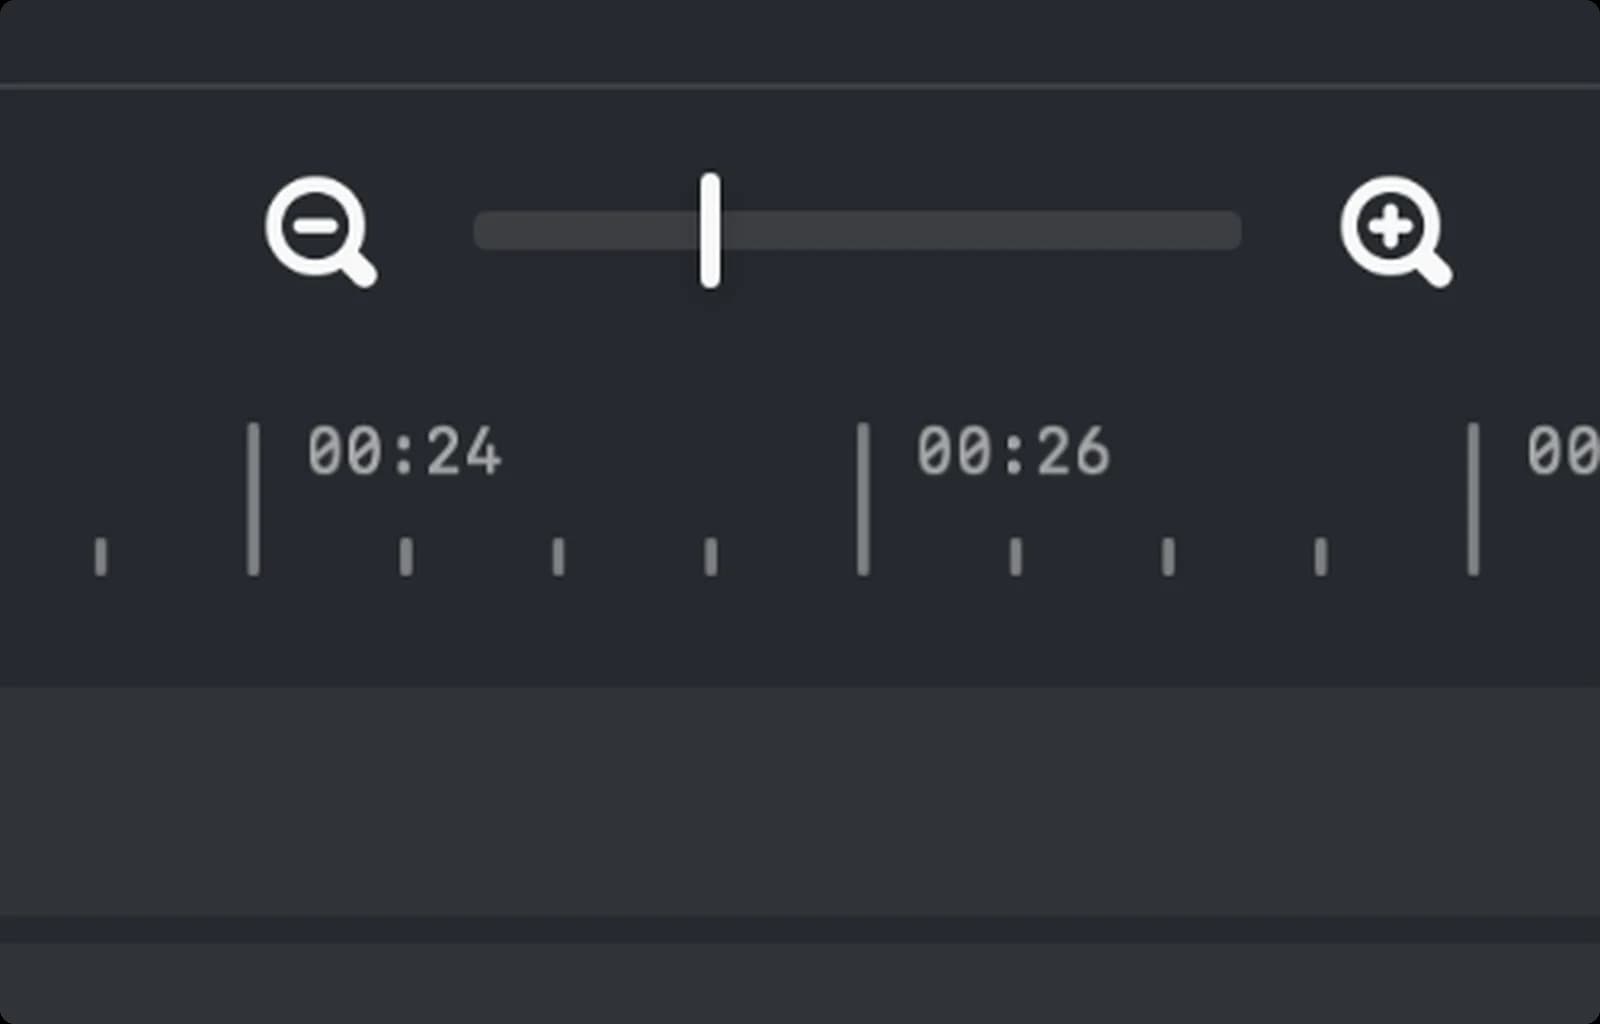

Zoom out
See more of the timeline. ⌘ and minus.

Zoom slider
Any zoom level in between.

Zoom in
Spread the clips out for precise cuts. ⌘ and equals, or ⌘ and scroll.
Tracks and Clips
What sits under the bar. Each track has its own icons at the left edge.
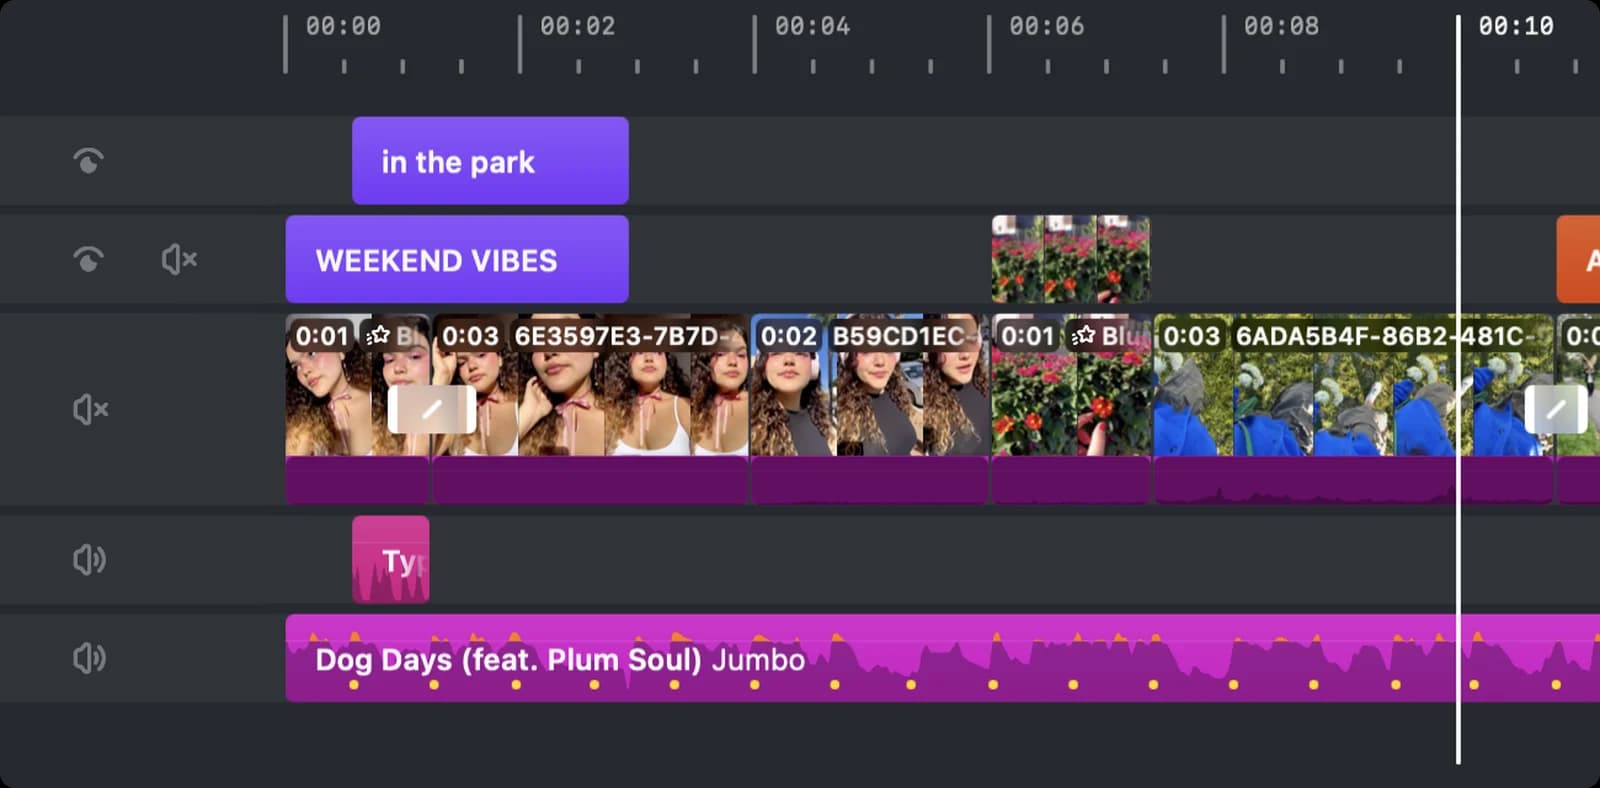

Playhead
The frame showing in the preview. Drag to scrub.

Hide track
The eye hides a text or overlay track from the preview and the export.

Track mute
Silences the whole track.

Text clip
A text or title on its own track above the video.
Video clip
A clip on the video track, with its length and name on top. Yellow edges mean it is selected.

Audio clip
Music, voiceover or a sound effect on the audio tracks.
Timeline Settings
The popover from the settings button in the bar.
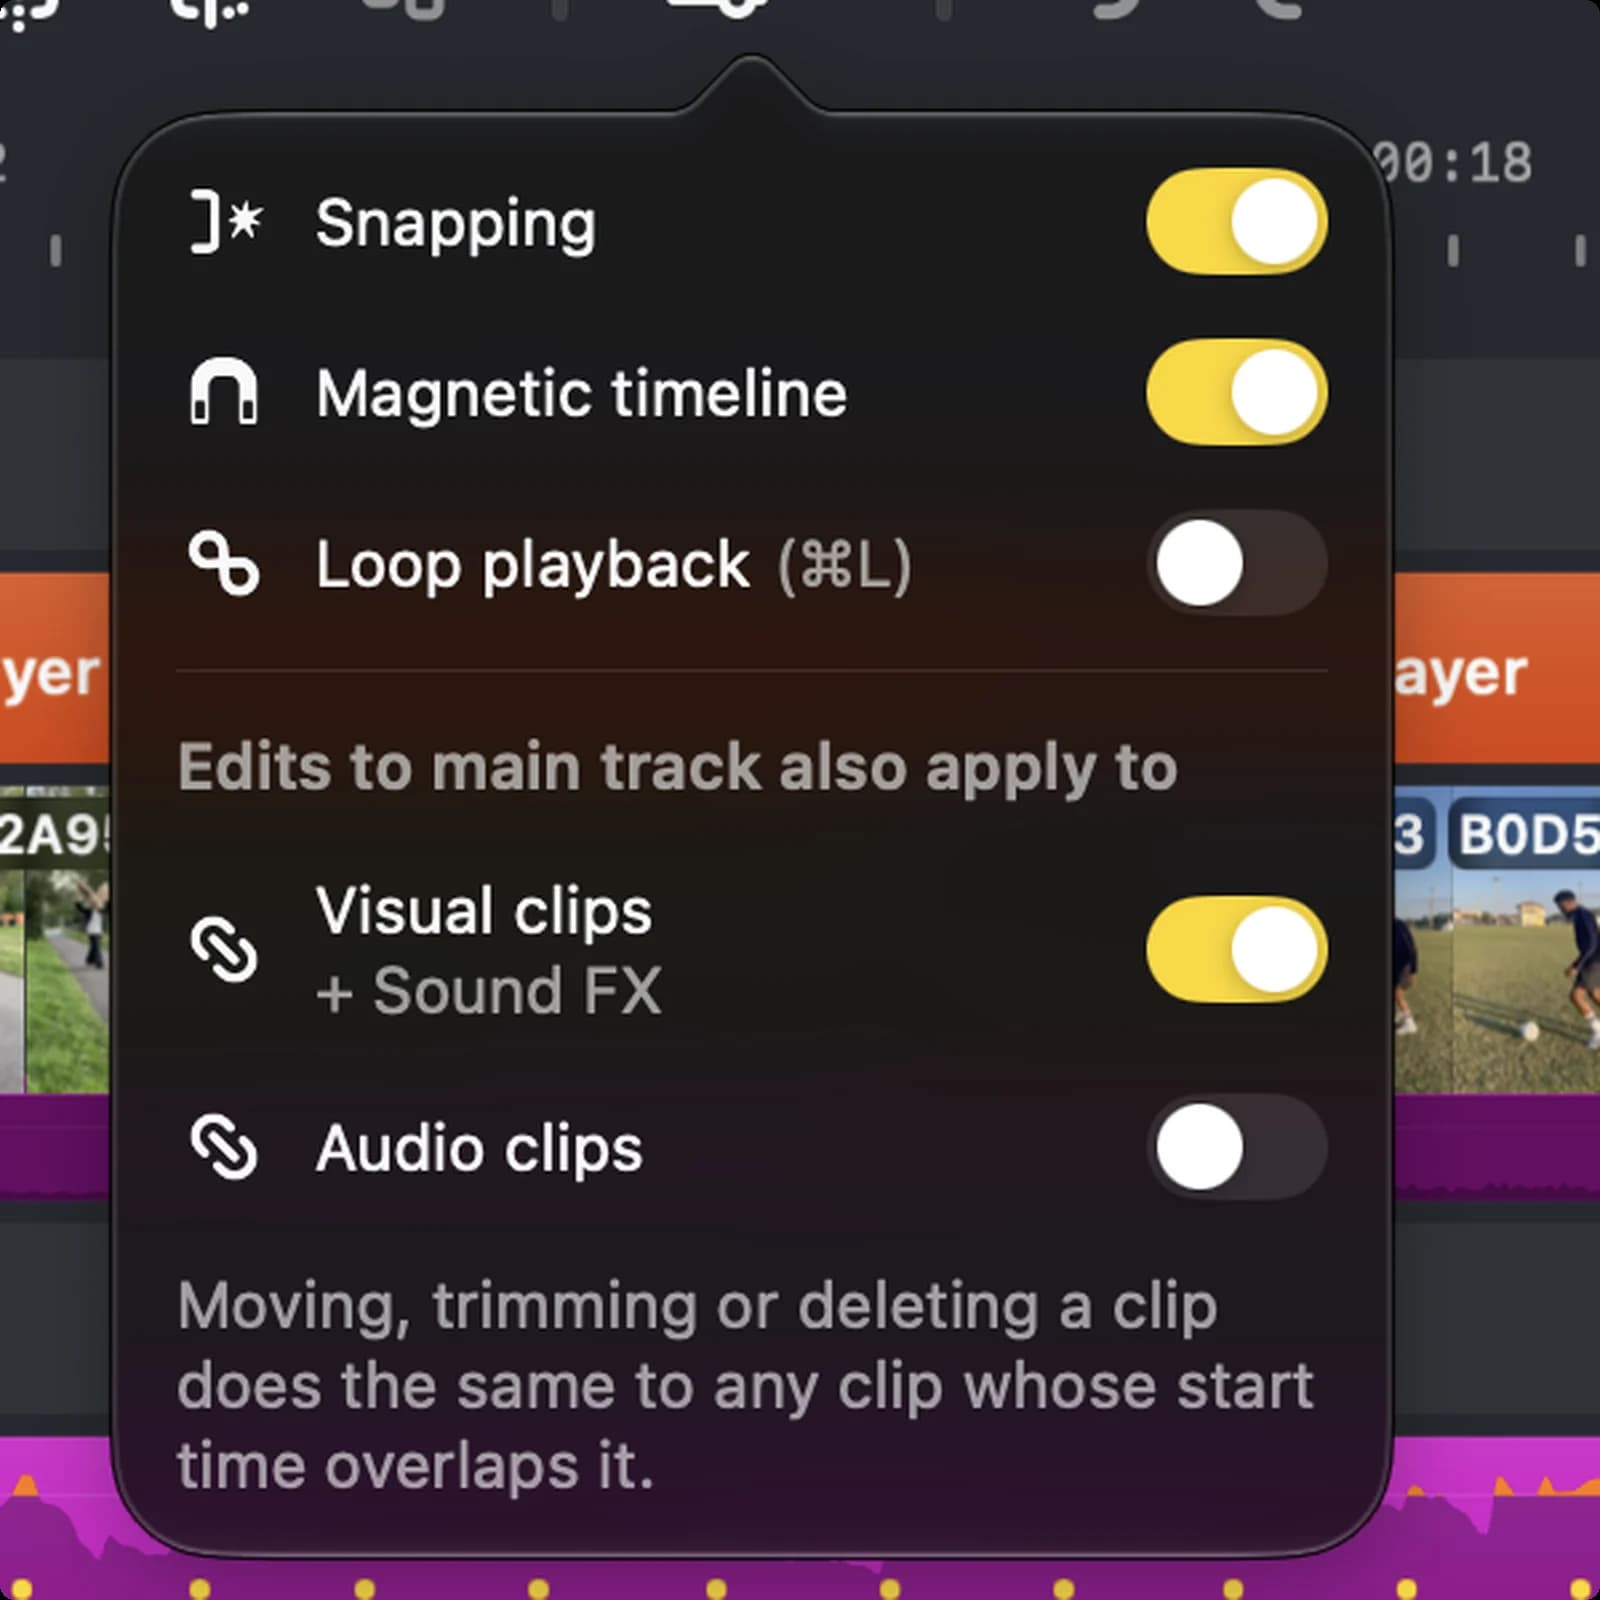

Snapping
Clips and the playhead snap to edges as you drag.

Magnetic timeline
Clips close the gap when you delete or move one.

Loop playback
Plays the timeline on repeat. ⌘L.

Visual clips and Sound FX
Edits to a main-track clip also move the text, effects and sounds that start over it.

Audio clips
The same link for music and voiceover. Off by default.
Clip Menu Basics
Right-click any clip in the timeline. The same commands are in the Clip menu in the menu bar.
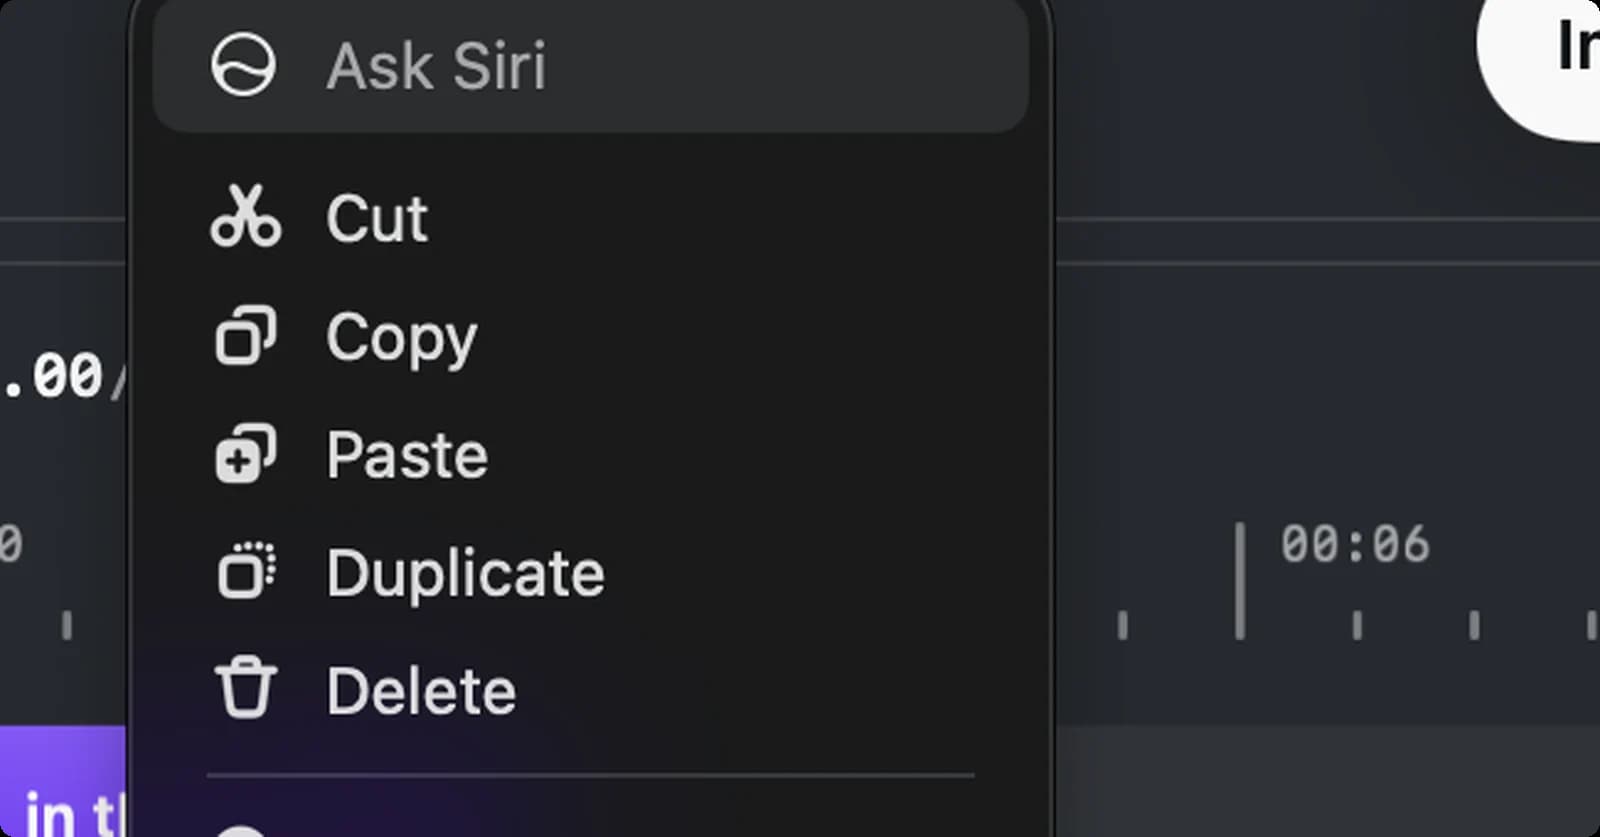

Cut
Removes the clip and keeps it on the clipboard. ⌘X.

Copy
Copies the clip. ⌘C.

Paste
Pastes at the playhead. ⌘V.

Duplicate
Makes a copy right after the clip.

Delete
Removes the clip. With the magnetic timeline on, the clips after it close the gap.
Clip Menu Edits
The middle of the same menu.
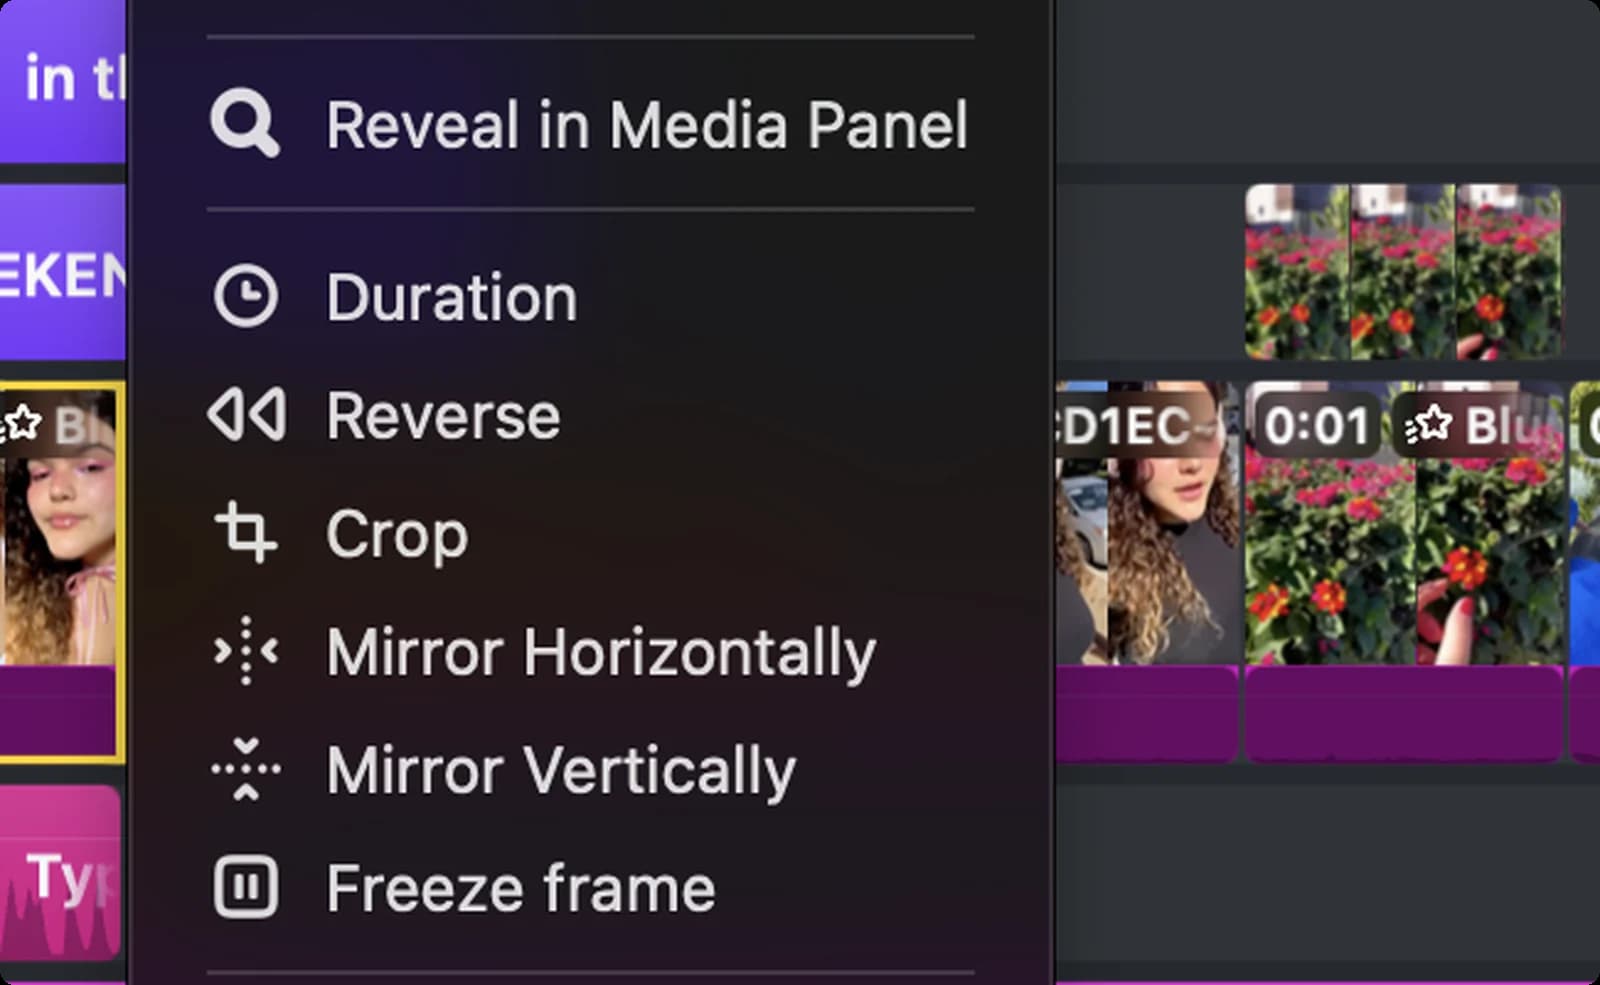

Reveal in Media Panel
Highlights the source file in the Media panel.

Duration
Sets an exact length, mostly for photos and text.

Reverse
Plays the clip backwards.

Crop
Opens the crop handles on the preview.

Mirror Horizontally
Flips the clip left to right.

Mirror Vertically
Flips it upside down.

Freeze frame
Adds a still of the current frame at the playhead.
Clip Menu Extras
The bottom of the same menu.
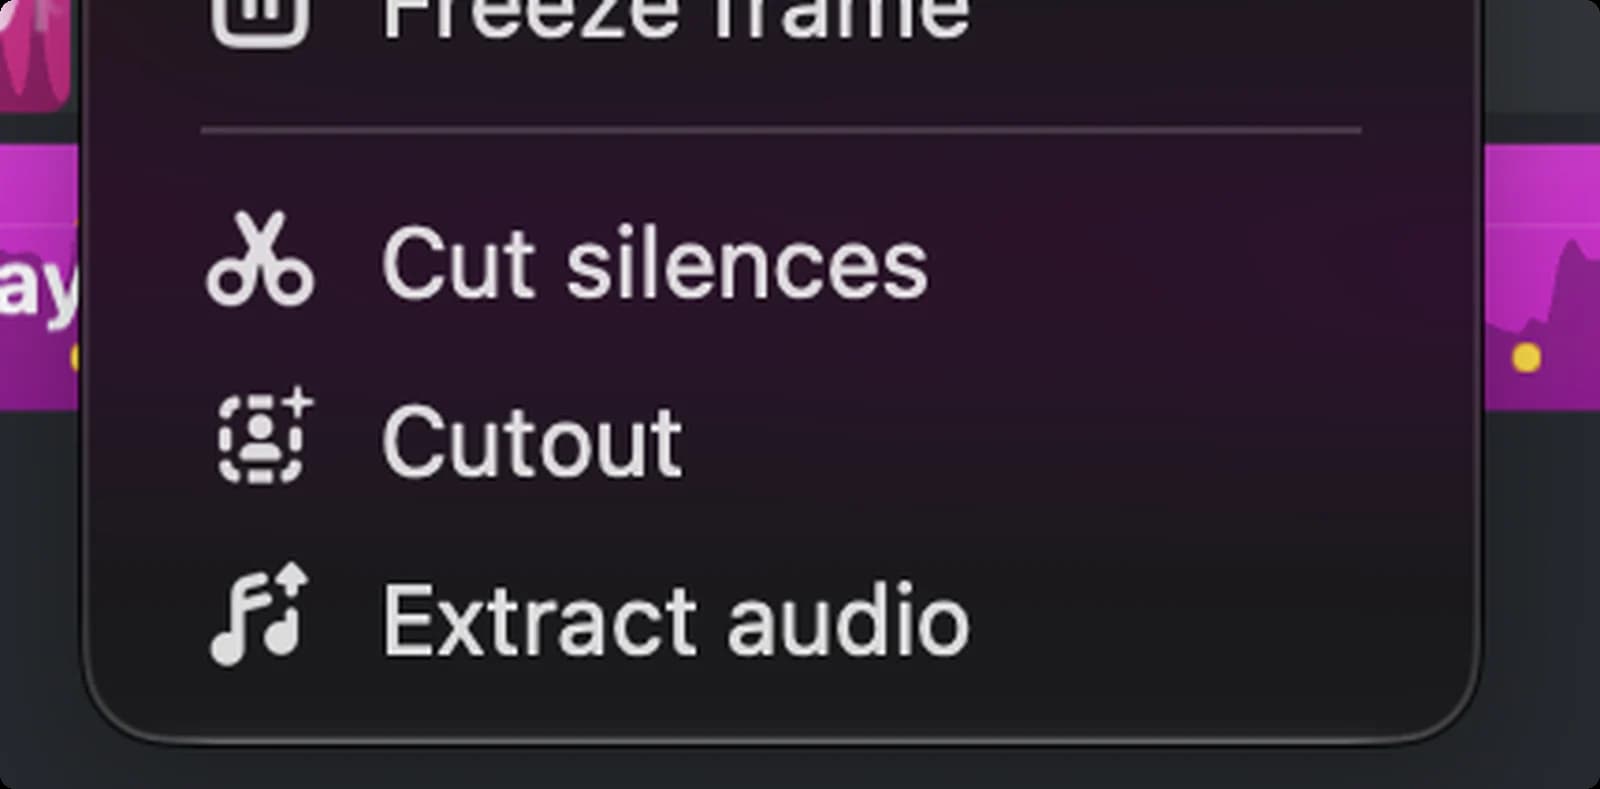

Cut silences
Finds the quiet parts of the clip and removes them, the quick way to tighten a talking video.

Cutout
Removes the background behind a person, like a green screen without the screen.

Extract audio
Puts the clip's sound on the audio track as its own clip, so you can edit the two separately.
Transform and Align
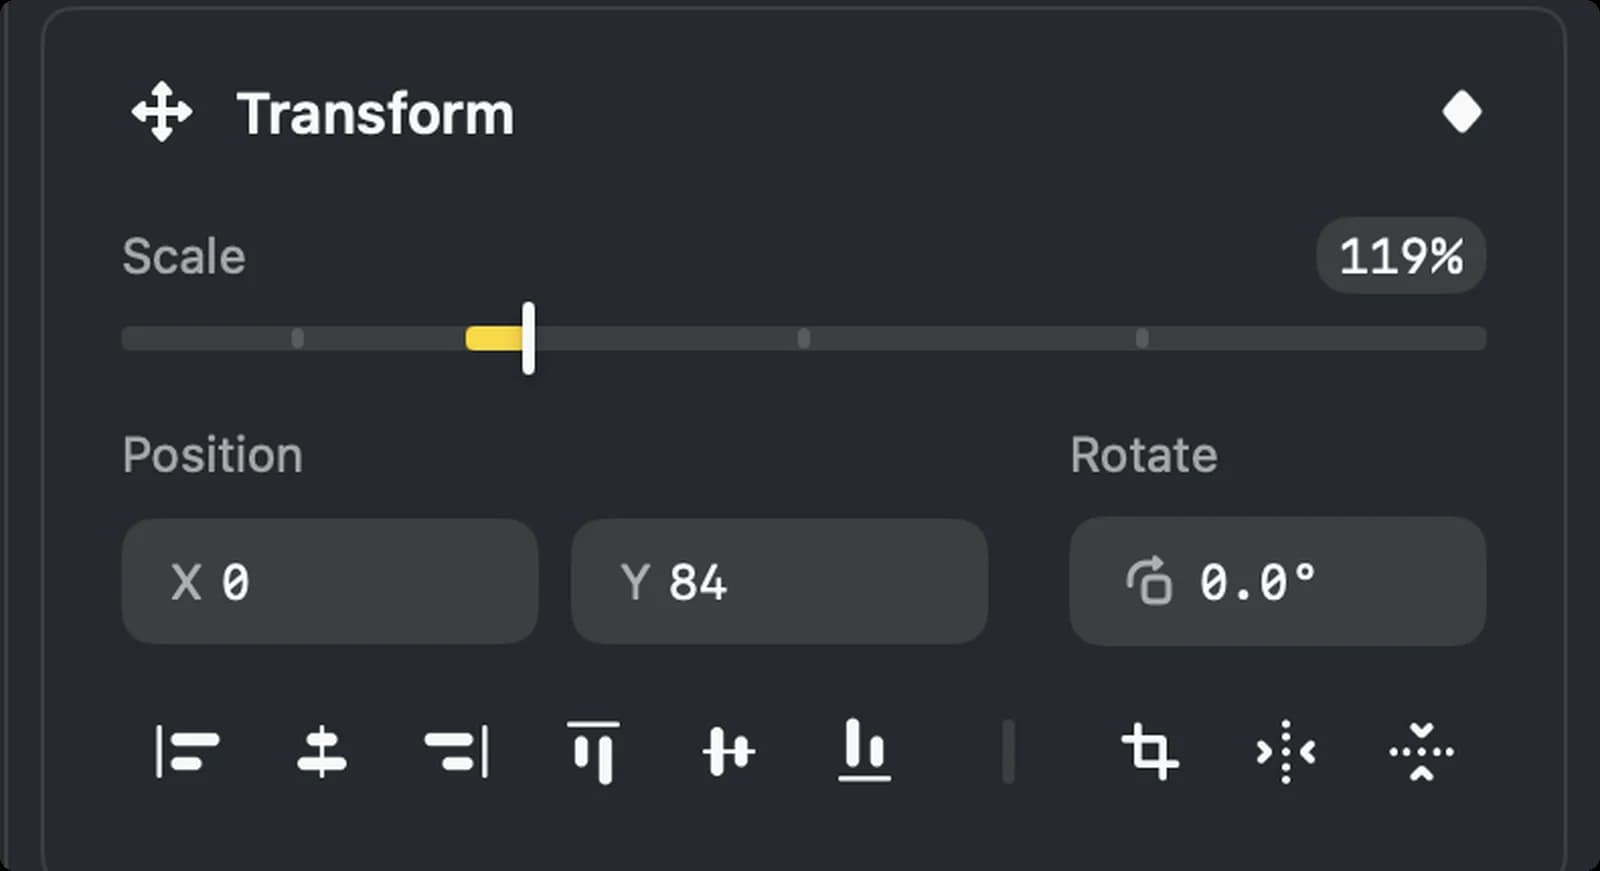
Select a clip and its settings fill the right side. The top section sizes and places it.

Transform
Size and position of the clip in the frame.

Keyframe
The diamond. Click it to record the current value at the playhead, then move the playhead, change the value and click again to animate between them.

Align left
Snaps the clip to the left edge of the frame.

Align center
Centres it horizontally.

Align right
Snaps it to the right edge.

Align top
Snaps it to the top edge.

Align middle
Centres it vertically.

Align bottom
Snaps it to the bottom edge.
Crop and Mirror
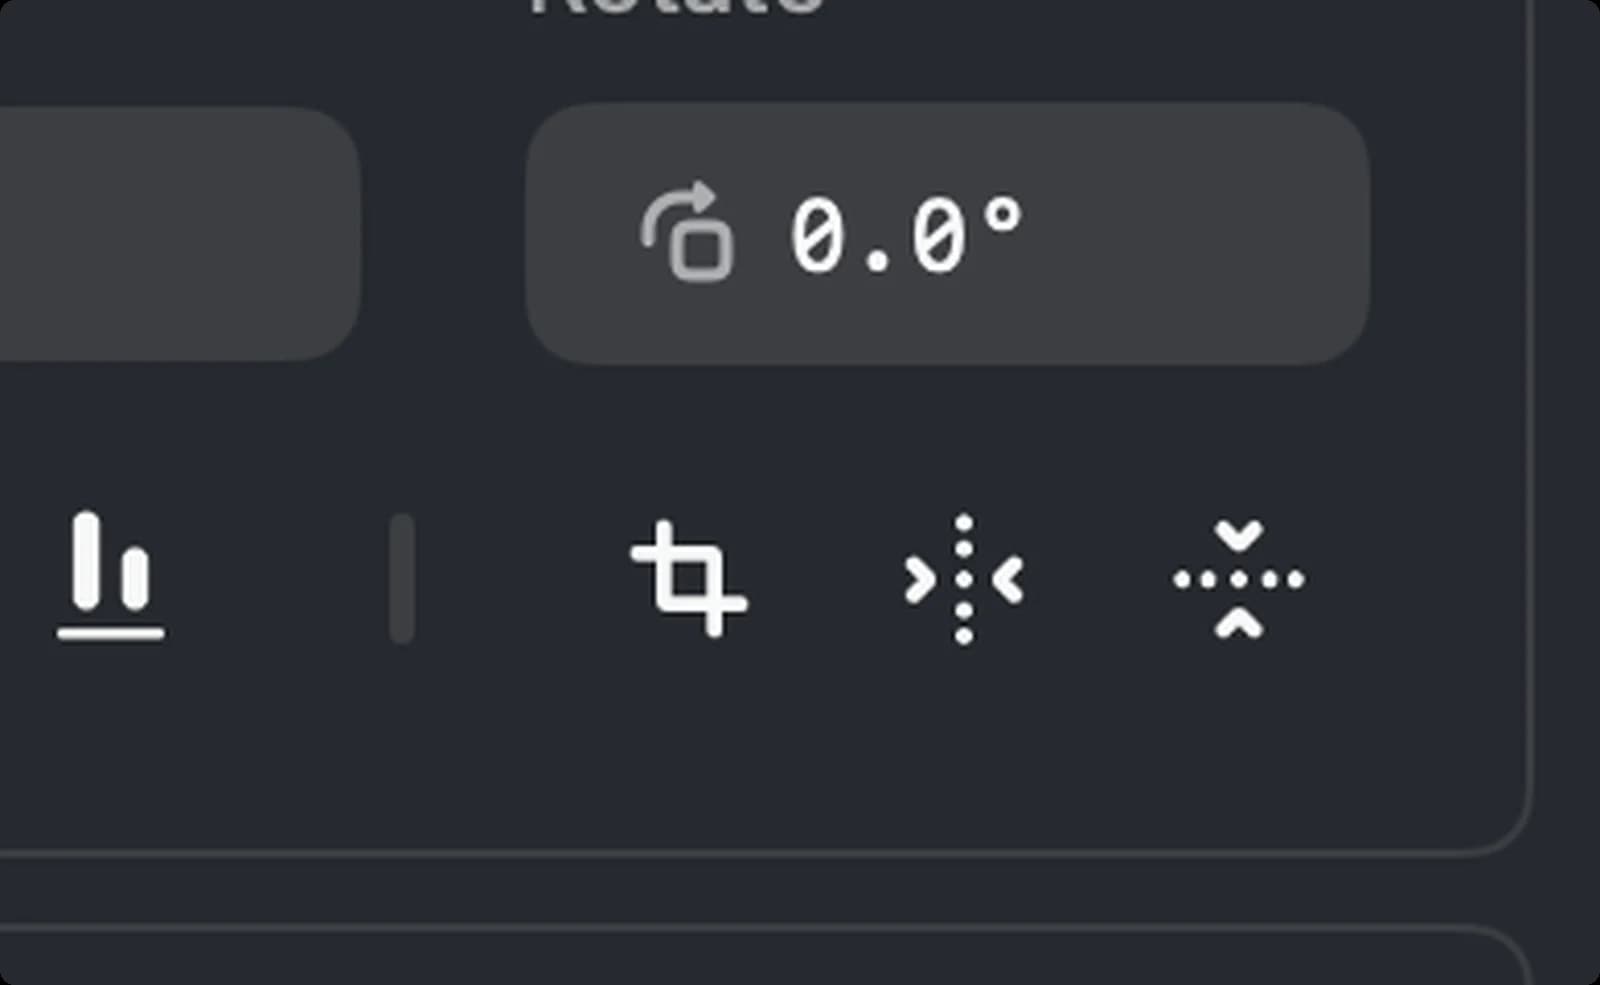
At the end of the align row.

Crop
Opens crop handles on the preview to cut away the edges of the clip.

Mirror horizontally
Flips the clip left to right.

Mirror vertically
Flips it upside down.
Clip Sound
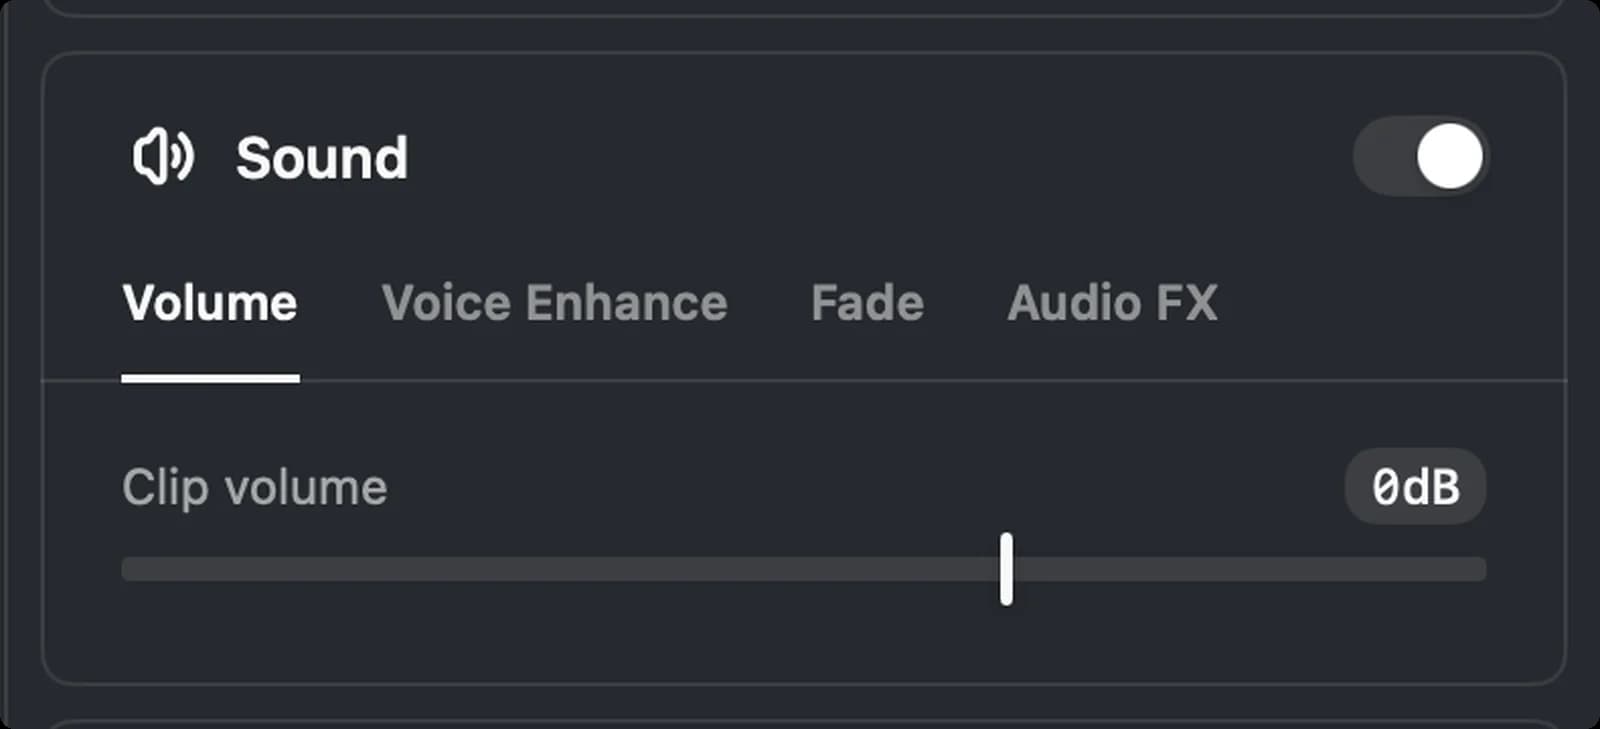
Under Transform.

Sound
The clip's own audio. The switch on the right mutes it without deleting anything.

Sound switch
Mutes or unmutes the clip's audio.
Speed and Look Controls
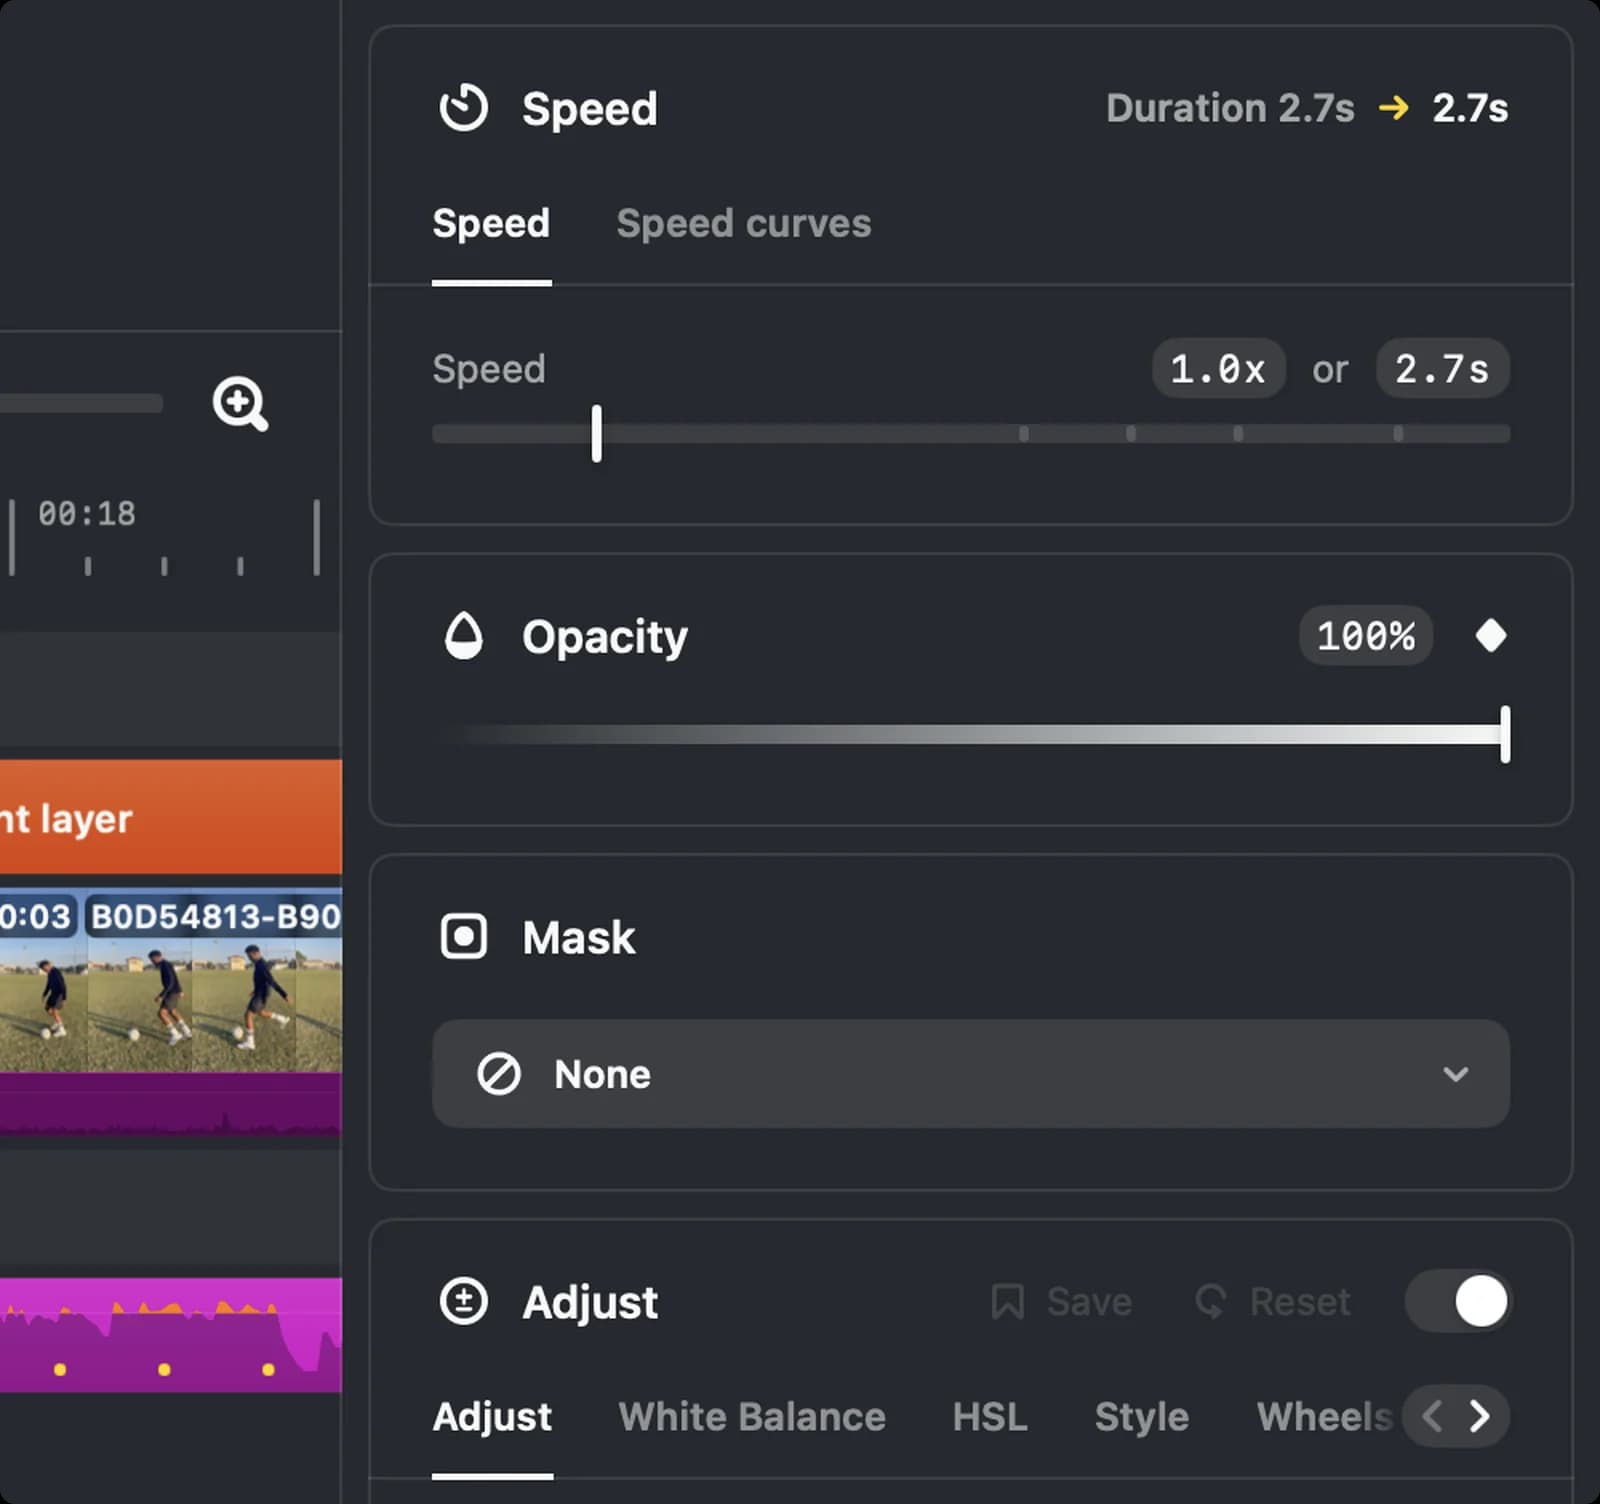
Further down the inspector: speed, opacity, mask and colour adjustments.

Speed
Slows the clip down or speeds it up. The header shows the original and the new duration.

Opacity
How see-through the clip is. Useful for overlays. It has its own keyframe diamond.

Mask
Shows only part of the clip through a shape. None means no mask.

Adjust
Colour and exposure controls for this clip, in tabs: Adjust, White Balance, HSL, Style, Wheels and more behind the arrows.

Save
Saves the current adjustments as a preset, which then appears in the Adjust library on the rail.

Reset
Clears every adjustment on the clip.

Adjust switch
Turns the adjustments off and on, so you can compare.
Audio Clip Inspector
Select a music clip and the inspector shows its sound settings and beat markers.
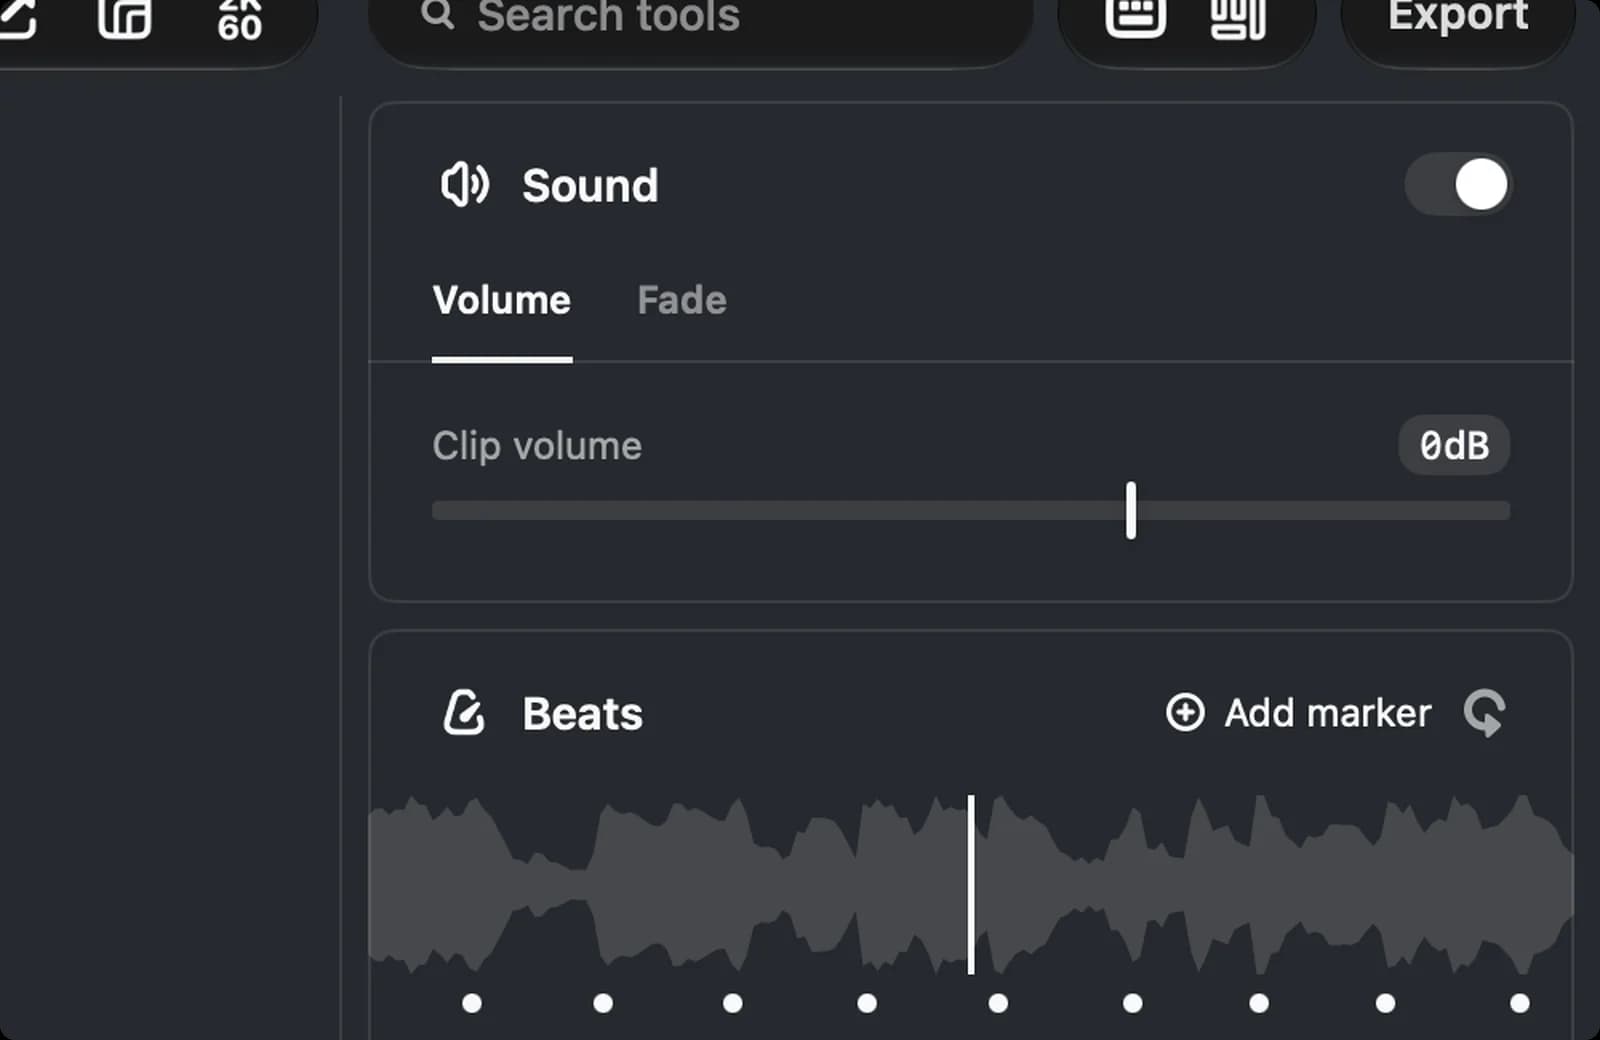

Sound
Volume and fade for the audio clip. Music gets just these two tabs.

Beats
Edits finds the beats in the music and marks them on the clip, so cuts can land on the beat.

Add marker
Drops your own beat marker at the playhead.

Reset beats
Clears your markers and goes back to the detected beats.
Audio Panel
Music to lay under your video. Hover a track to preview it or add it to the timeline.
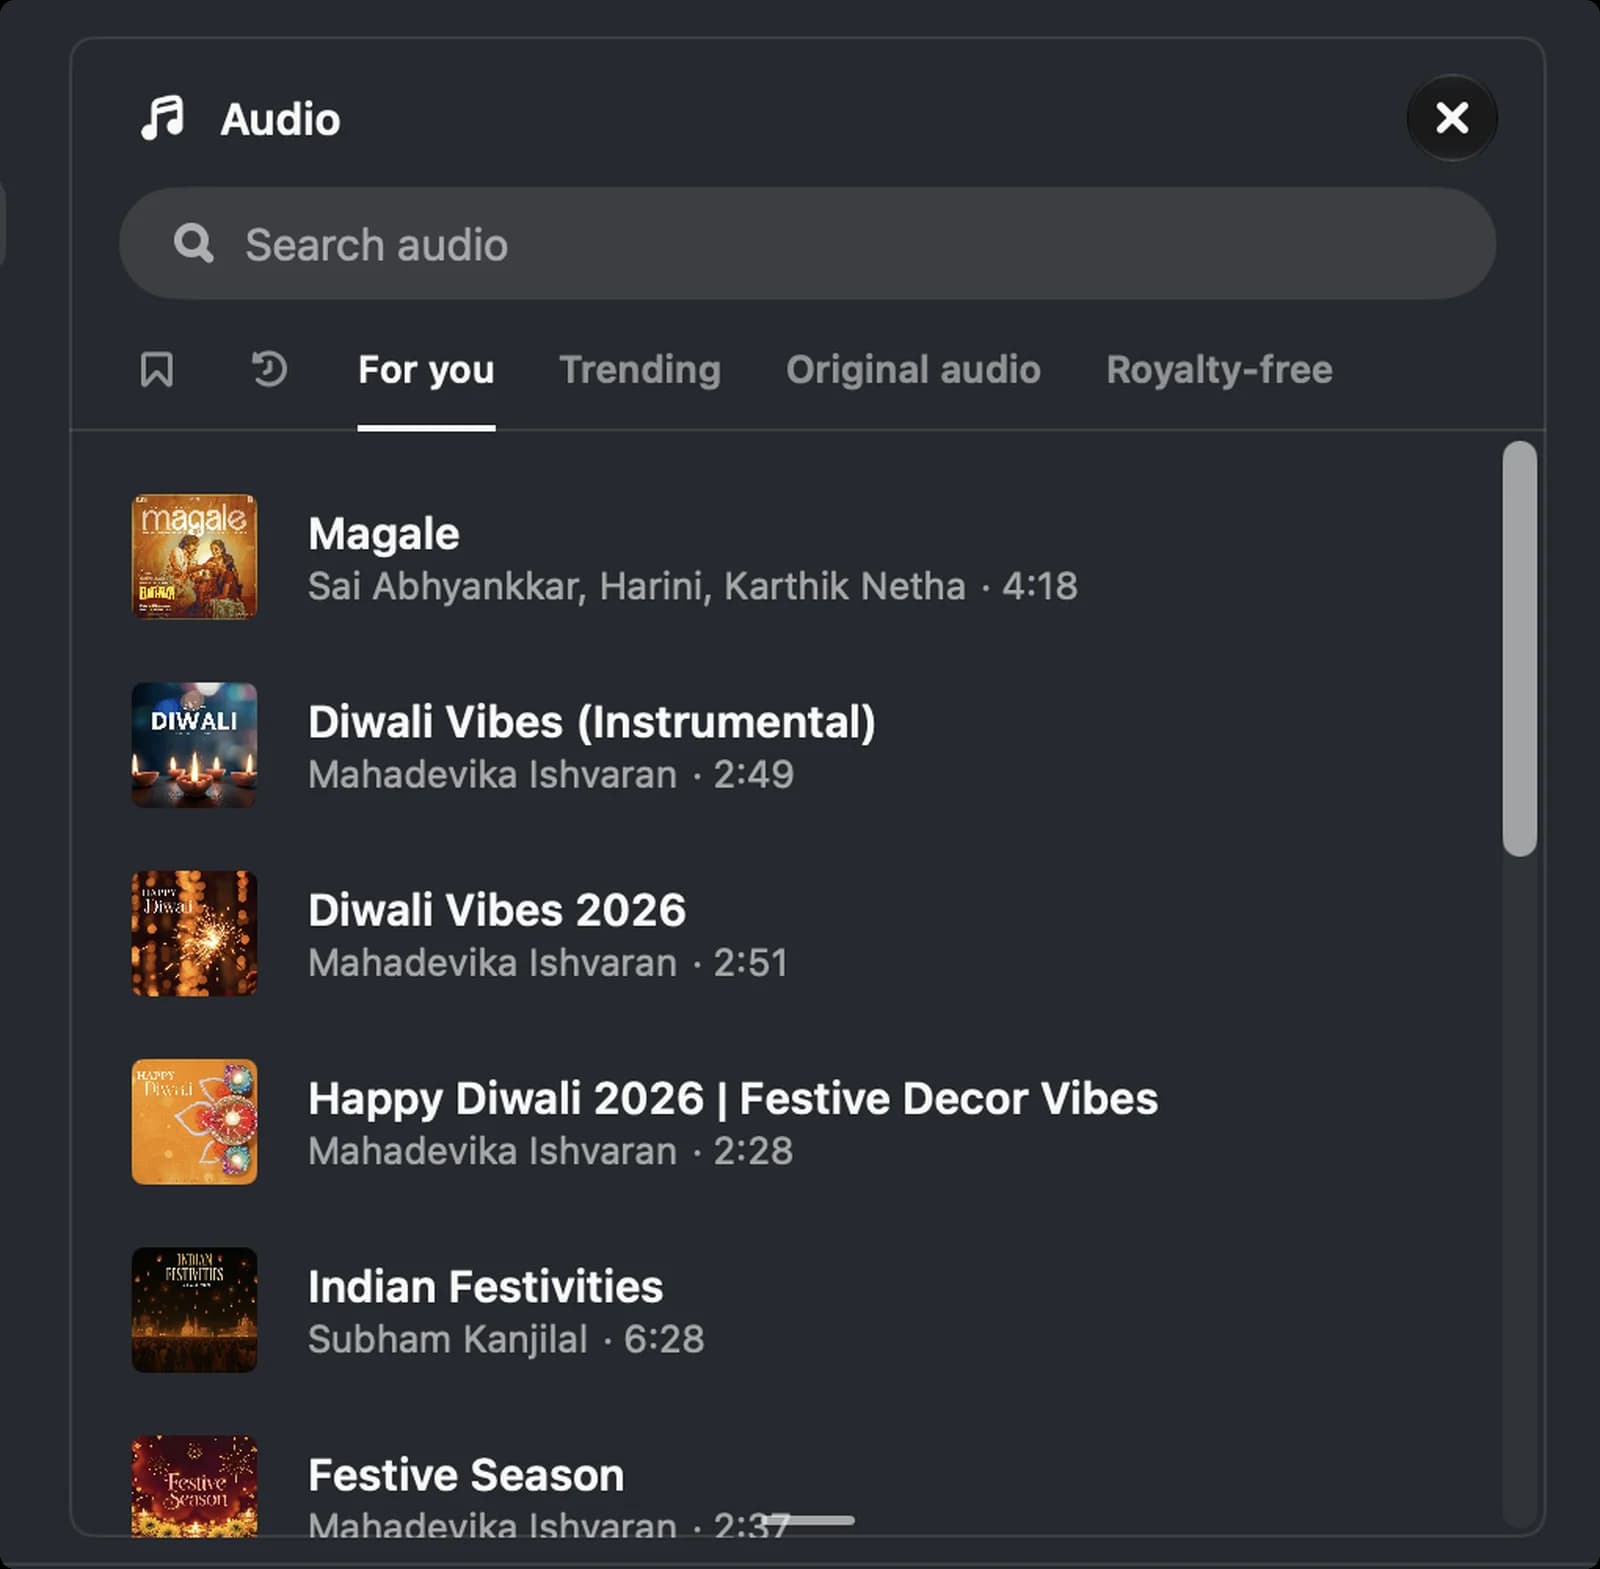

Audio
The panel's name.

Close
Hides the panel.

Saved
Tracks you bookmarked.

Recents
Tracks you used before.

Track
The cover, title, artist and length. Hover it for play and add buttons.
Text Panel
Text styles. Click one and a text clip appears at the playhead; type into it on the preview.
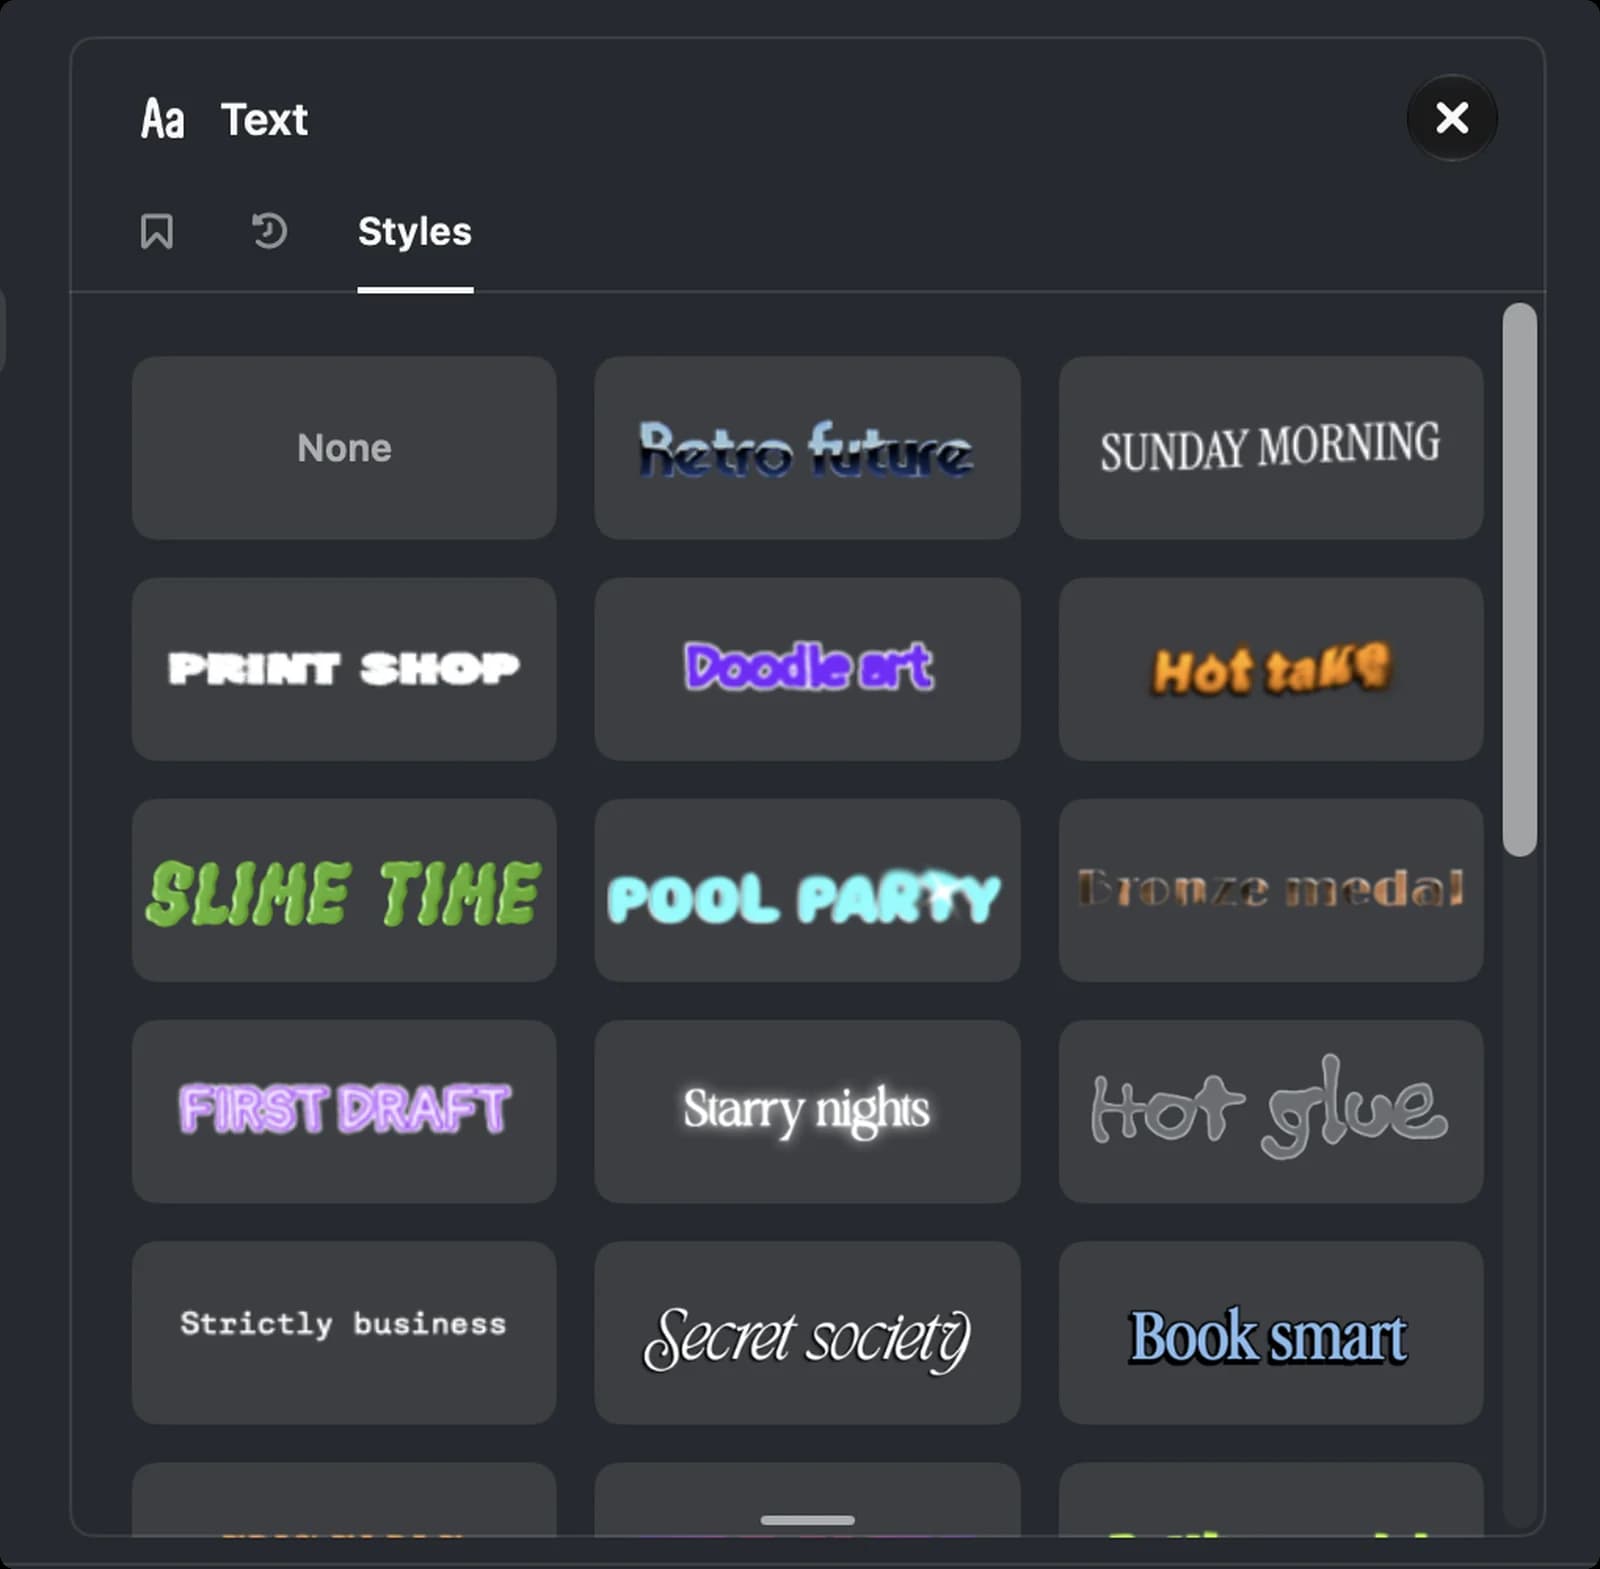

Text
The panel's name.

Close
Hides the panel.

Saved
Styles you bookmarked.

Recents
Styles you used before.
None
Plain text with no styling, for a clean caption.
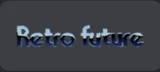
Style tile
Each tile previews the font, colour and effect. Click it to use it.
Captions Panel
Edits listens to the speech in your clips and writes captions for them.
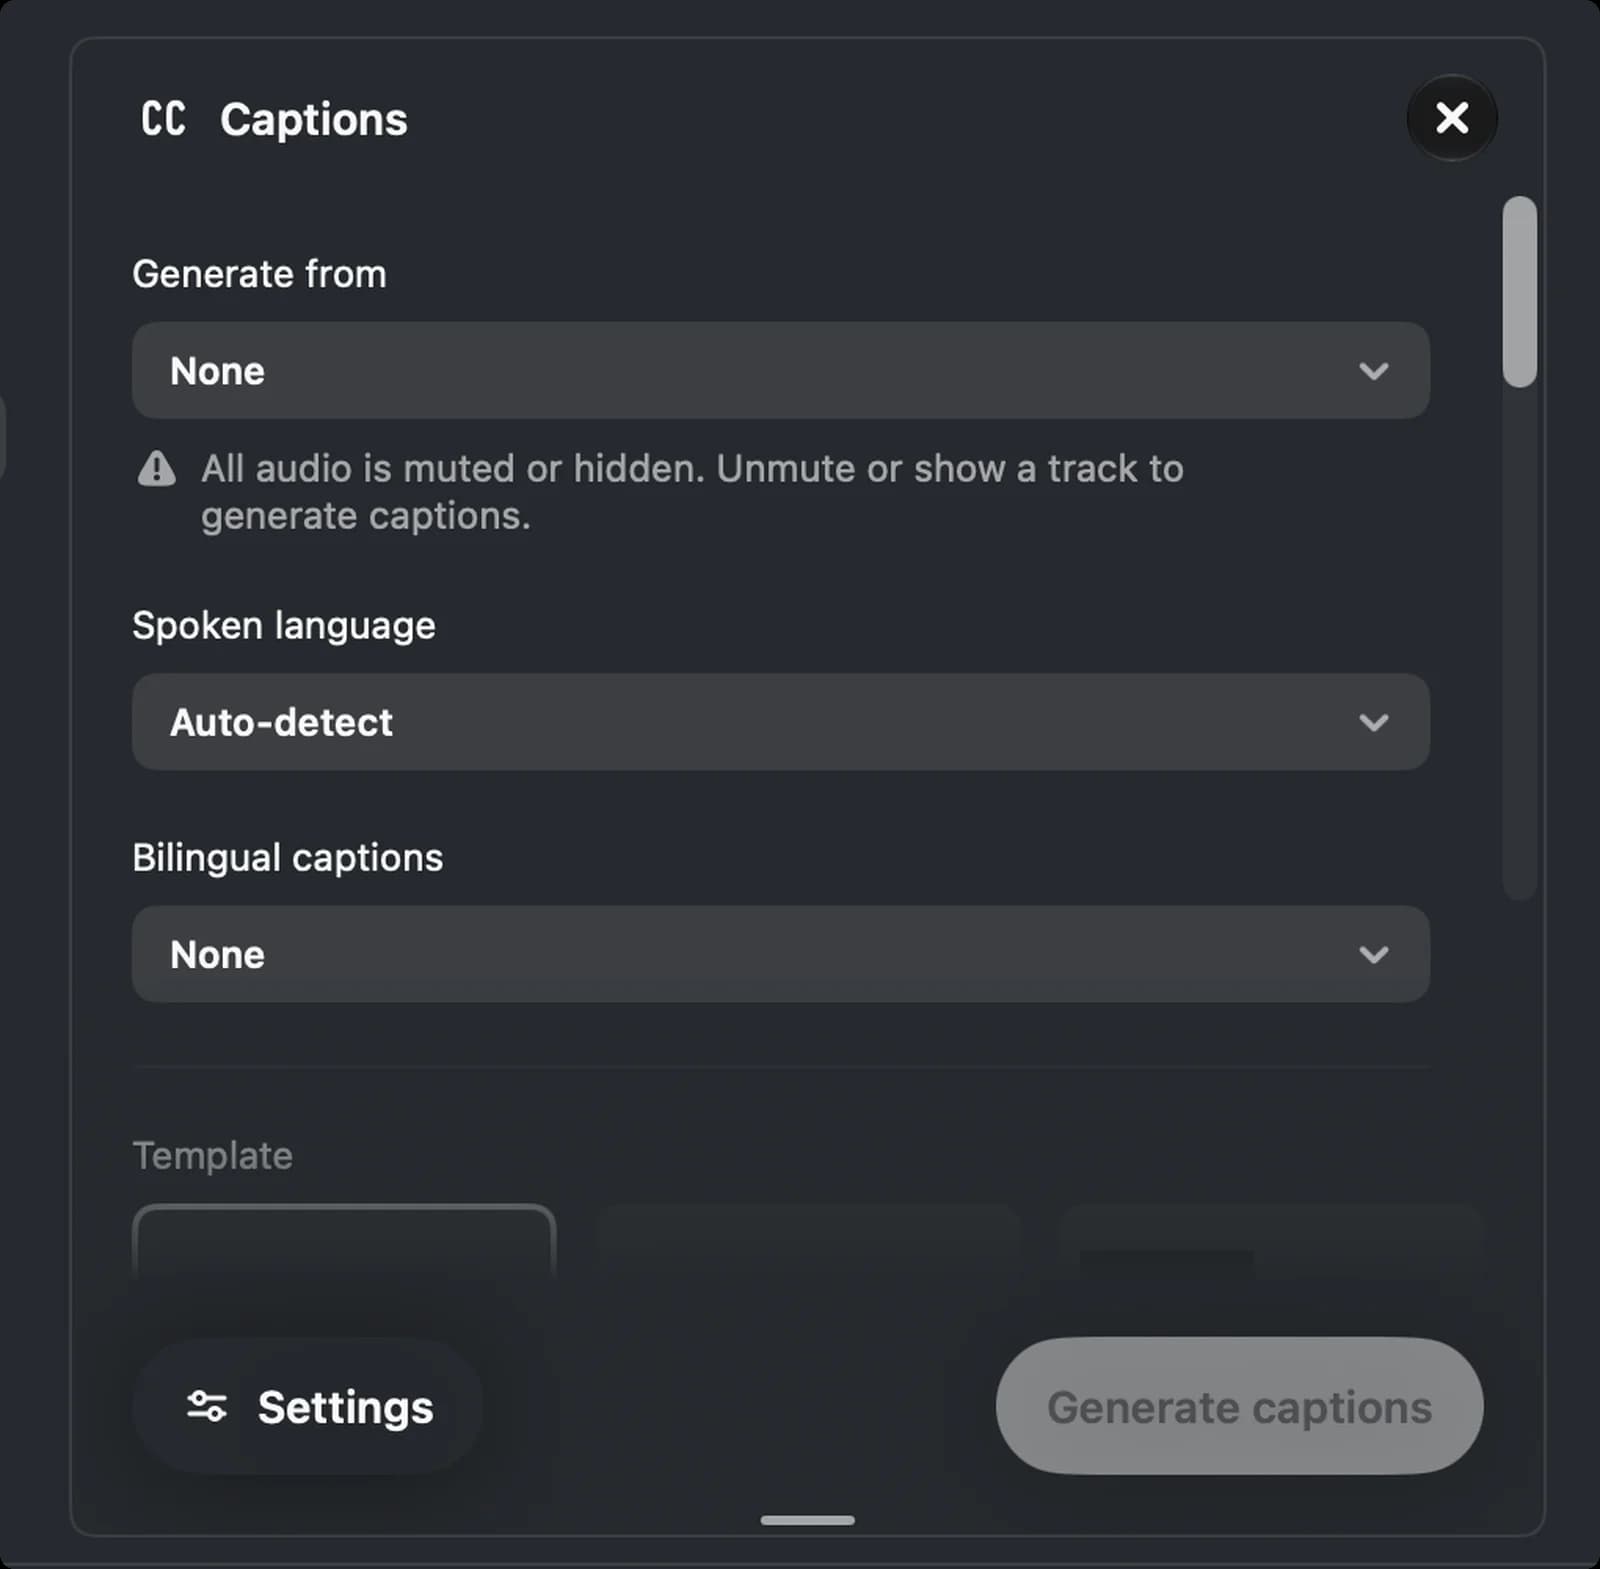

Captions
The panel's name.

Close
Hides the panel.

Settings
Finer options such as caption position and whether words highlight as they are spoken.
Voiceover Panel
Record narration straight into the project while the video plays.
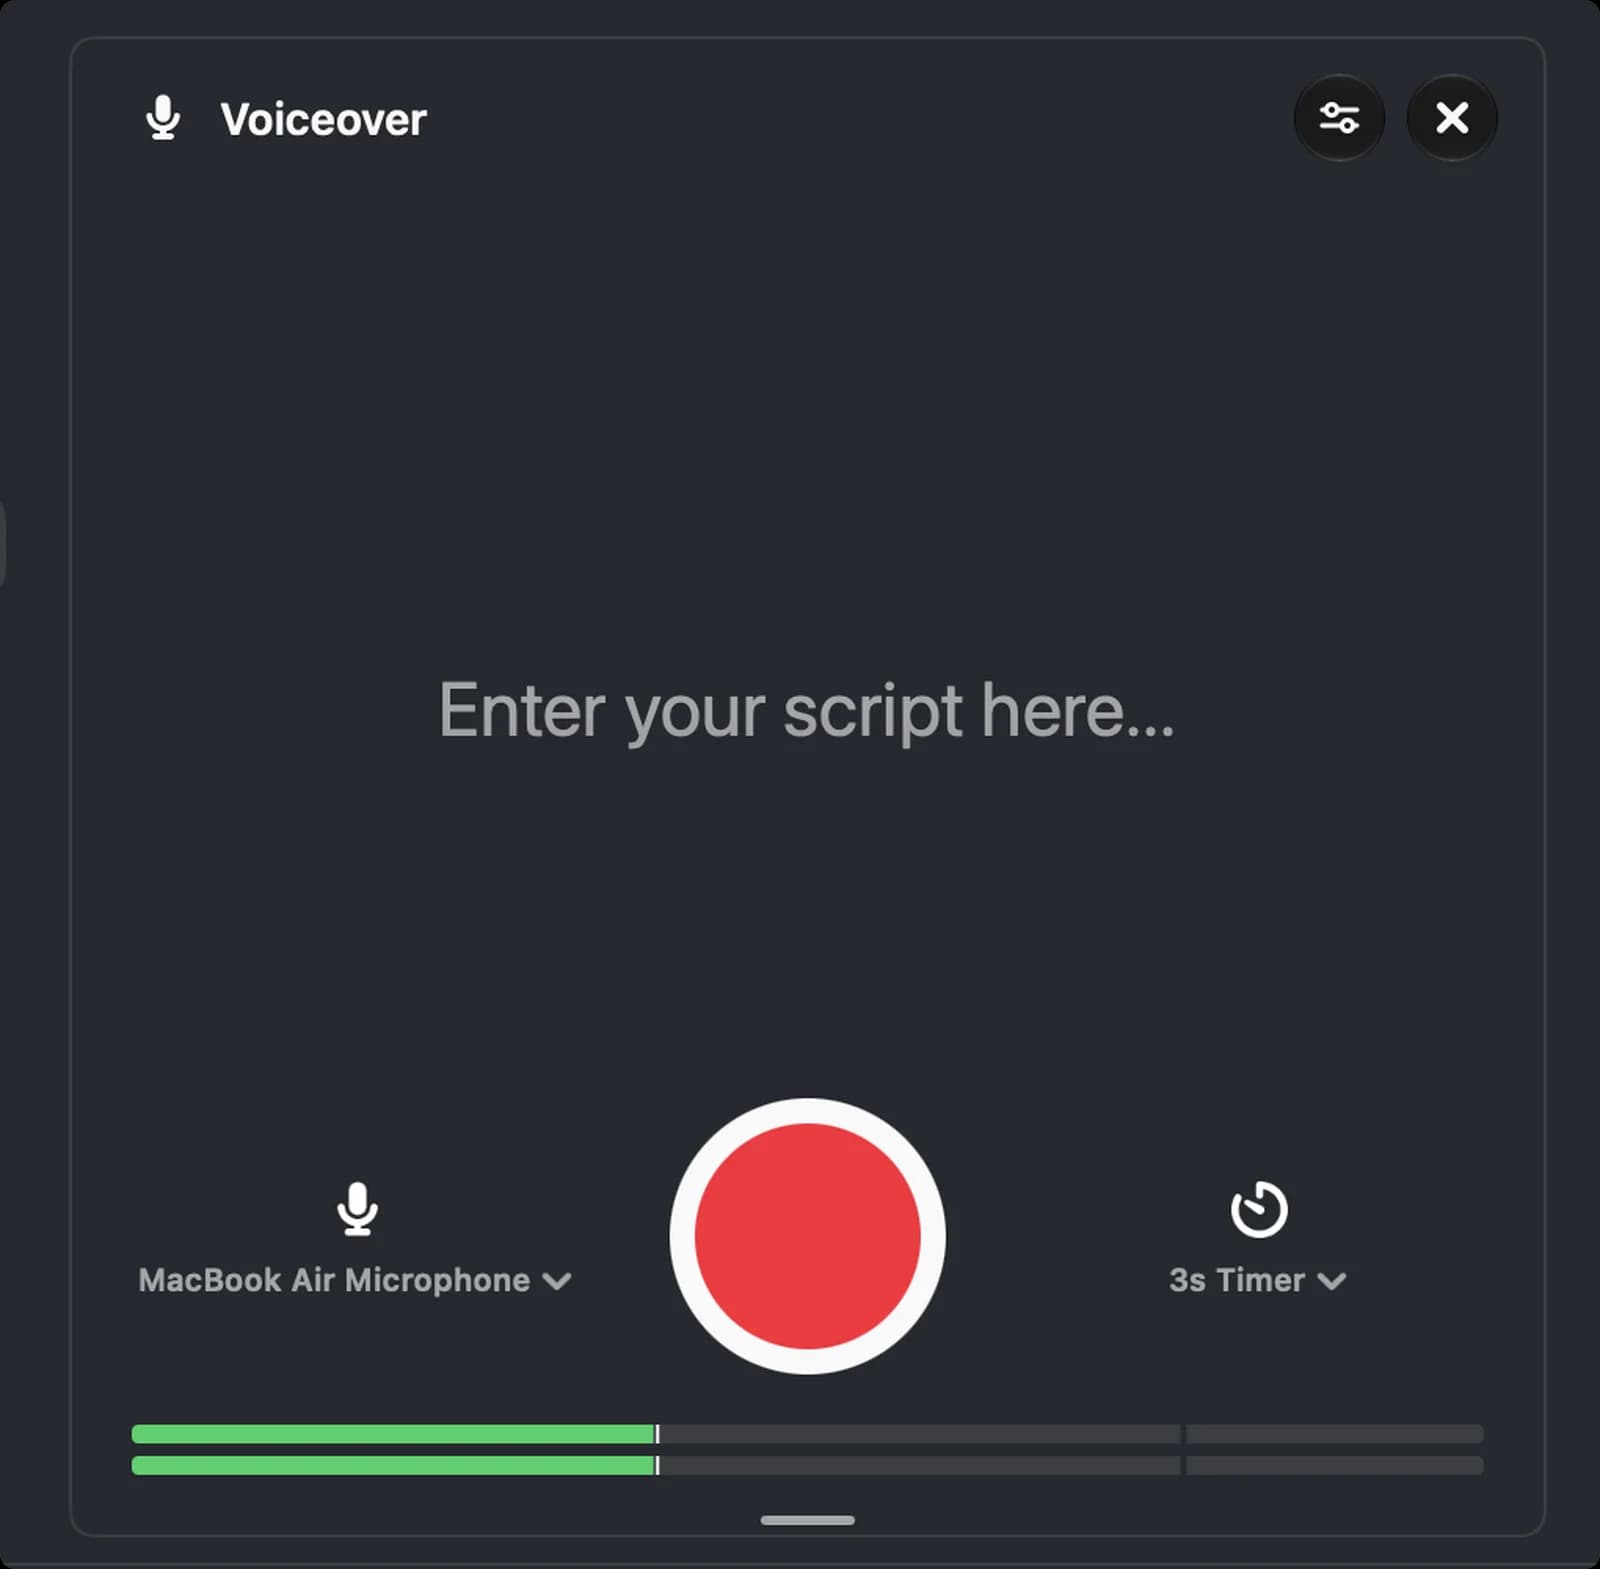

Voiceover
The panel's name.

Settings
Recording options.

Close
Hides the panel.

Microphone
Which mic records. The built-in one is picked by default.
Record
Starts recording after the countdown; click again to stop. The clip goes on the audio track at the playhead.

Timer
The countdown before recording starts, 3 seconds by default.
Effects and Filters Panels
Three panels with the same layout: a search, your saved and recent picks, a None tile to remove the effect, and a grid of previews.
Effects
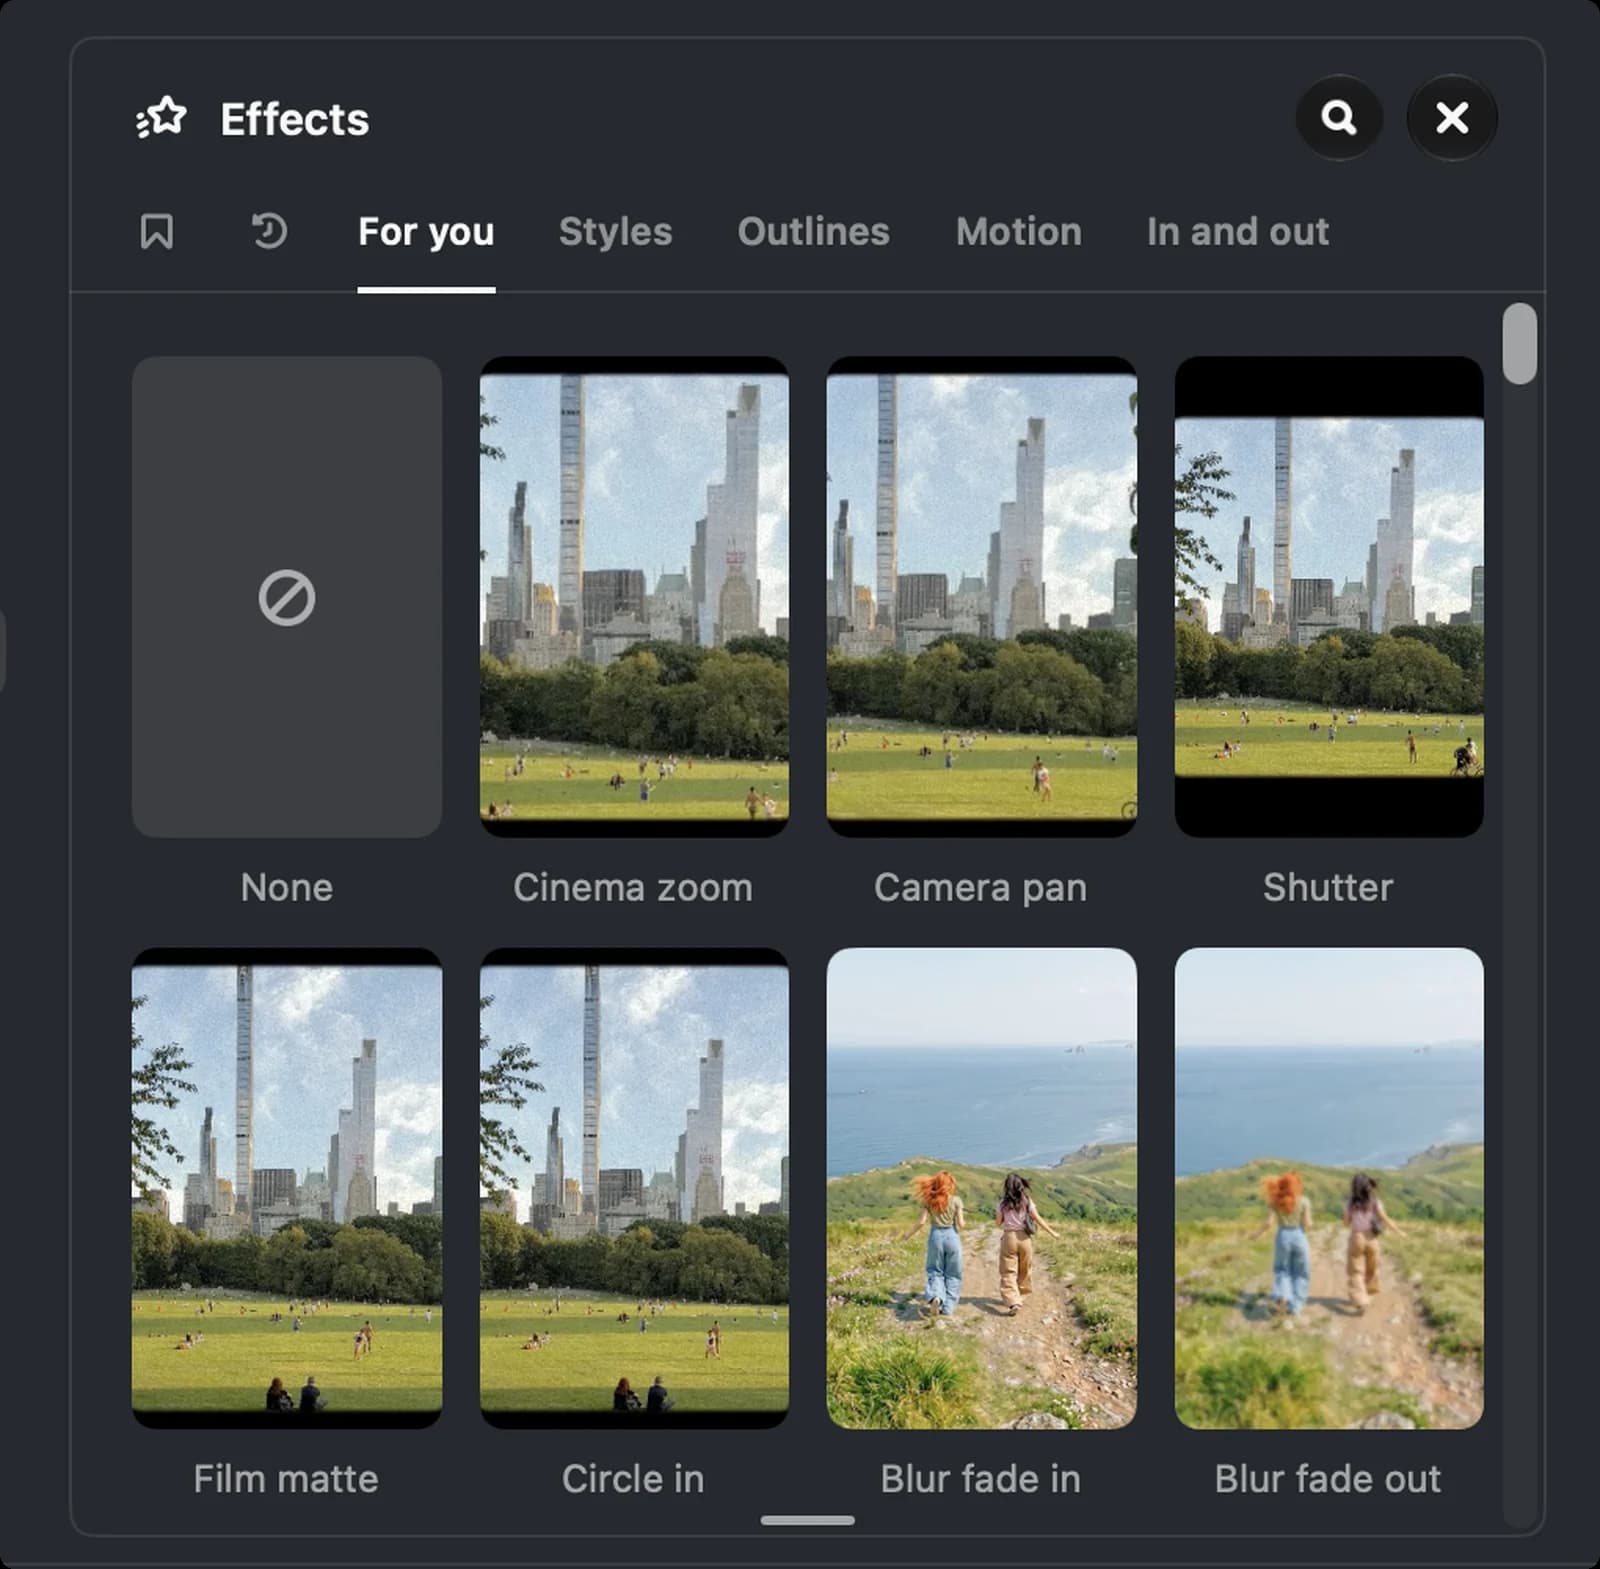

Effects
The panel's name.

Search
Search the effects by name.

Close
Hides the panel.

Saved
Effects you bookmarked.

Recents
Effects you used before.
None
Removes the effect from the selected clip.
Effect tile
A preview of the effect. Click it to apply it to the selected clip.
Transitions
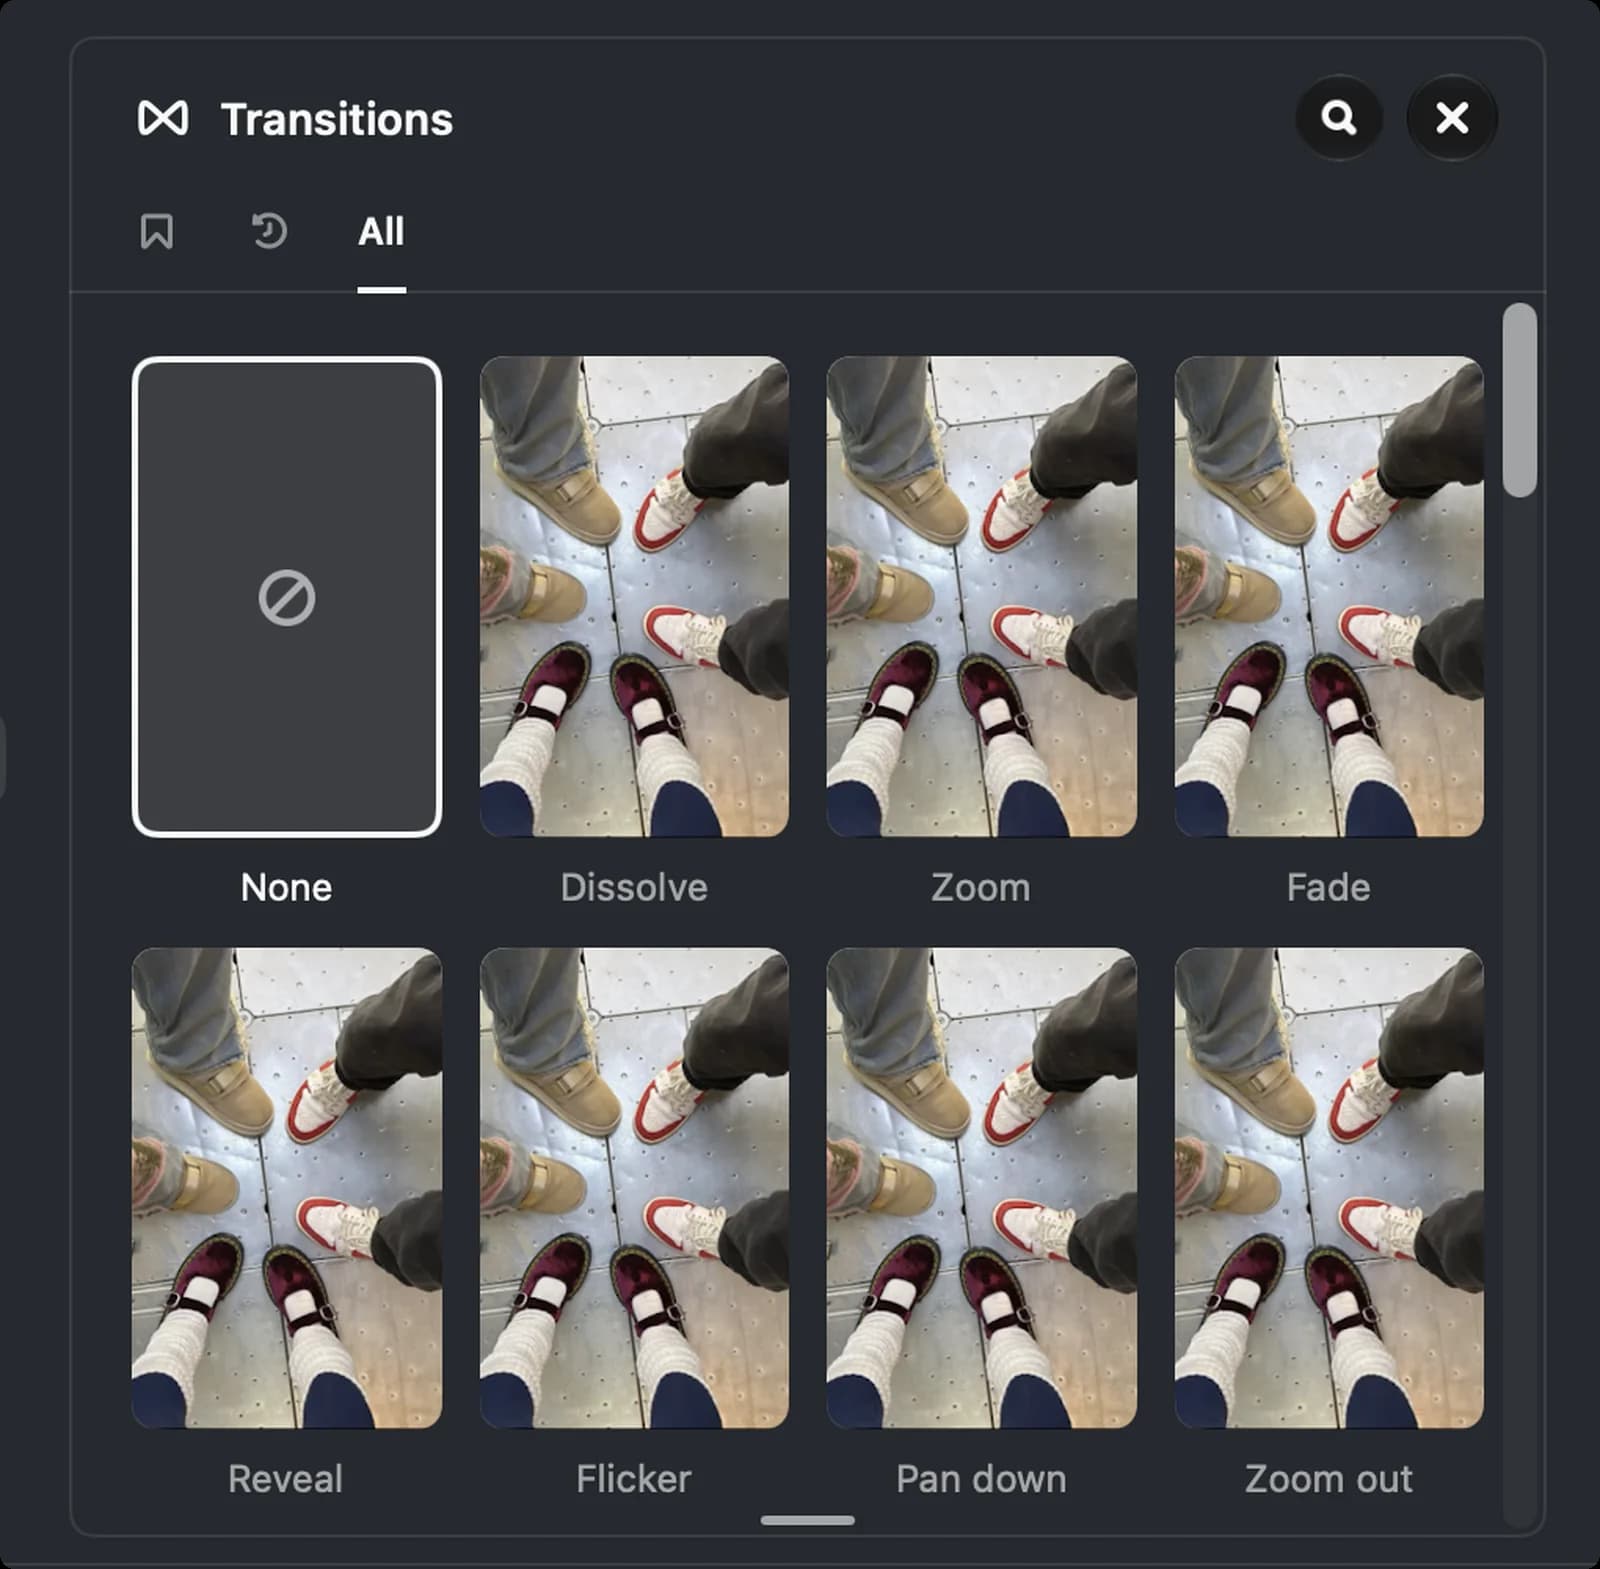

Transitions
Transitions go between two clips. Click one with the playhead on a cut, or drag it onto the cut.

Transition tile
Dissolve, Zoom, Fade, Reveal, Flicker, Pan down and Zoom out are the first row.
Filters
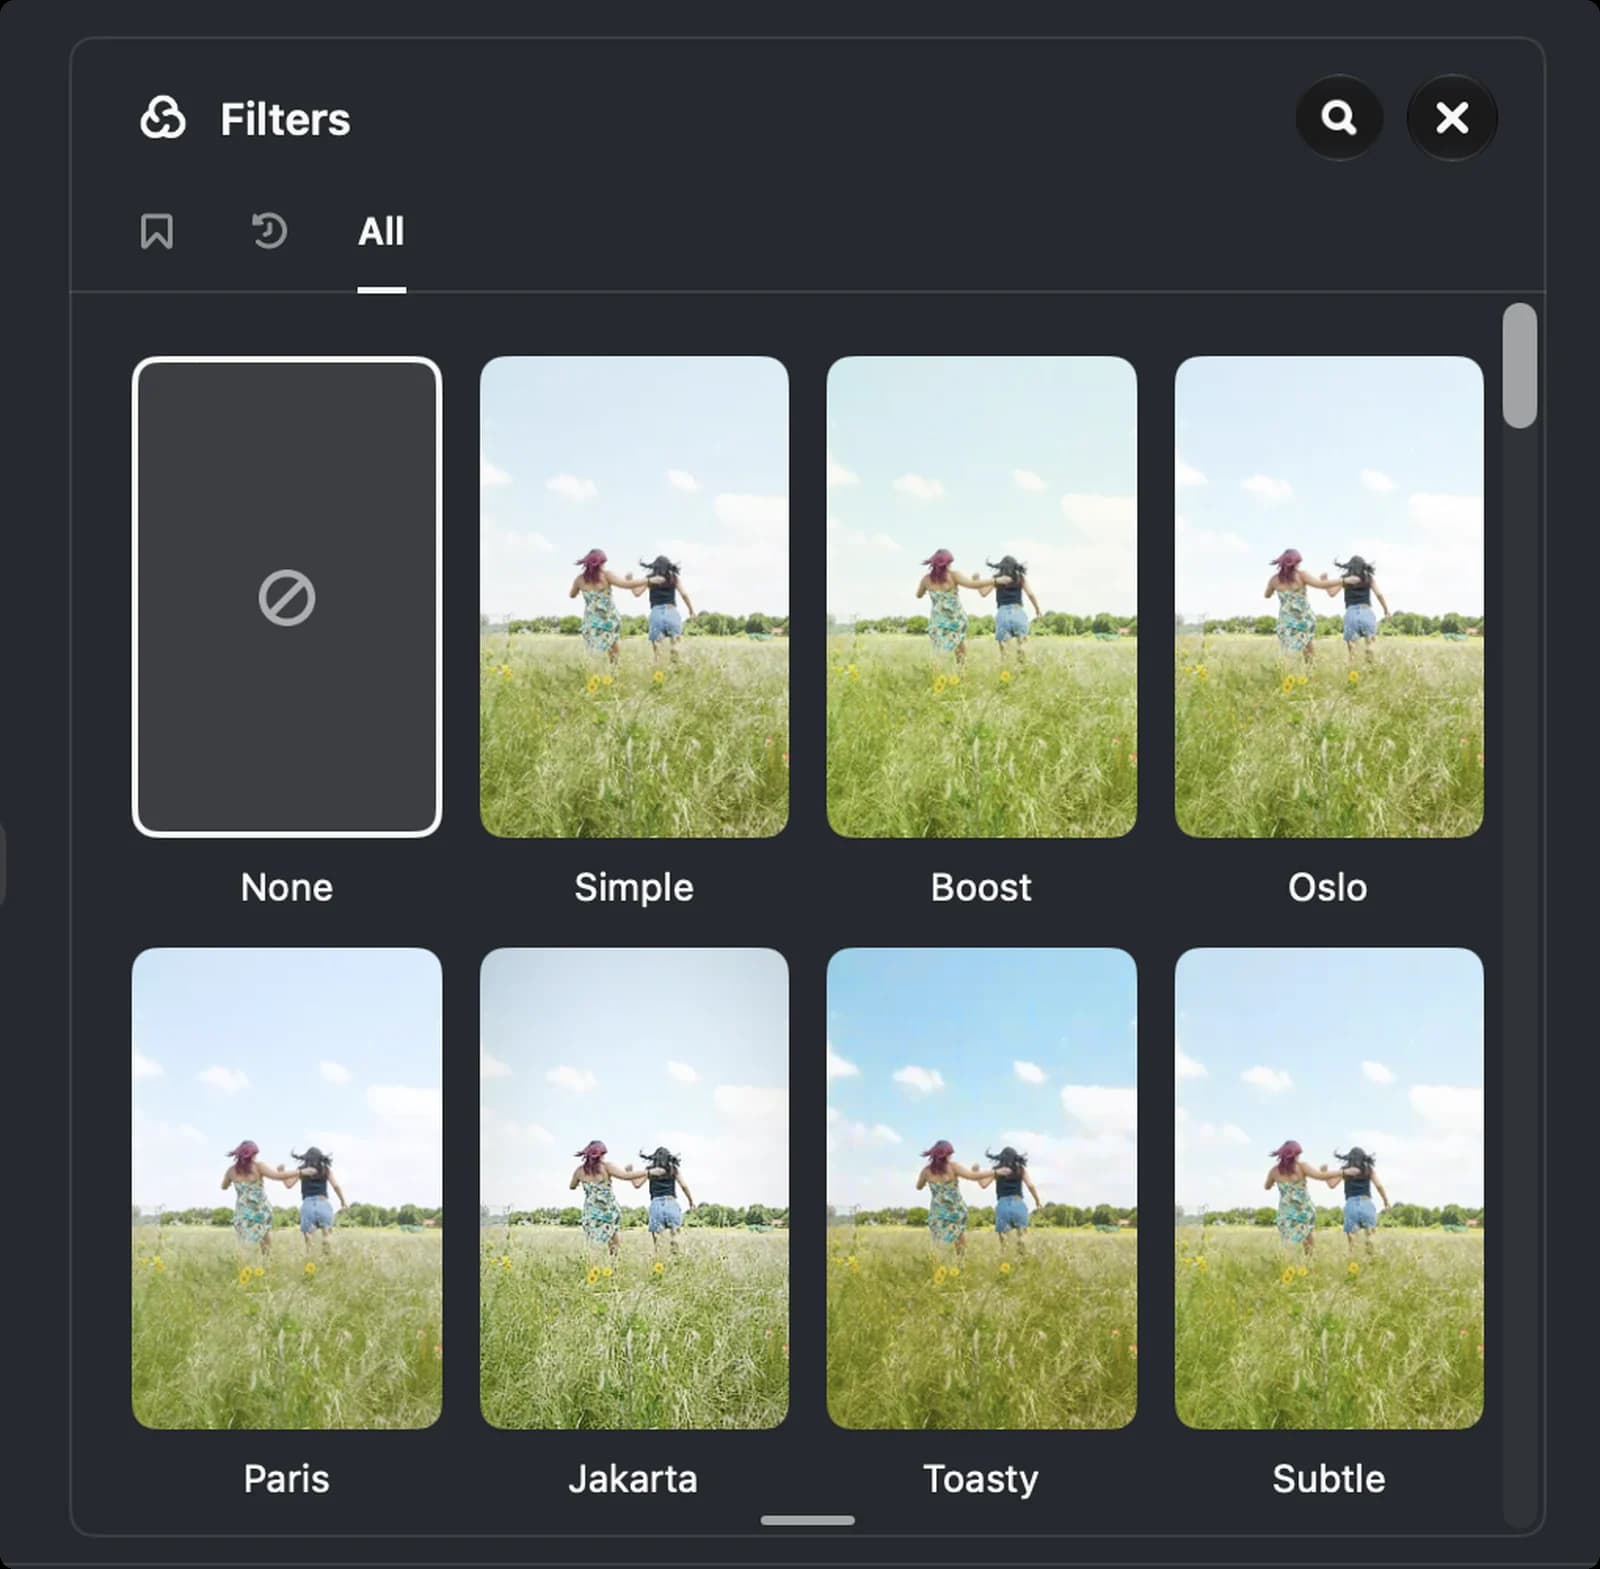

Filters
Colour looks for the whole clip. The tiles preview the filter on your own footage.

Filter tile
Simple, Boost, Oslo, Paris, Jakarta, Toasty and Subtle are the first row. One click applies it.
Adjust Panel
Not the colour controls themselves, which are in the inspector, but the presets you saved from them.
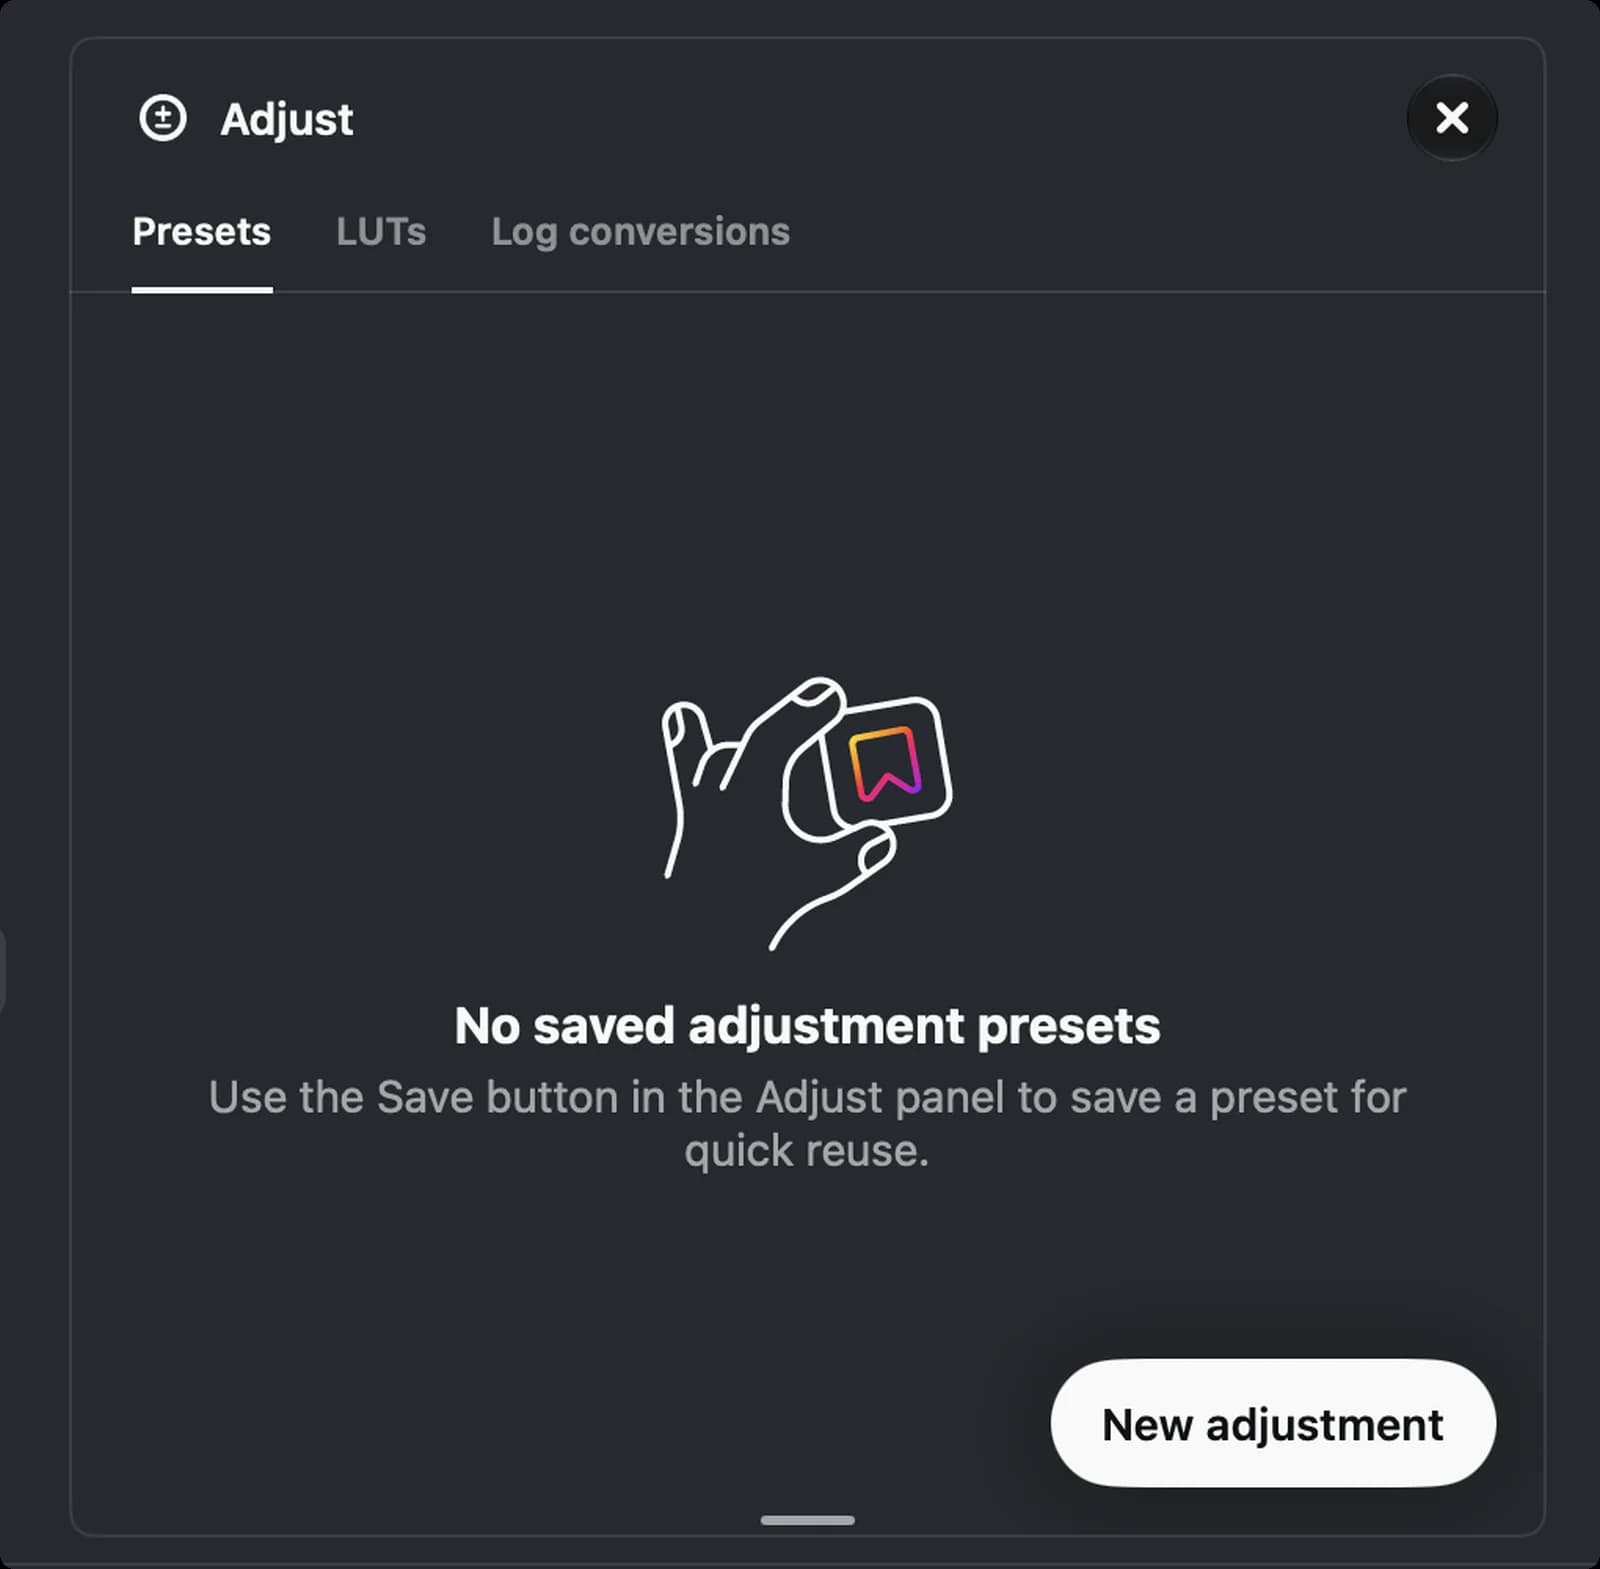

Adjust
The panel's name.

Close
Hides the panel.
Sound FX Panel
Short sounds to drop onto the timeline.
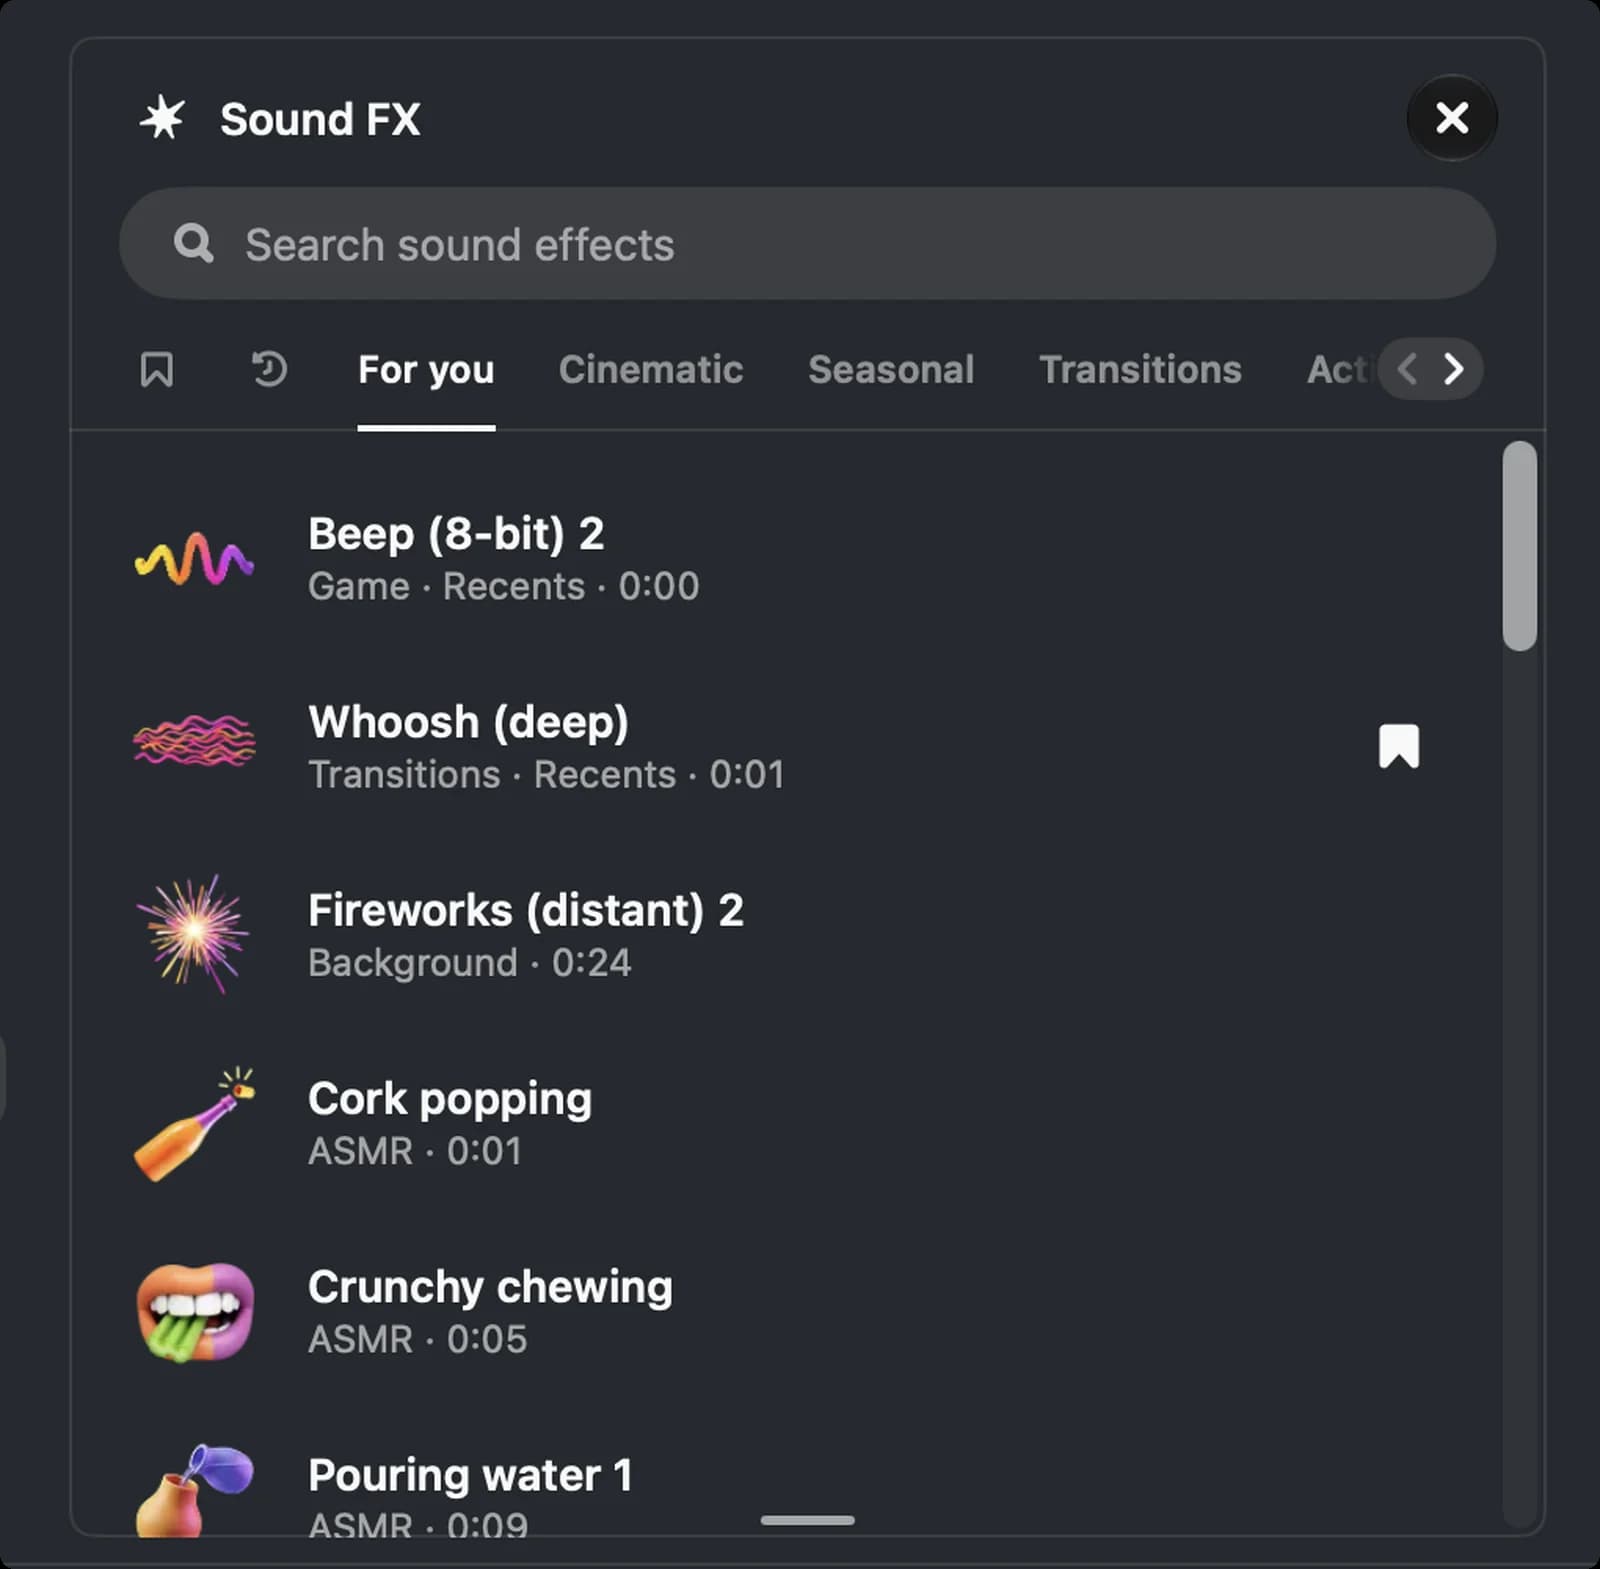

Sound FX
The panel's name.

Close
Hides the panel.

Saved
Sounds you bookmarked.

Recents
Sounds you used before.

Sound
The waveform, name, category and length. Hover it to play or add it.

Bookmark
Click it on any sound to save it to the Saved list.
Export
Export starts as soon as you click the button. When it is done you get the share screen with these buttons.
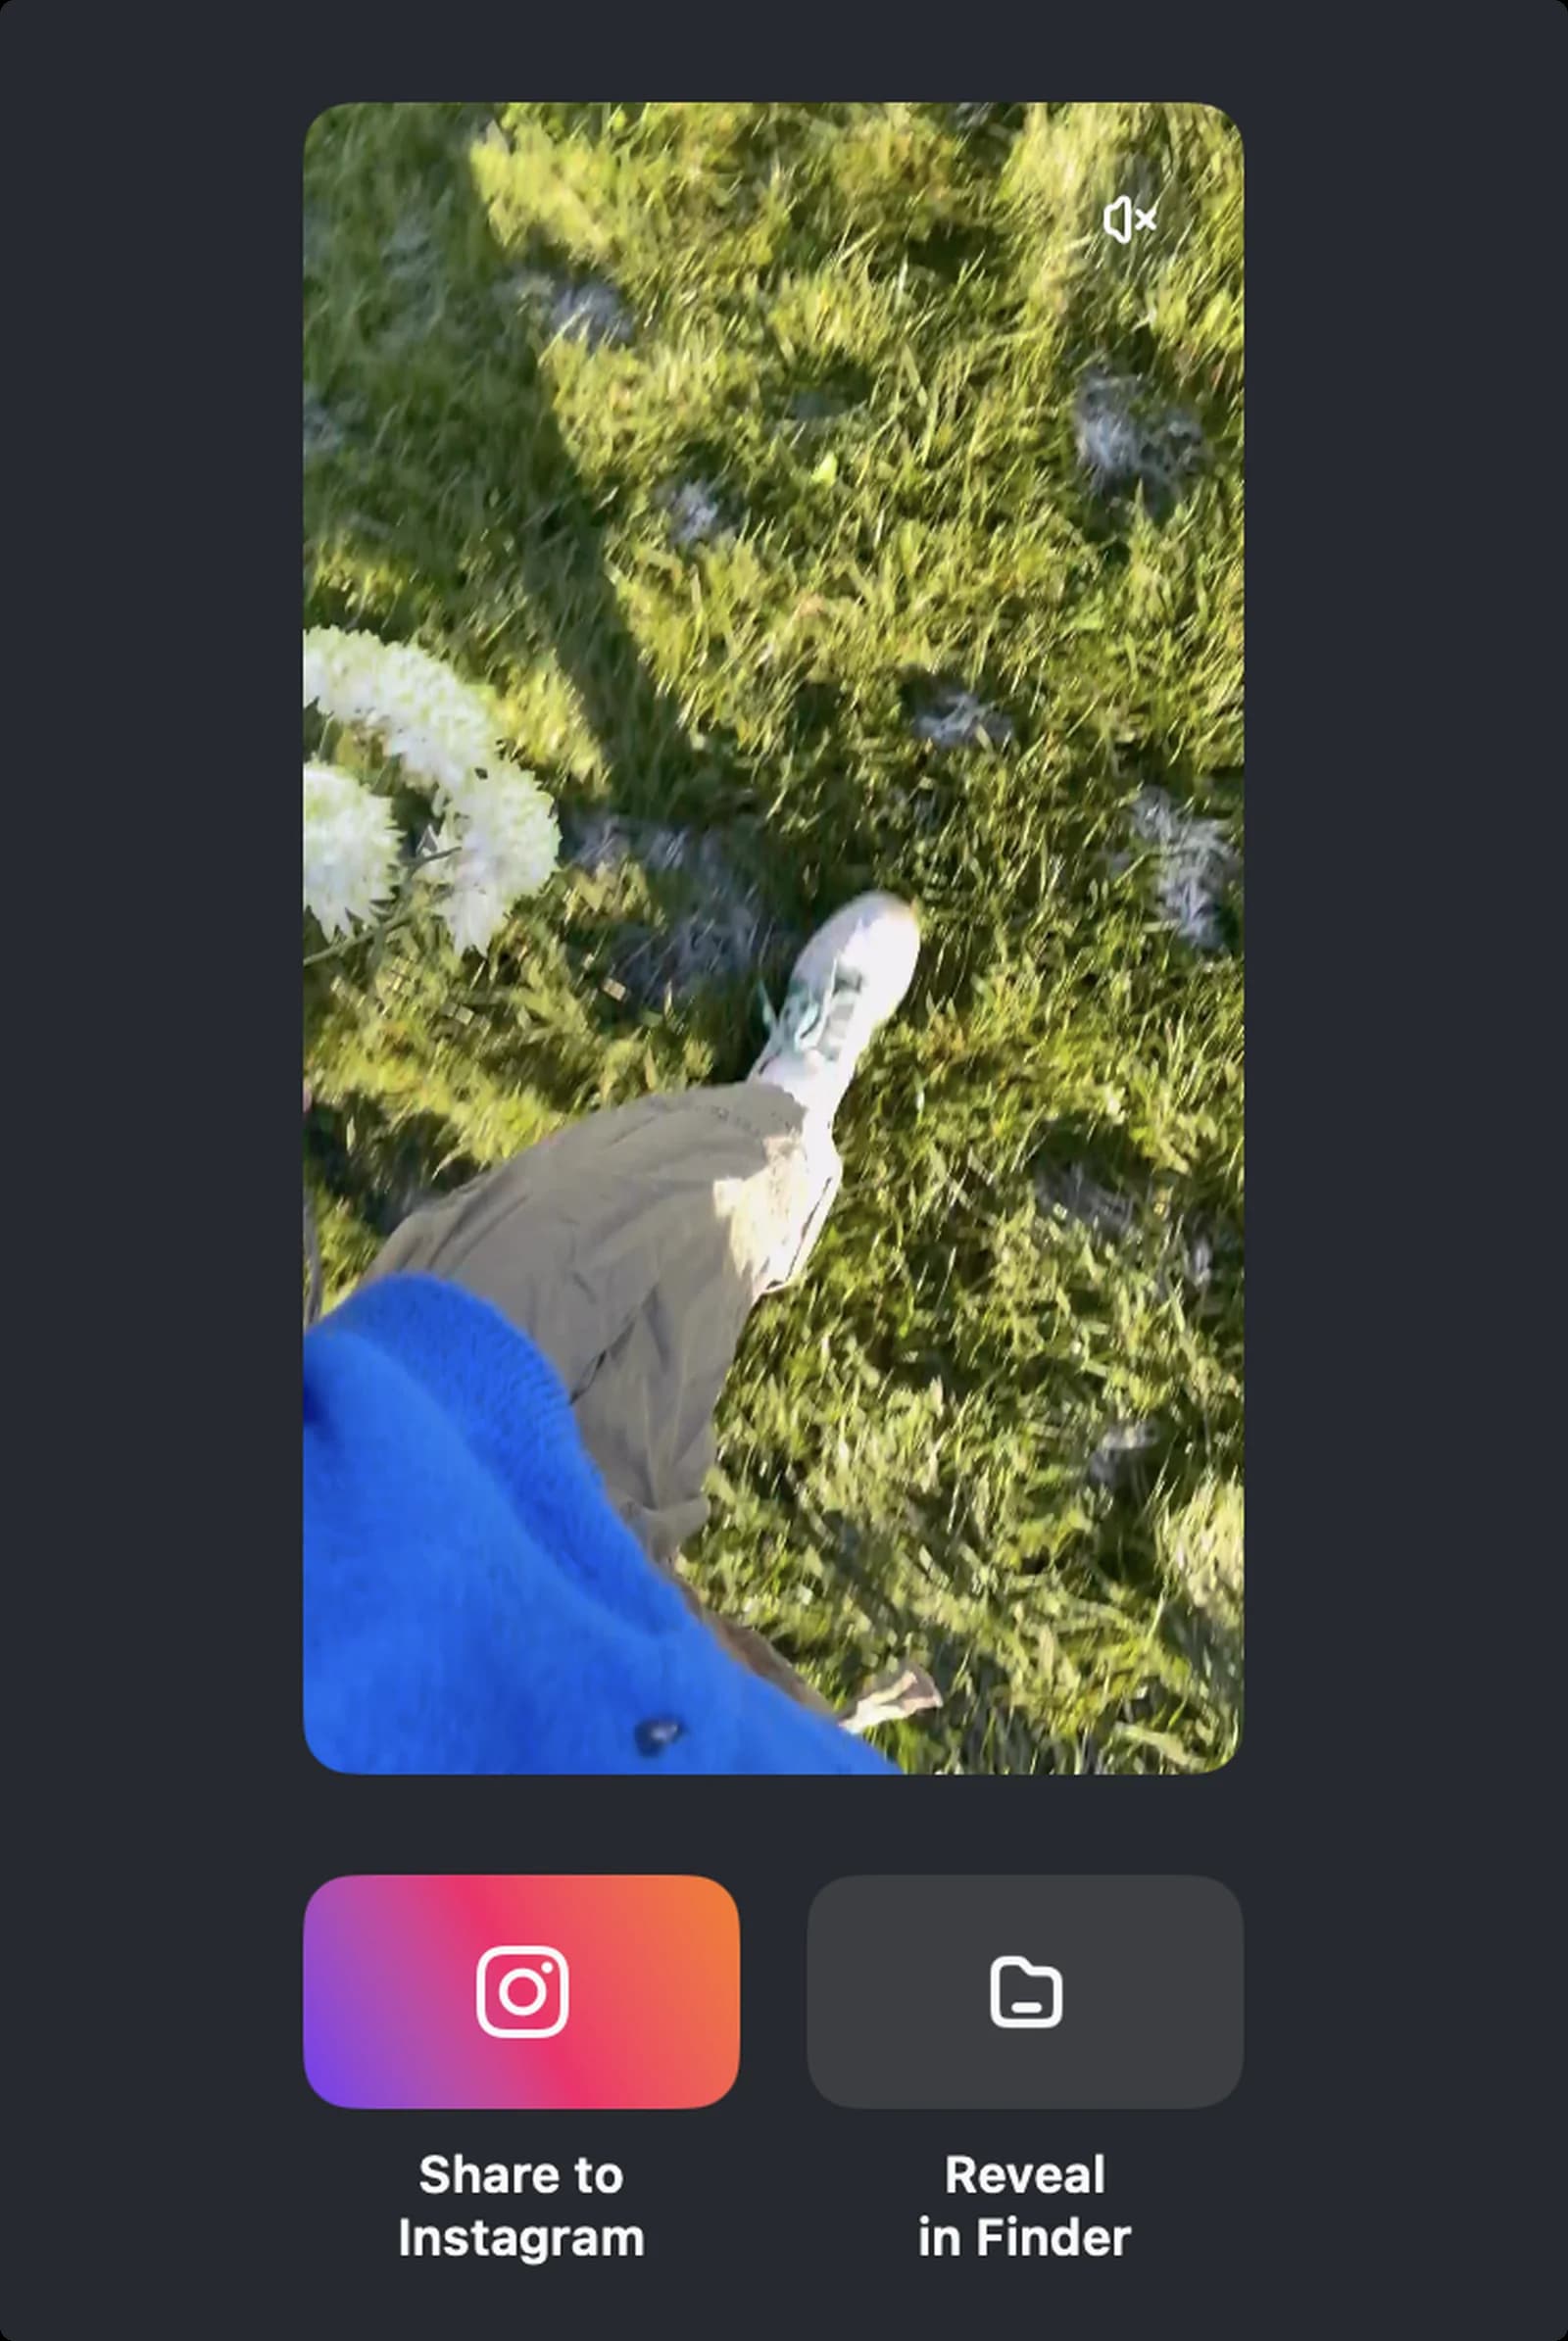

Mute
Mutes the preview of the finished video.
Share to Instagram
Sends the video to the Instagram app to post as a Reel.
Reveal in Finder
Opens the folder with the exported file, in Movies, then Edits, then Exports.
Settings Sidebar
Open Settings from the Edits menu, or by clicking your profile photo on the Projects screen.
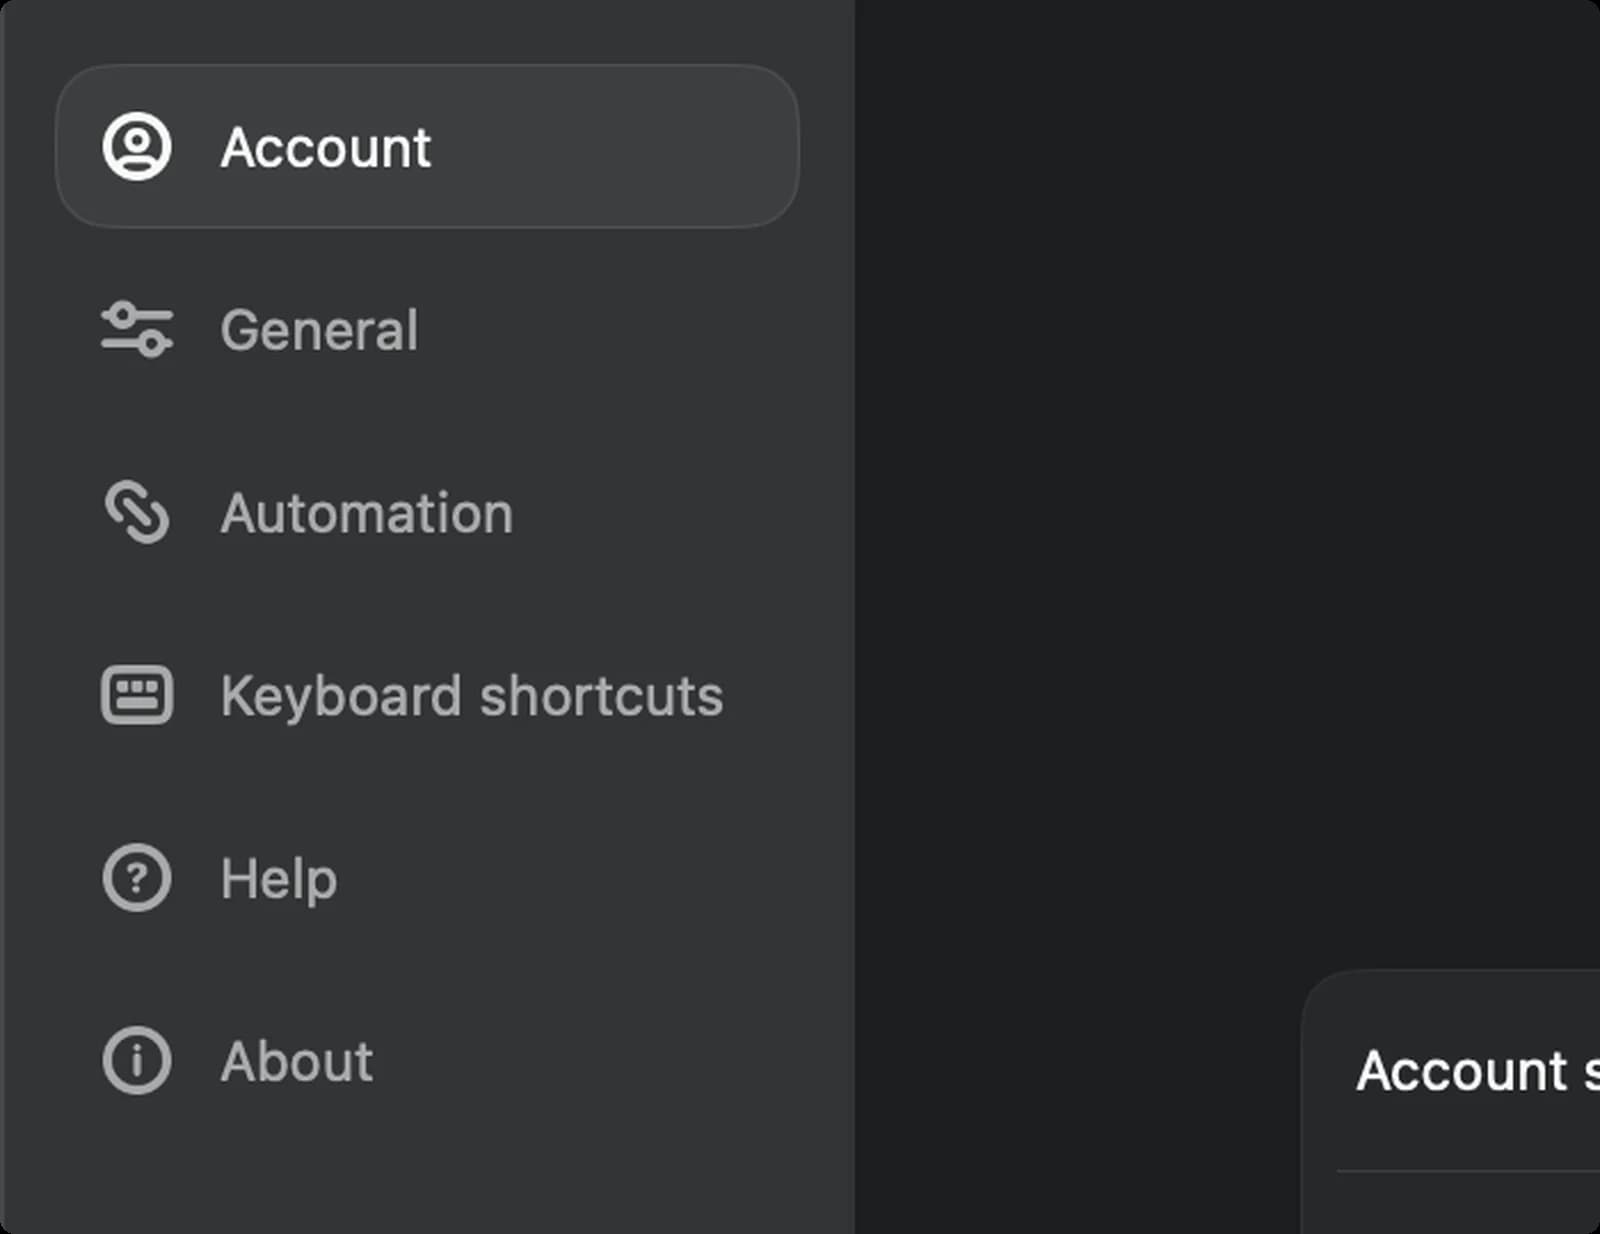

Account
Your Instagram account: status, data export and log out.

General
Window, playback and import options.

Automation
A local server that lets AI tools such as Claude Code edit your projects.

Keyboard shortcuts
The same shortcut editor as the keyboard button in the top bar.

Help
Opens the Edits help pages.

About
The app version.
Account Links
On the Account page. Each opens Instagram.
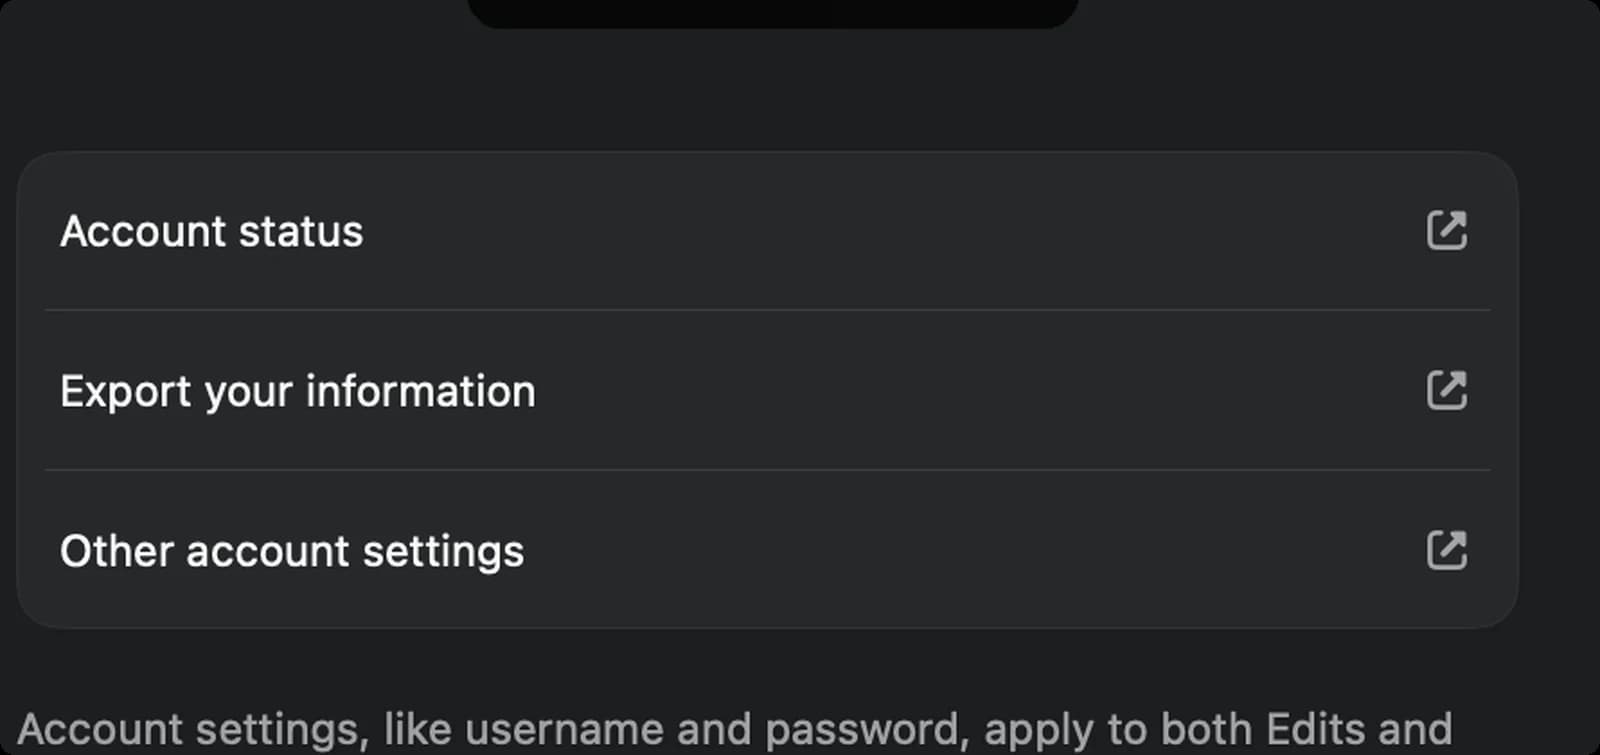

Account status
Opens Instagram's account status page, which shows whether anything on your account is restricted.

Export your information
Requests a copy of your Instagram data.

Other account settings
Everything else, which lives on Instagram, not in Edits.
That covers every part of the Edits app on the Mac. These screenshots are from Edits 454 on a MacBook Air running macOS 27, and we update this guide when the layout changes. For more guides like this, see our TechPP icon guides.
Comments
0Share your thoughts, questions, or feedback about this guide.